DIY Dream Kitchen Makeover - LOFT VIBES
Loft Vibes is the series where we makeover our office space into the studio space of our dreams! Season 4 has begun, and we made the move from our old loft office to a huge industrial garage studio, but it needs A LOT of work to make it come to life as the vibey studio space we’re dreaming of. To watch the previous episodes, check out our playlist here. This week we’re taking on the kitchen and using new DIY skills we’ve never tried before! If you missed the last three makeovers, you can catch the storage room makeover here, our colourful lounge boardroom makeover here, and our office desk space makeover here!
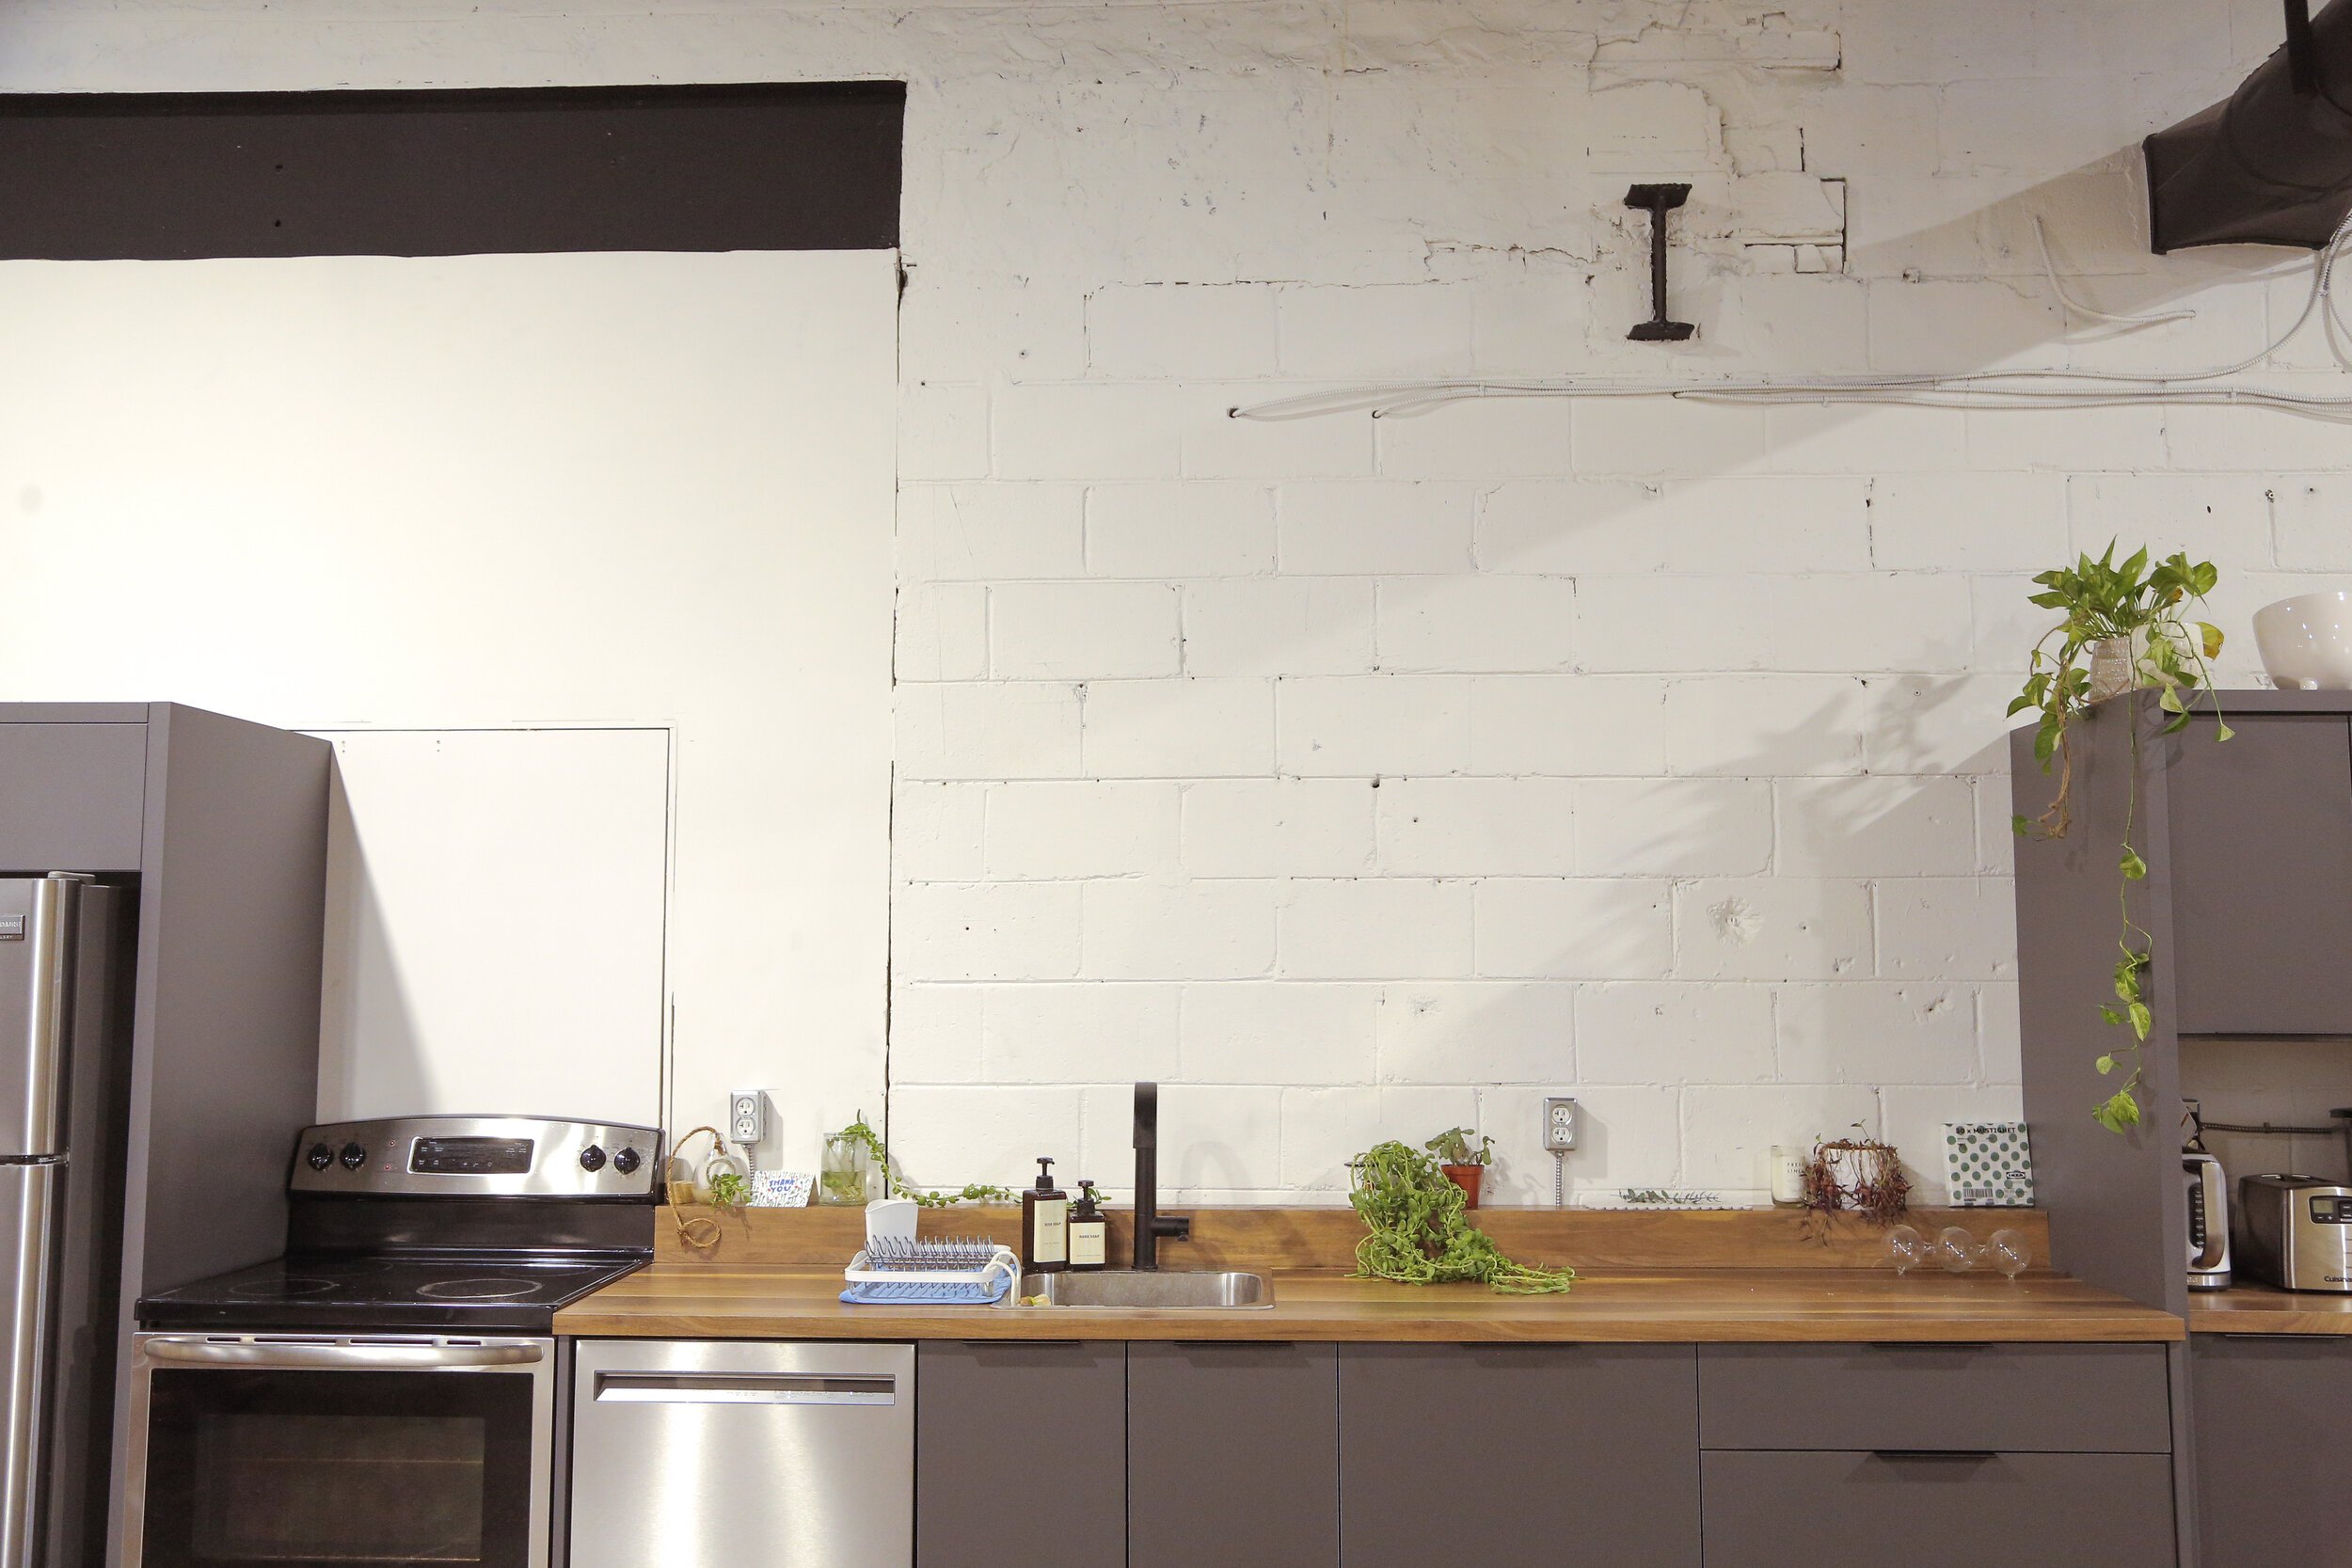
For the kitchen, we want to make this space more of the heart of the office including a warm tiled backsplash and some bistro tables. Check out the empty kitchen we custom designed with our landlord before this makeover:
BEFORE


THE PLAN


We created a mood board and floor layout for all of the design elements we’re looking to include. We want a long pink-toned runner, wall sconces and hanging pendant lights, plus a vertical tiled backsplash. Let’s get started!


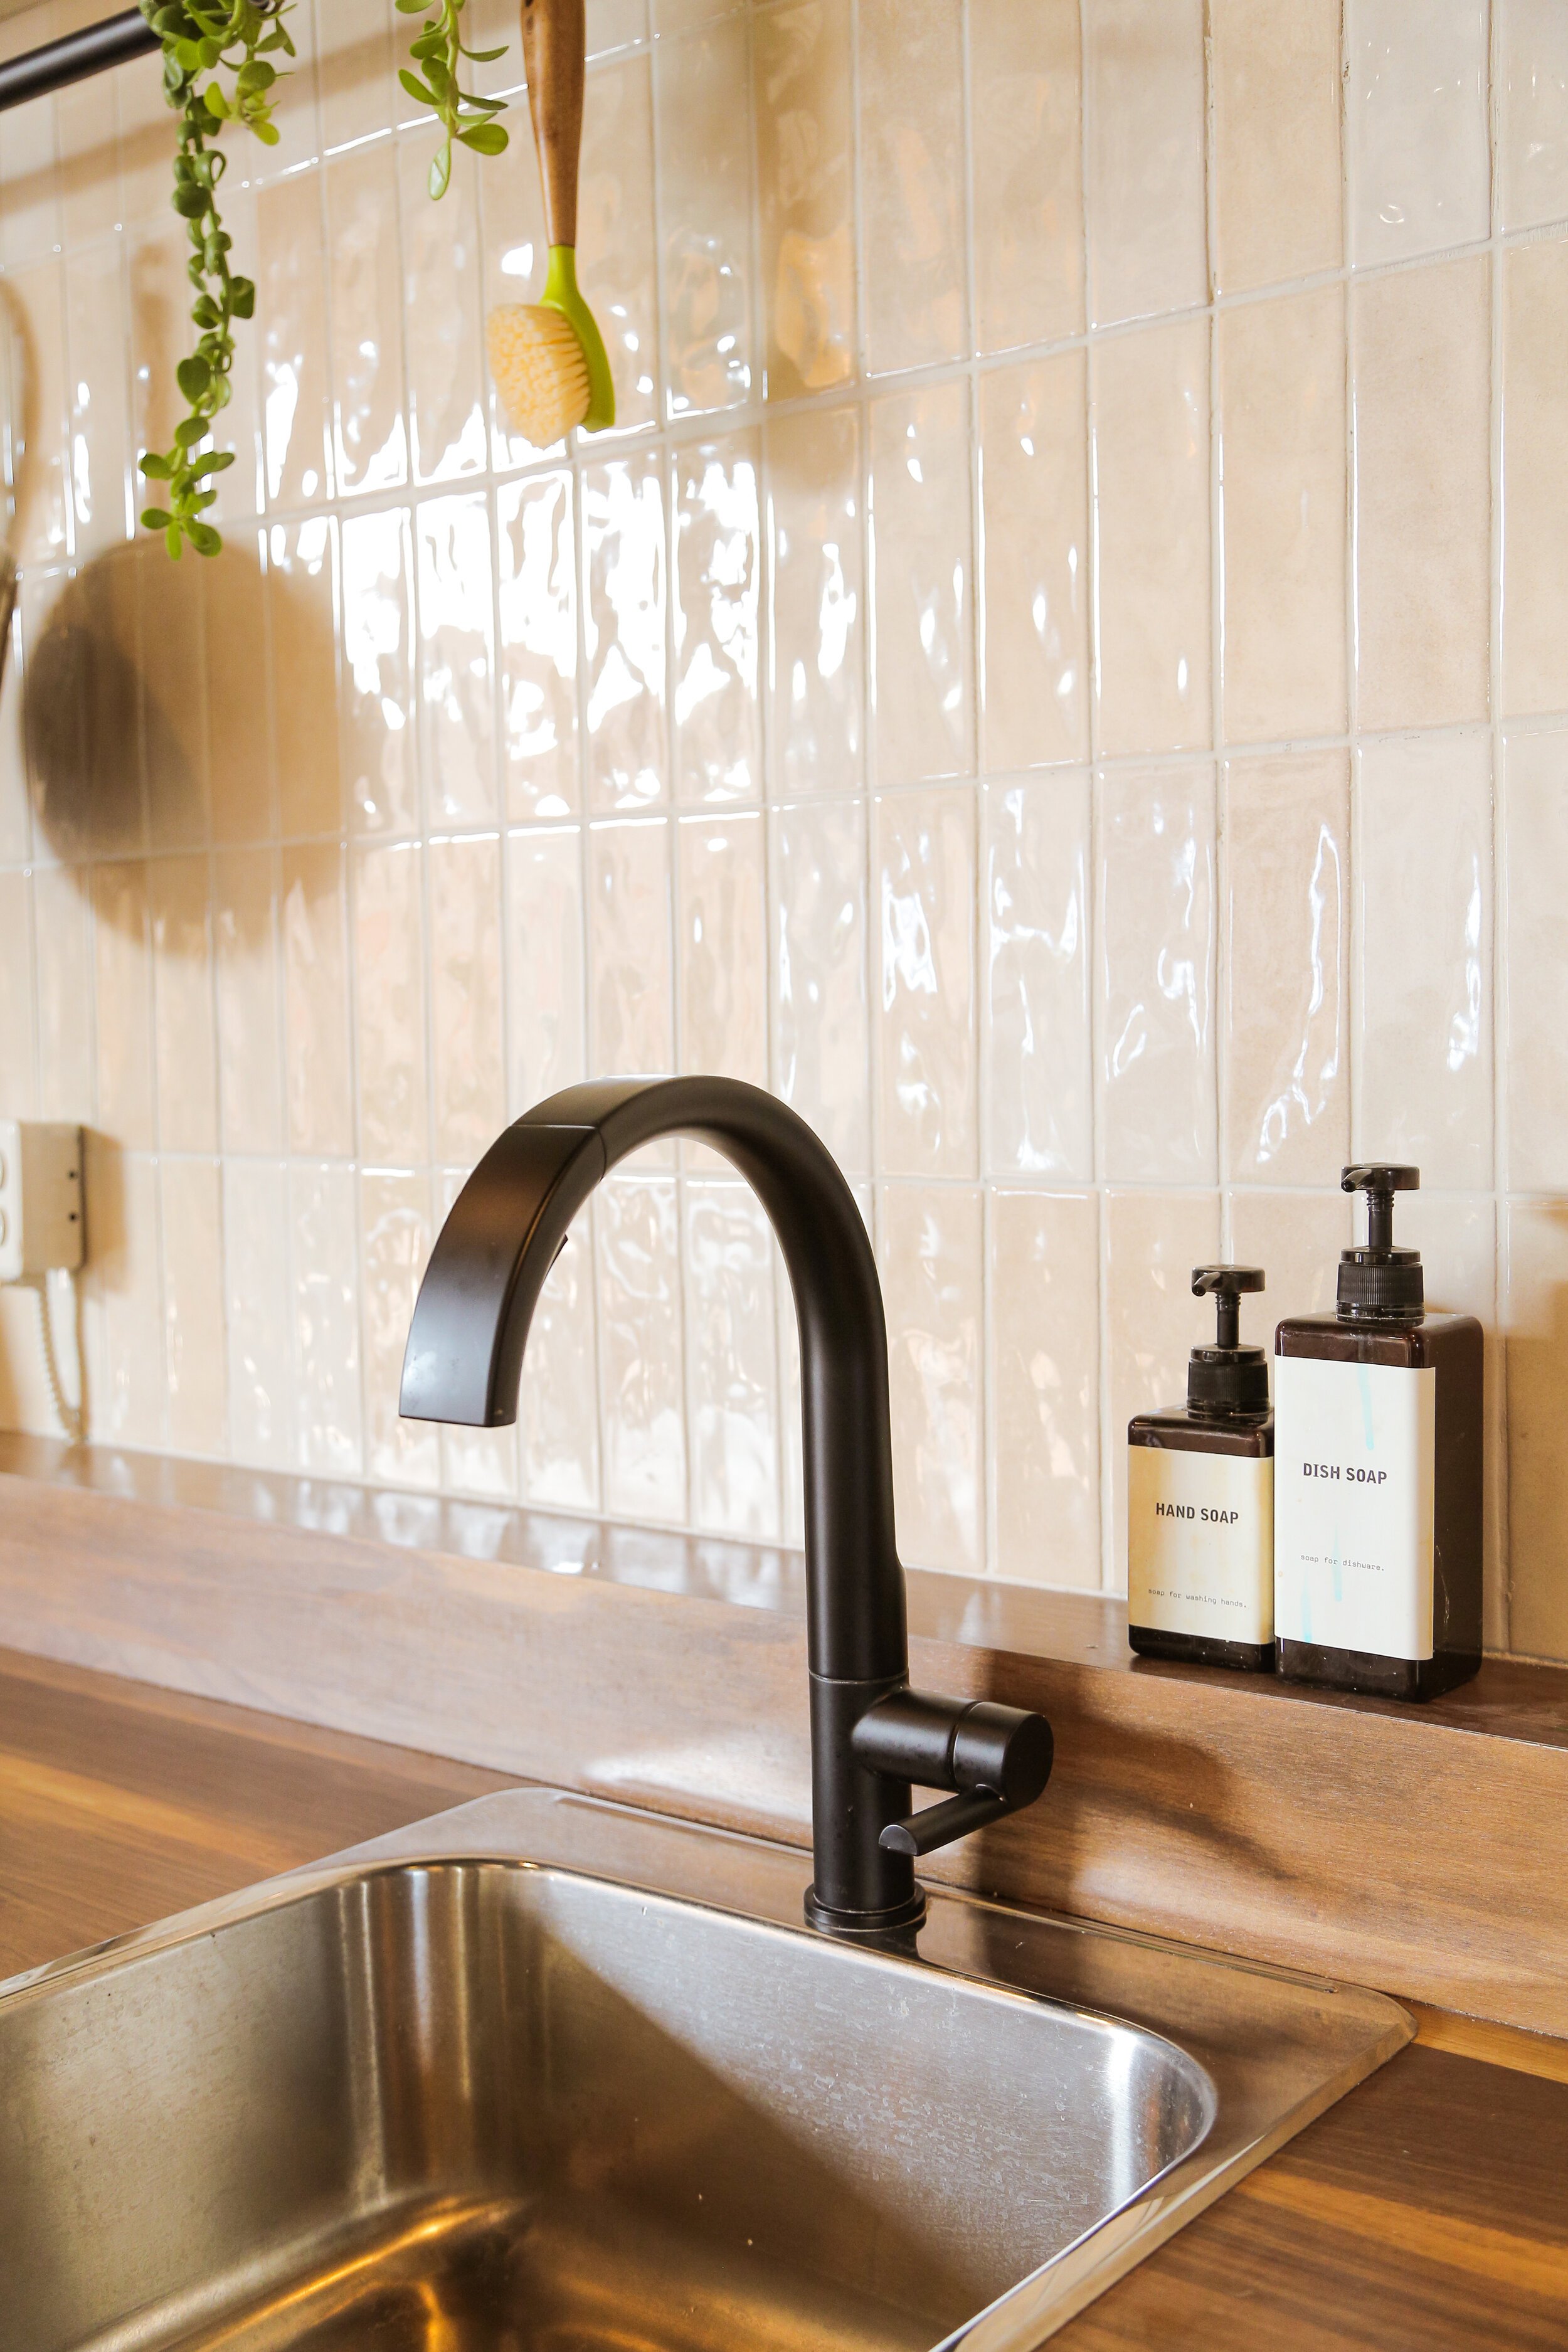
The biggest part of this project is tiling the backsplash all by ourselves! We’ve never done this before, but we’re confident that we’ll pull it off with a little help from our handy friends on YouTube who always come through with the great tutorials. We started by laying them all out on the ground, and then went head first into this DIY.


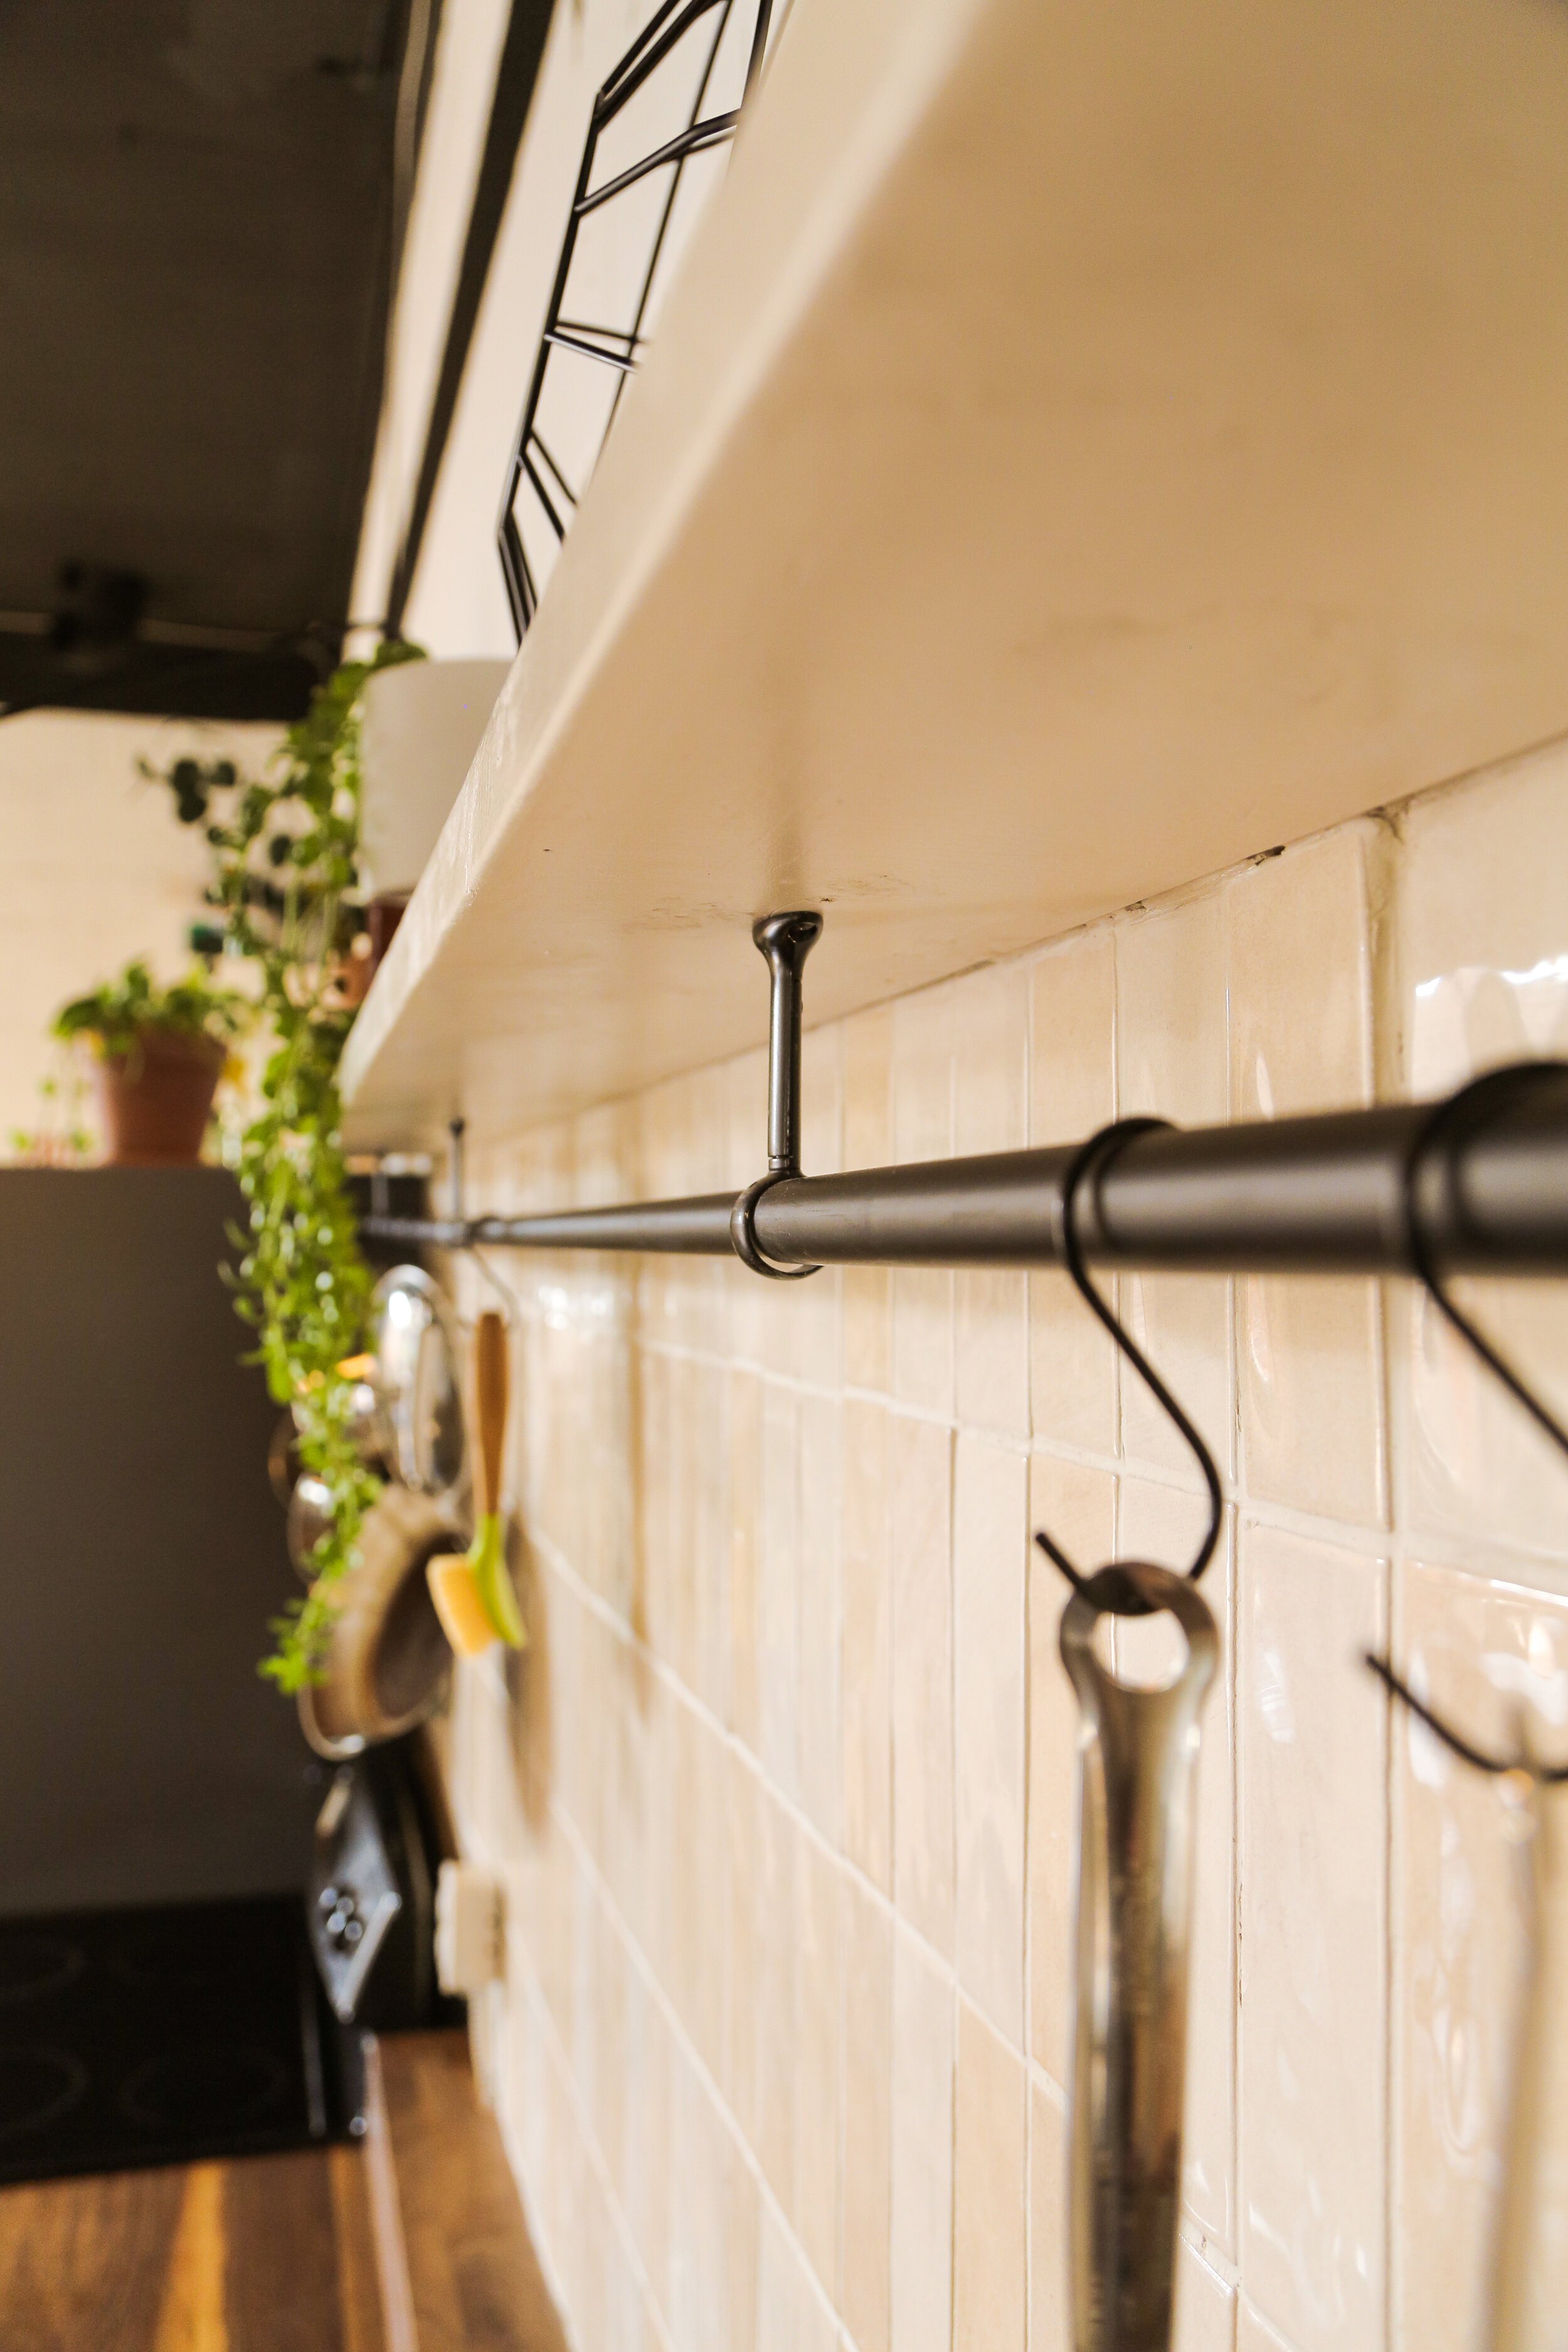
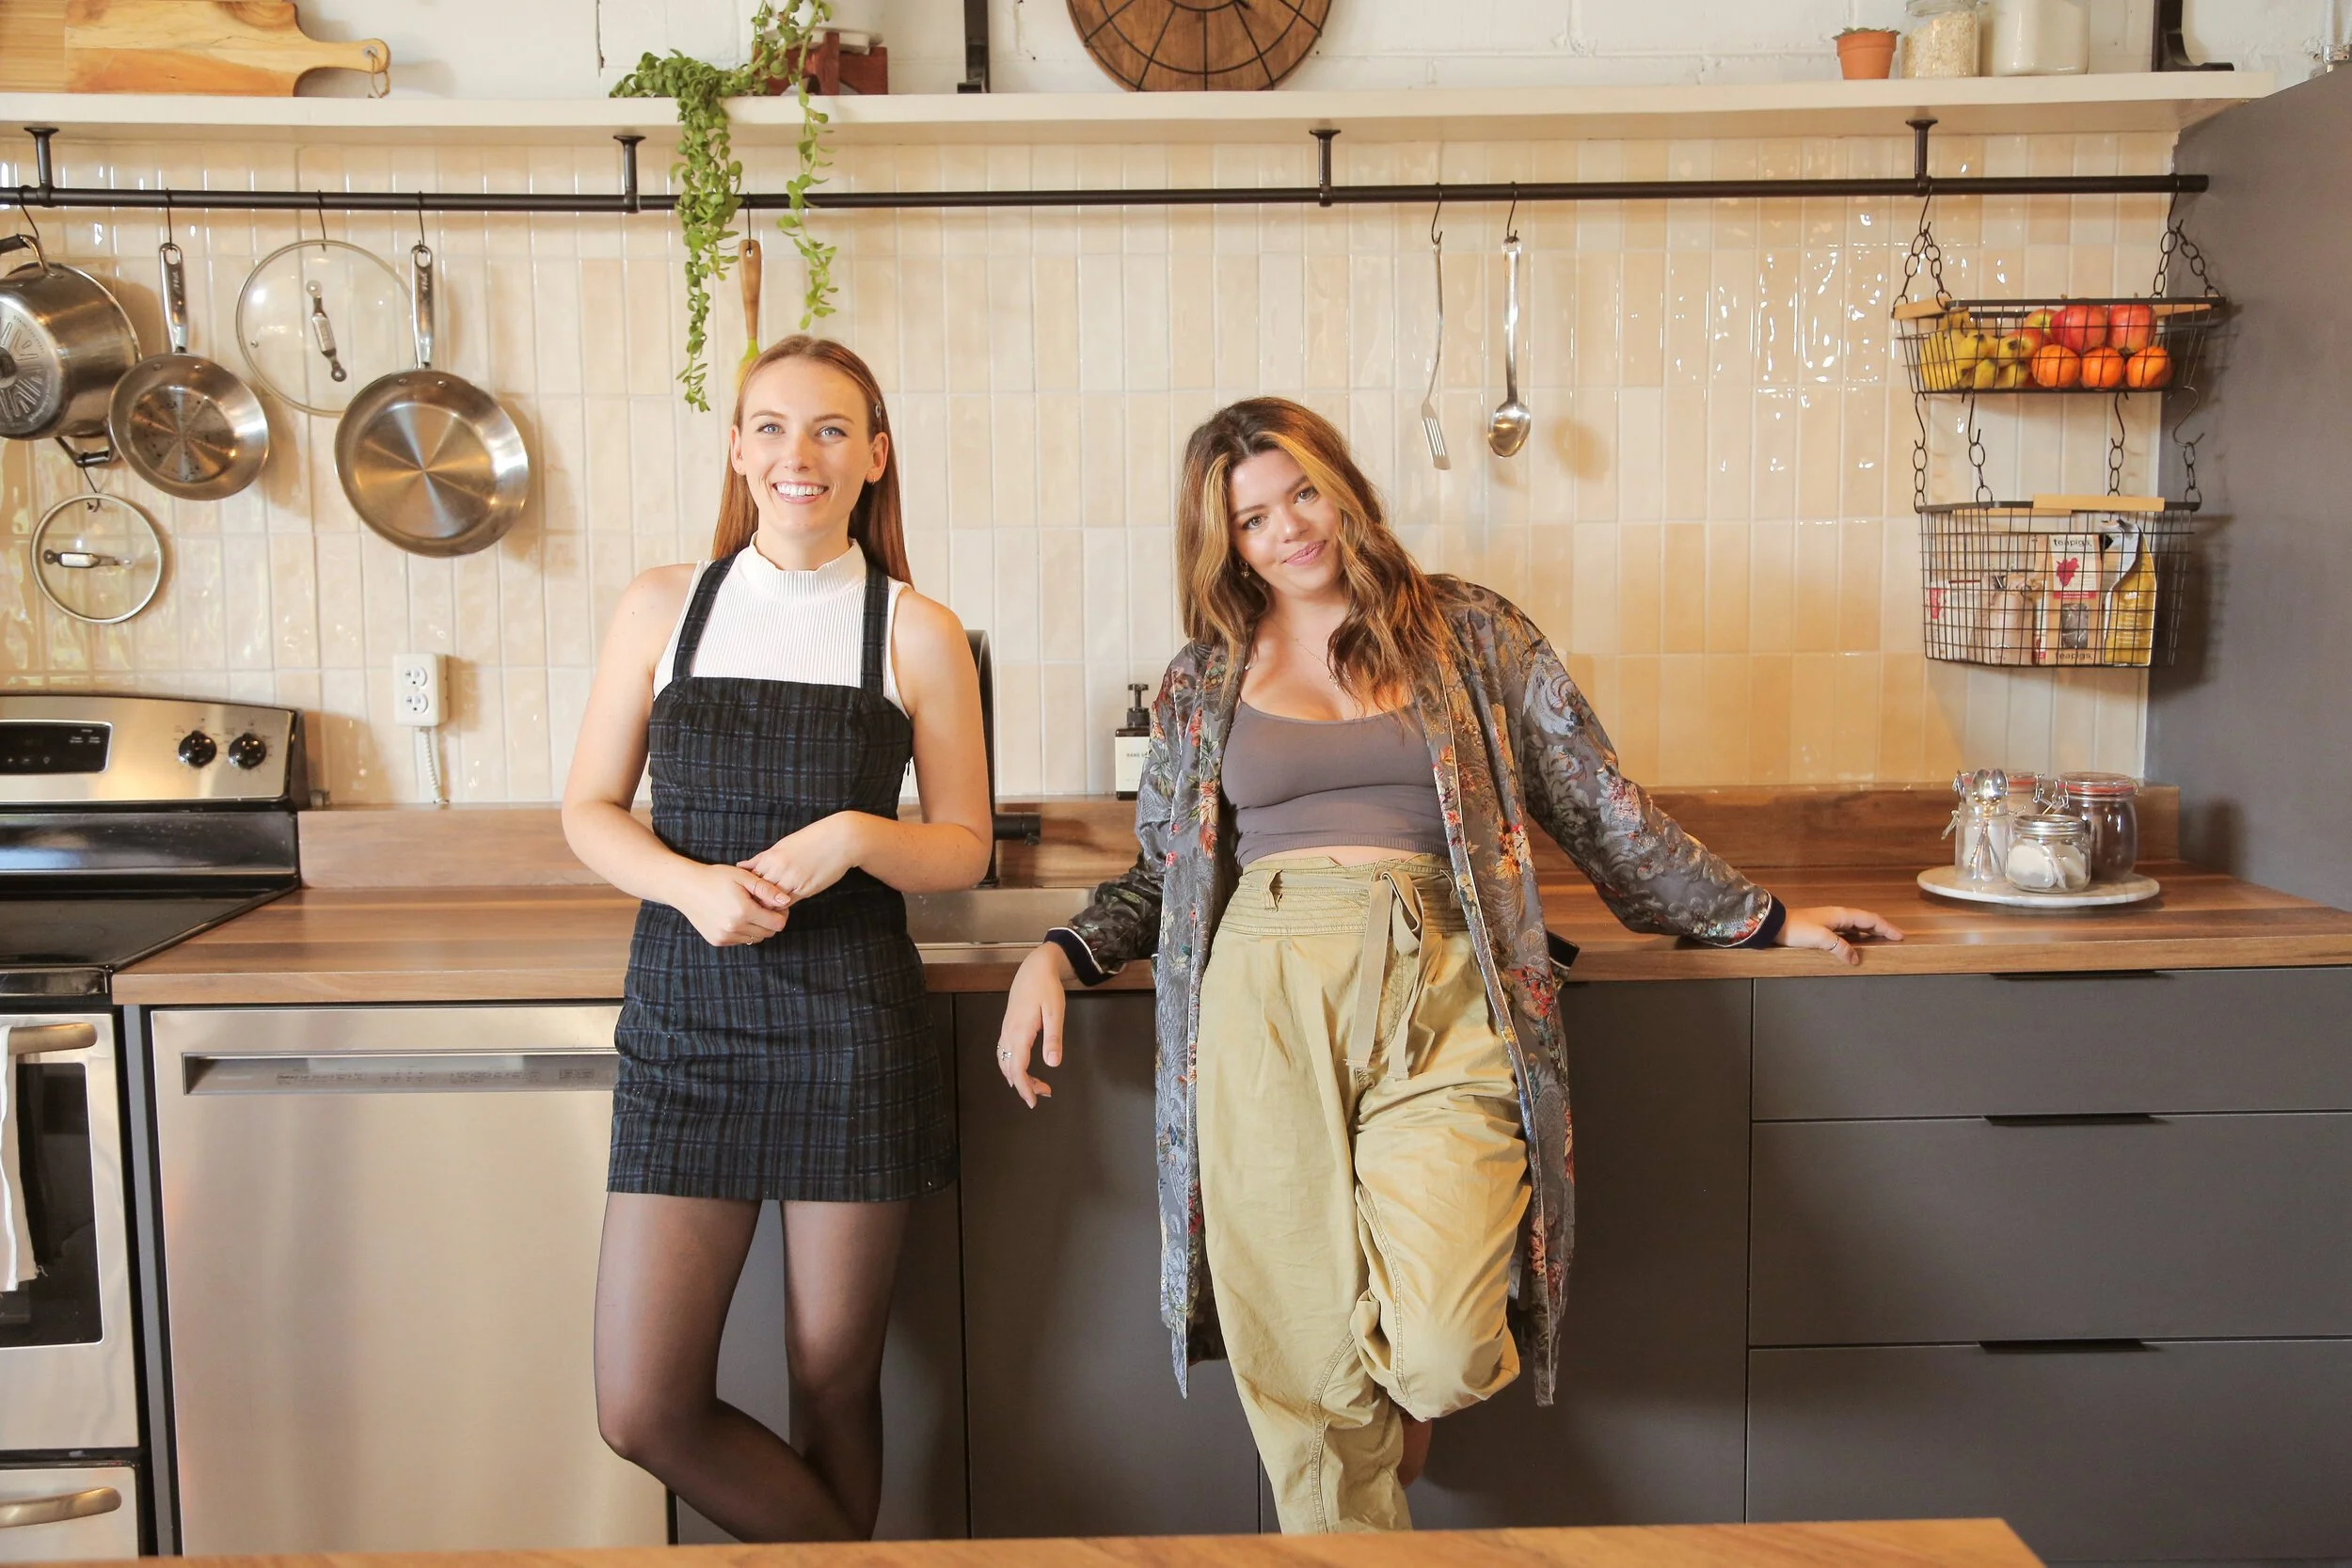
With the tiling done, we had an electrician come in to install new junction boxes for our wall sconces and pendant lights. We also installed a wooden shelf painted to match the tile across the entire top of the cabinets. This helped to seal in the tile and also acted as a base for our kitchen rail hack! Using top mounted curtain rod hooks and a regular curtain rod, we made a kitchen rail to hang some pots and baskets that really completes the look. All that’s left is some finishing touches!


Check out our finished DIY dream kitchen makeover!
AFTER

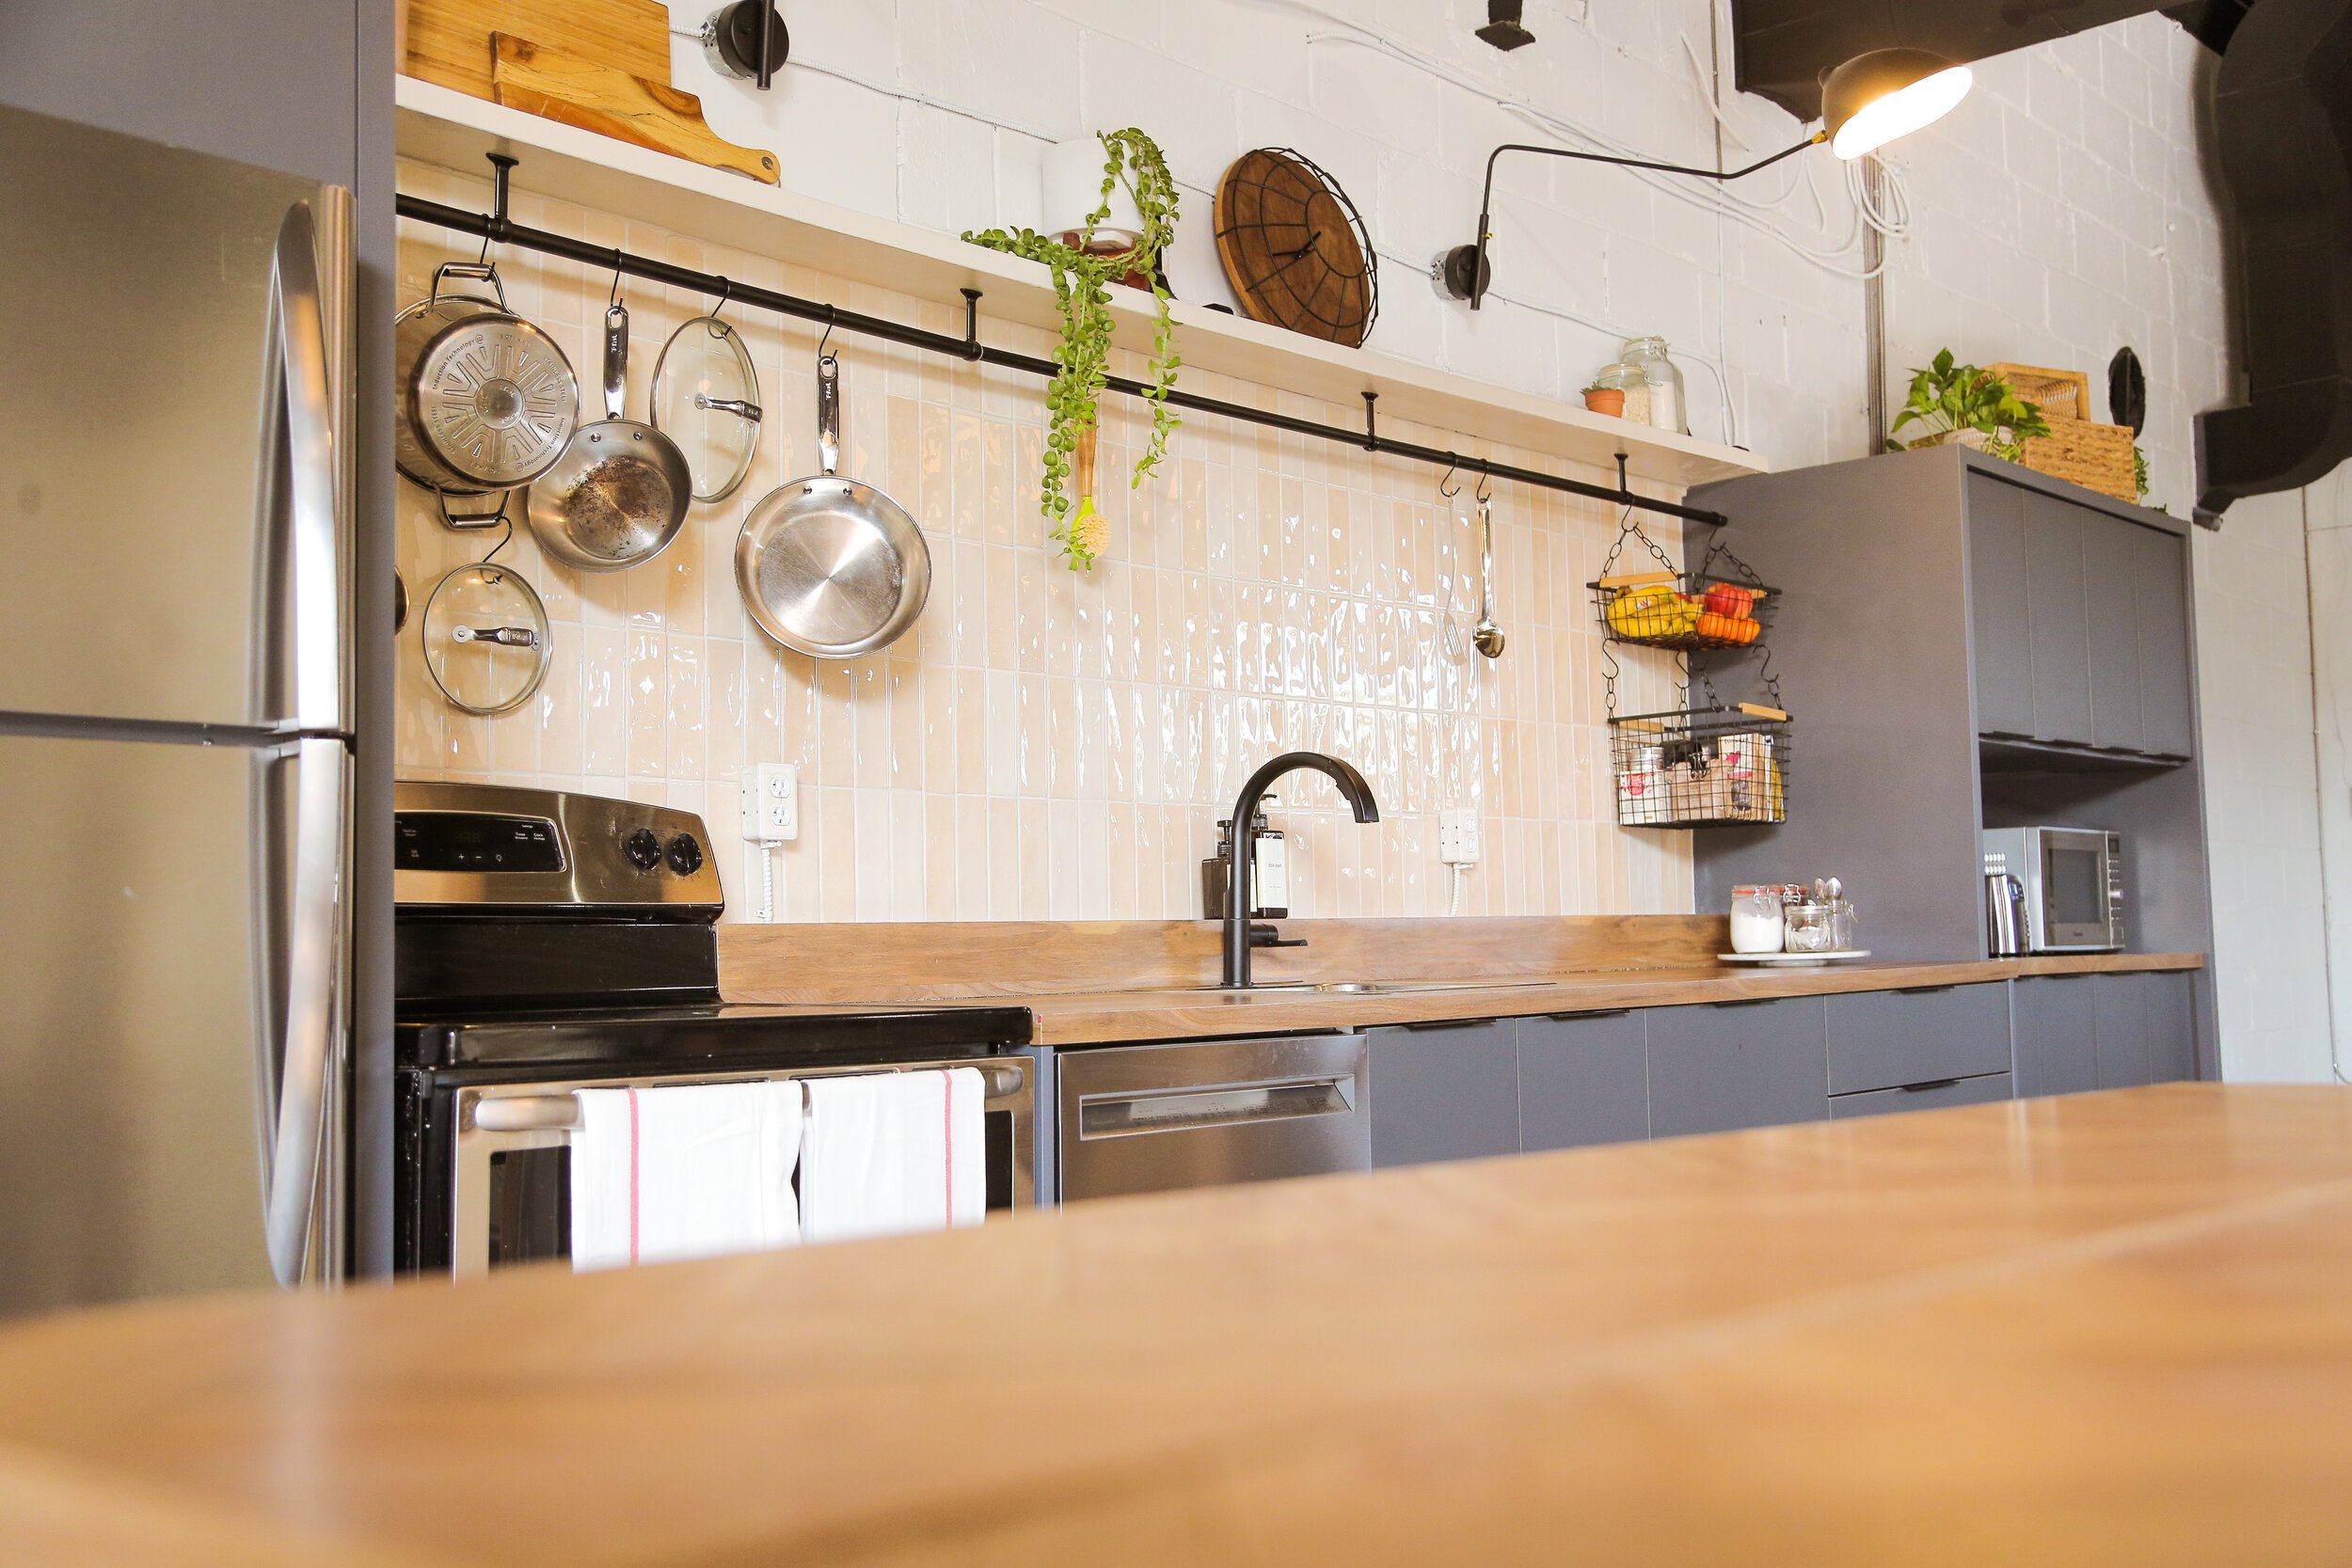


We had so much fun learning new skills for this kitchen makeover and DIYing our way to the dream we envisioned when we moved in. If you want to check out the entire Loft Vibes journey you can find our playlist here, and to see this kitchen makeover really come together then make sure to watch the video below!
STEAL OUR STYLE
Tile (in beige): https://decotile.com/tile/craft-series/
Pendant lights: https://crafthomedecor.com/products/lugar-1?_pos=19&_sid=0bb9f0758&_ss=r
Tile cutter: https://bit.ly/3laHBib
Wall sconce (similar): https://www.cb2.ca/mantis-wall-sconce/s440156
Bistro tables: https://fave.co/2Sb74LO
Bistro chairs: https://fave.co/3kZddHm
Shelf brackets: https://fave.co/3imQHqh
Kitchen rail rod (similar): https://bit.ly/2Gib8XS
Kitchen rail ceiling attachments (similar): https://bit.ly/33bVWEE
Kitchen hooks (similar): https://bit.ly/33e5xLm