Three Ways to Fix Broken Ceramics!
Have you guys seen the viral video where someone fixes a sink with ramen noodles? Ridiculous right? Totally not do-able right? We’re here to find out. And to not make this entire post a total waste if this goes south, we’re also going to be showing you two other ways to fix broken things that we definitely know will work! Let’s get started!
THE RAMEN METHOD
WHAT YOU’LL NEED:
Ramen
Super glue
Sandpaper/electric sander
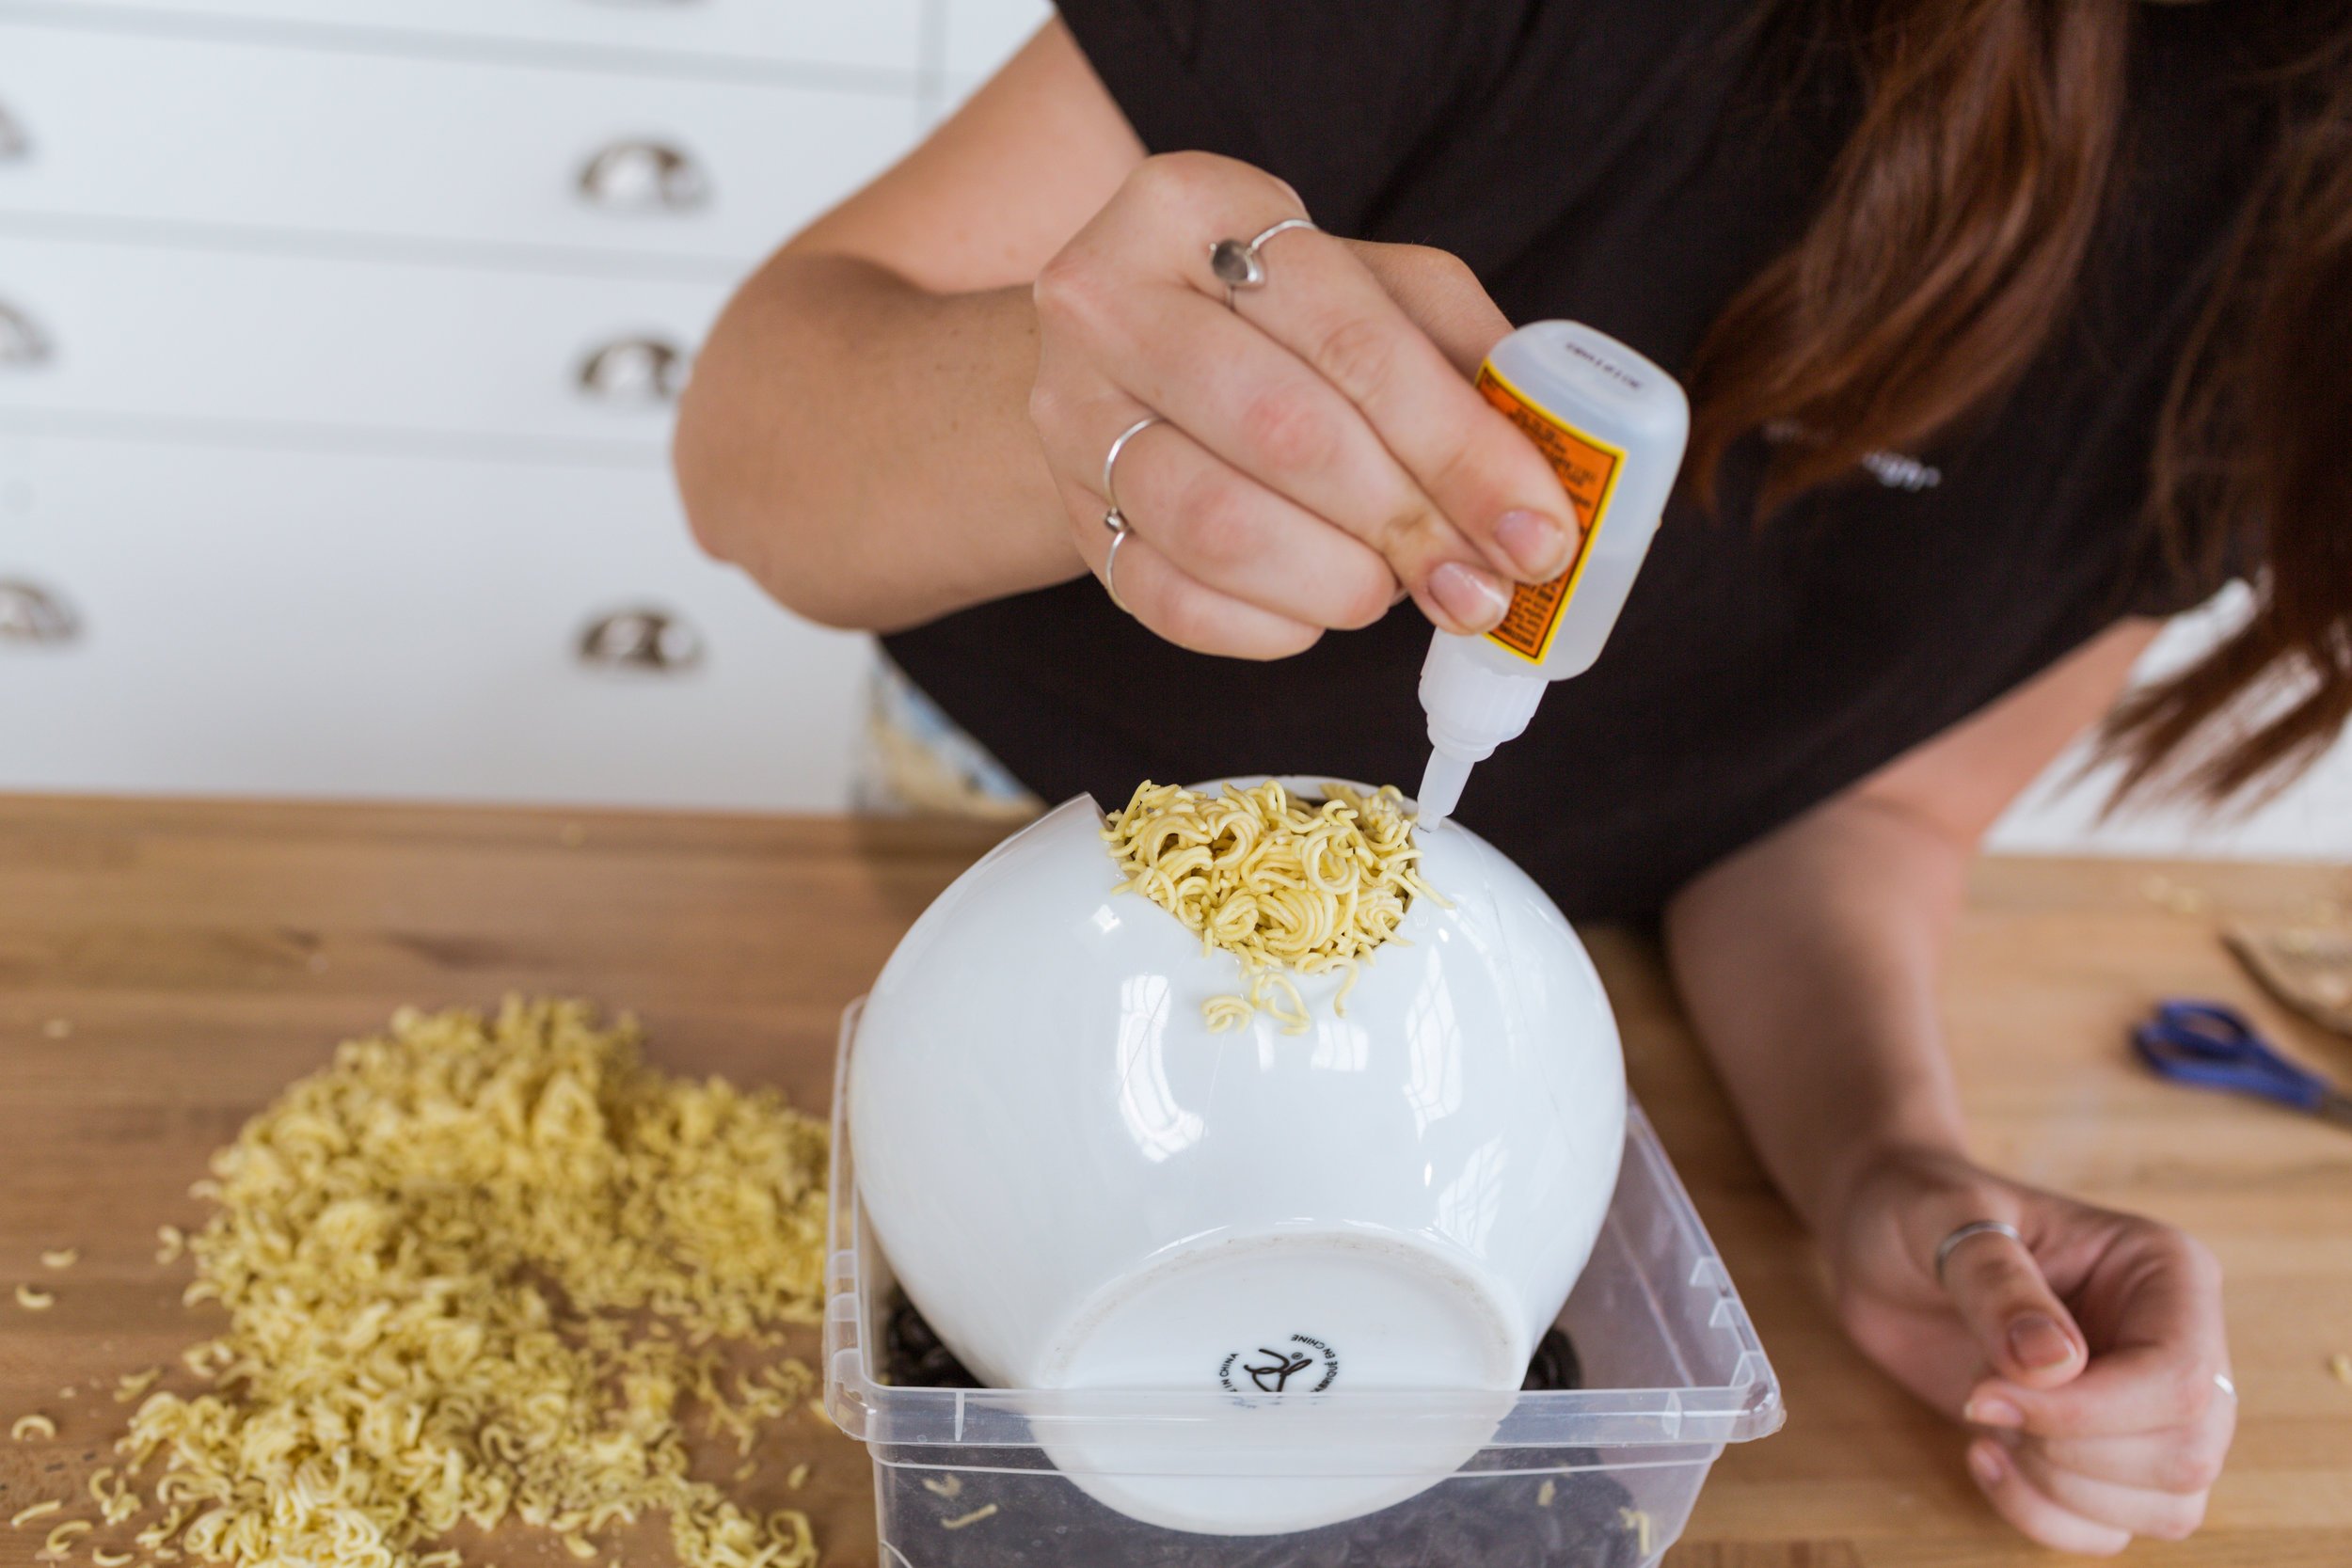
So we think this ramen method might work not because the ramen is this magical glue, but that it acts as a pretty good filler when used with glue (kind of like the way that wood filler is just pieces of wood mixed with glue). We’re going to start by cutting off a small piece of sandpaper and taping it to the inside of the broken ceramic. This will hold our ramen in place while it is drying.

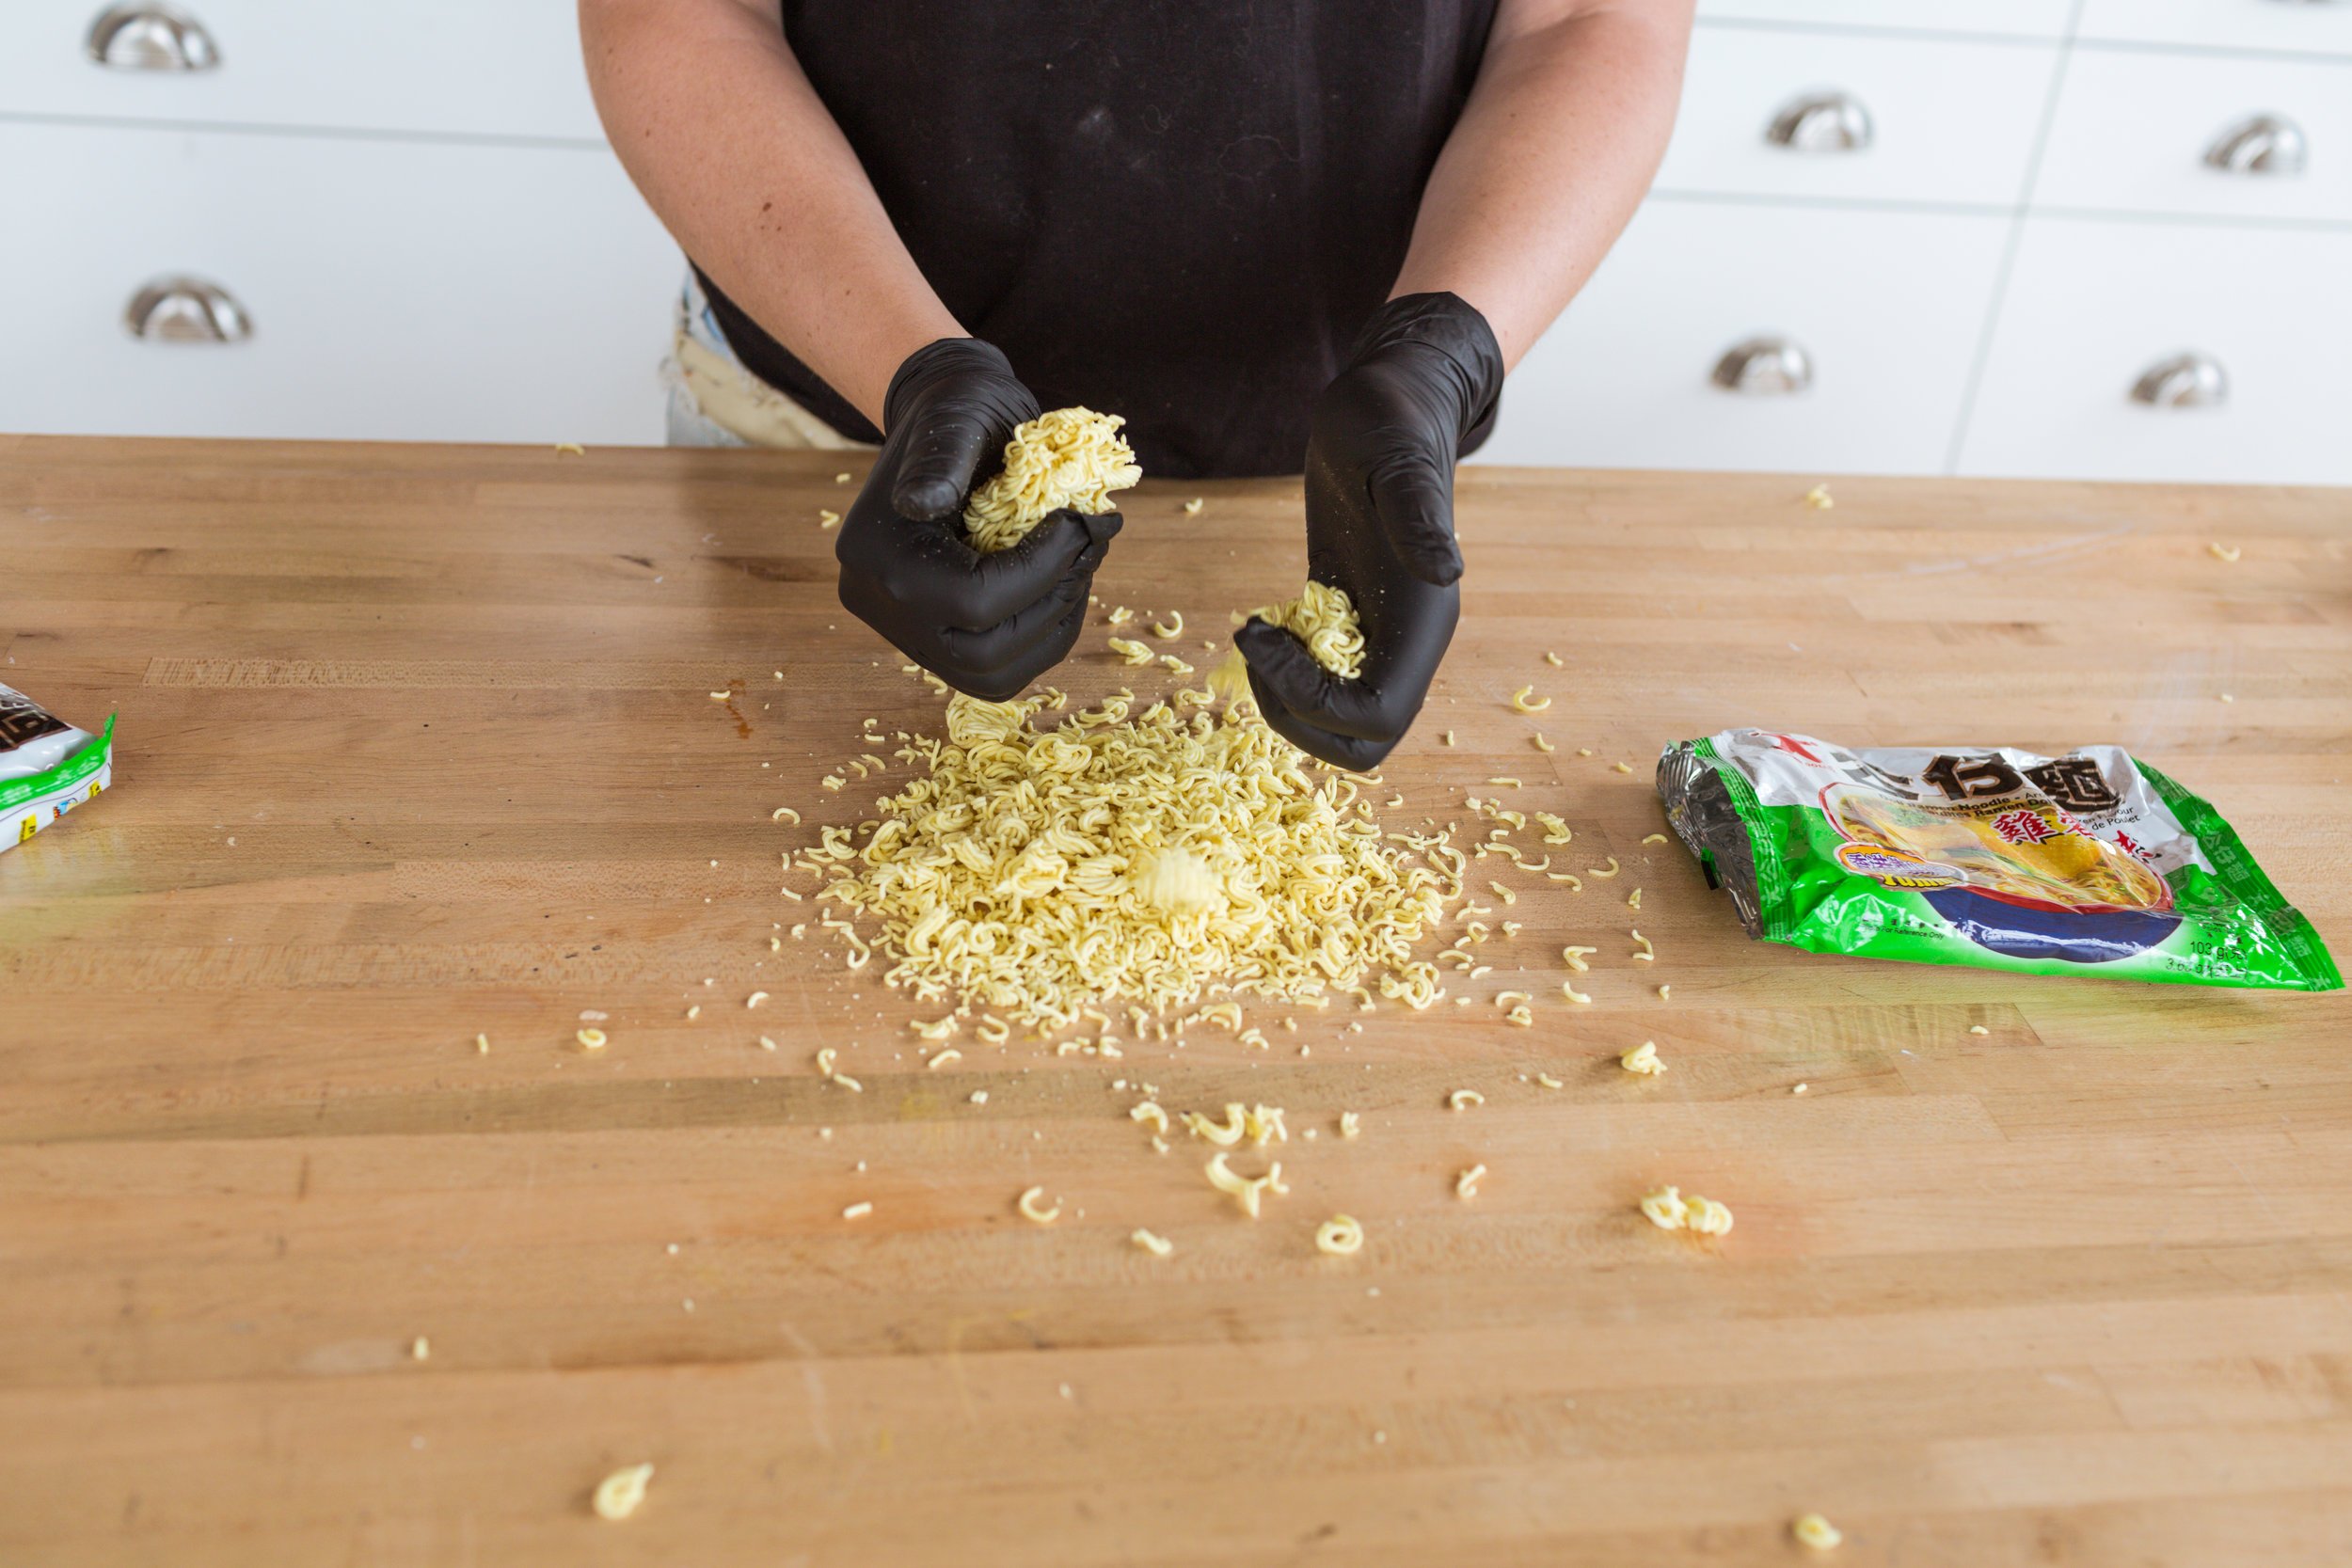
Next, we crushed up a bunch of ramen and essentially started gluing it to the ceramic. We kept layering the crushed noodles and the glue. Once everything was built up, we crushed some of the noodles into a finer dust and sprinkled those on top of the wet glue and cracks to fill in some of the gaps. Once we were happy with the build up of noodles, we let everything dry really well.

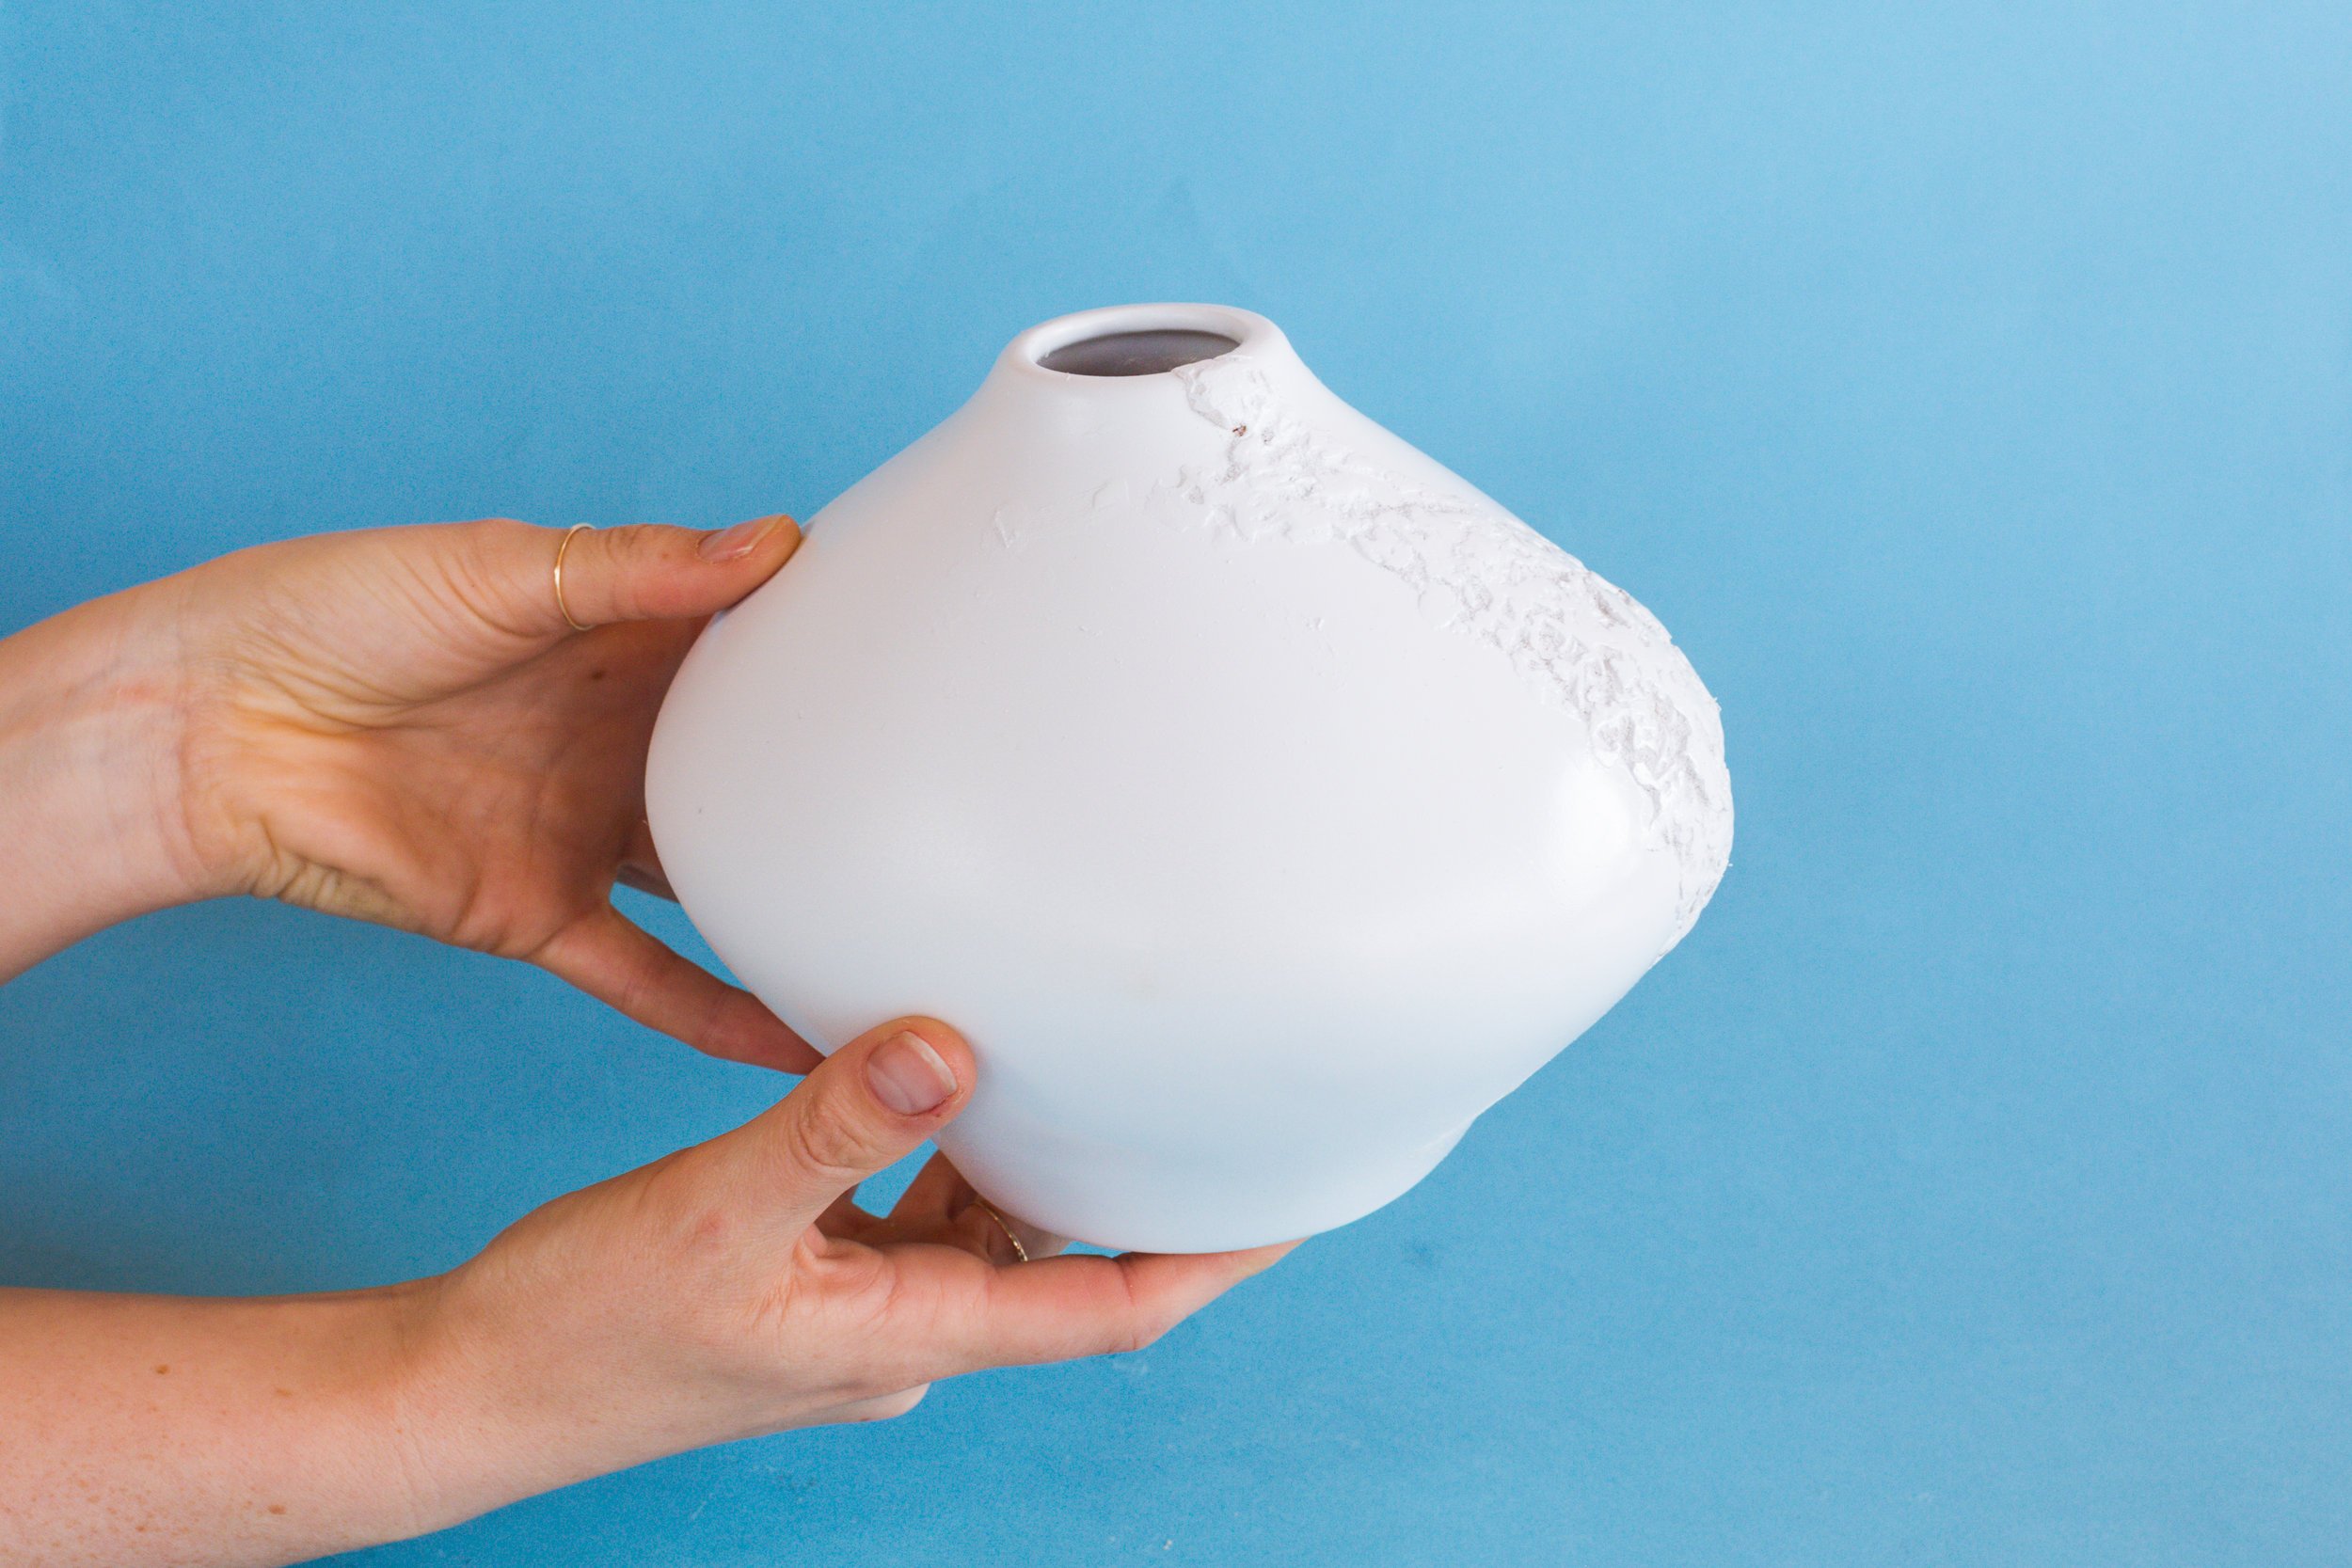
Once dry, it’s time to sand! This was definitely a process, we started with regular sand paper, then moved onto a file, and finally had the guts to try the electric sander. The electric sander worked the best, but if you don’t have one a file or a super tough sandpaper works best! Keep sanding until you’re happy! Once sanded, we coated it in a glossy white paint and let dry!

THE PLASTER OF PARIS METHOD
WHAT YOU’LL NEED:
Plaster of paris
Tape
Popsicle stick
Spray paint
Start off by taping off the back of your crack. This will make sure that the plaster of paris doesn’t fall through into the vase. Time to mix your plaster! Follow package directions - ours says to mix two parts plaster one part cold water for the perfect consistency! This stuff dries fast, so make sure to mix in smaller batches and work quickly!

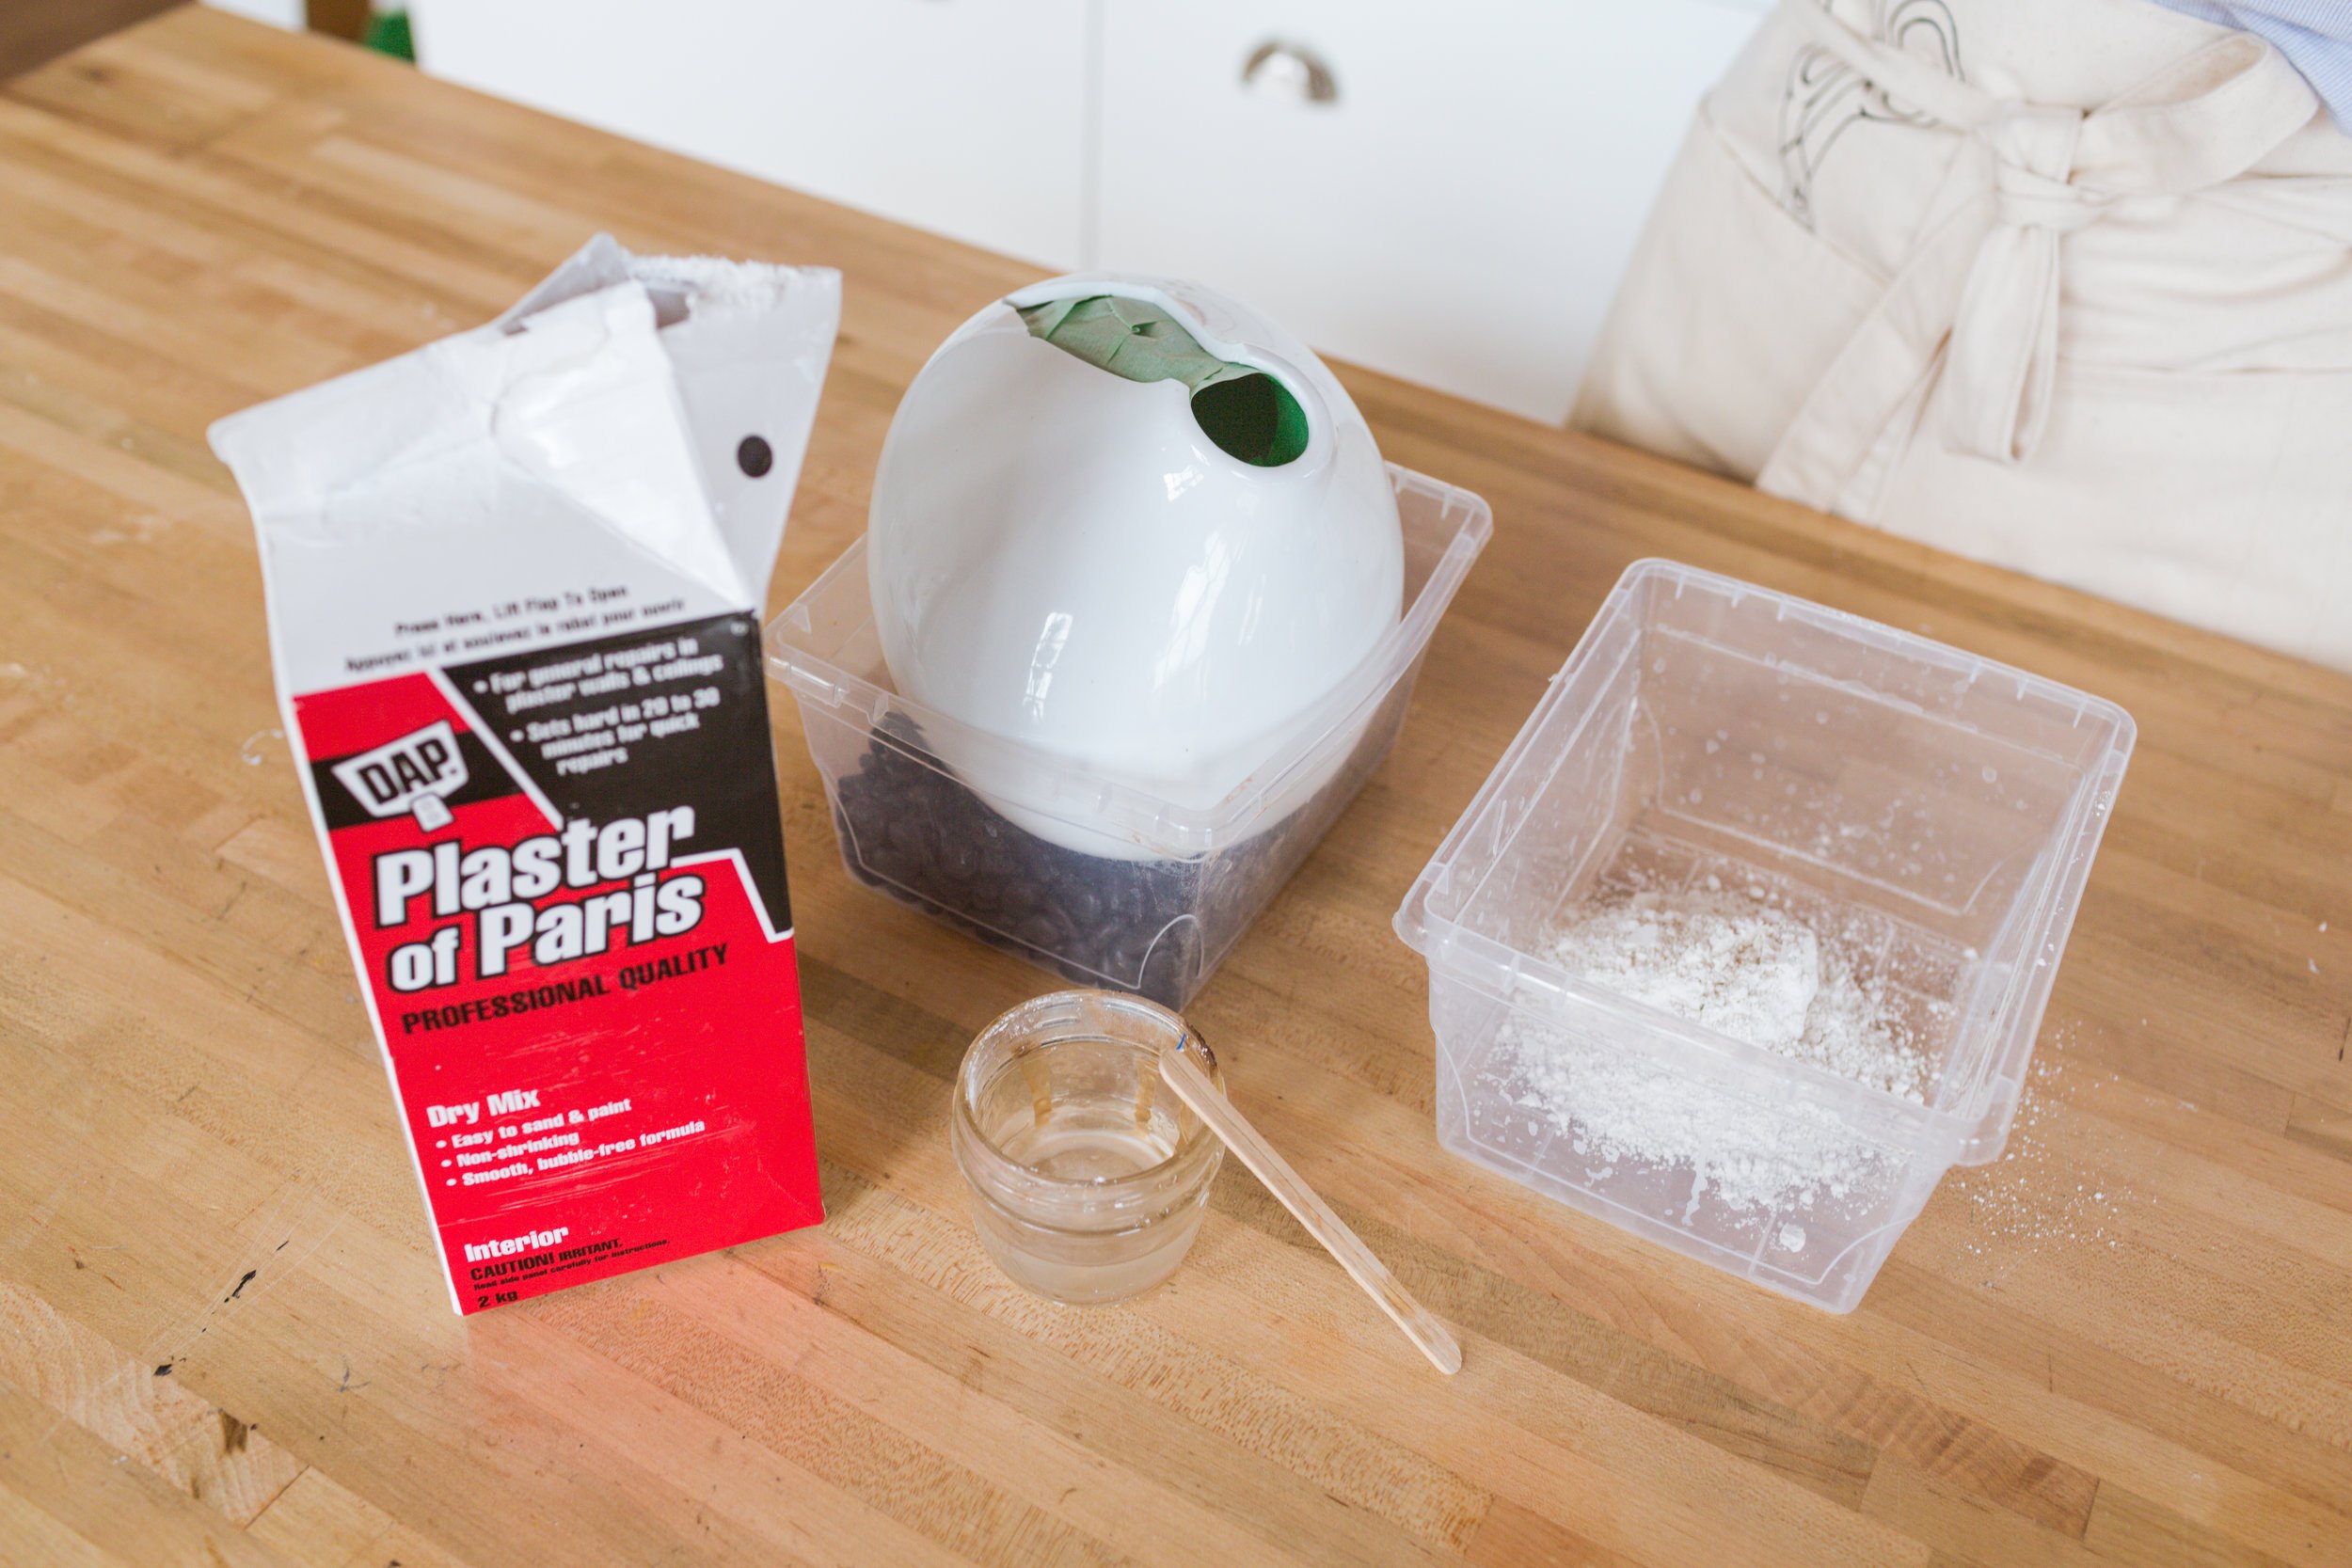
Once mixed, we used a popsicle stick to add the plaster to the crack! Once filled, let dry for 30 minutes! Let everything dry and give everything a nice light sand. Next, make sure there is no dust on the vase and spray paint it to match the original vase colour!


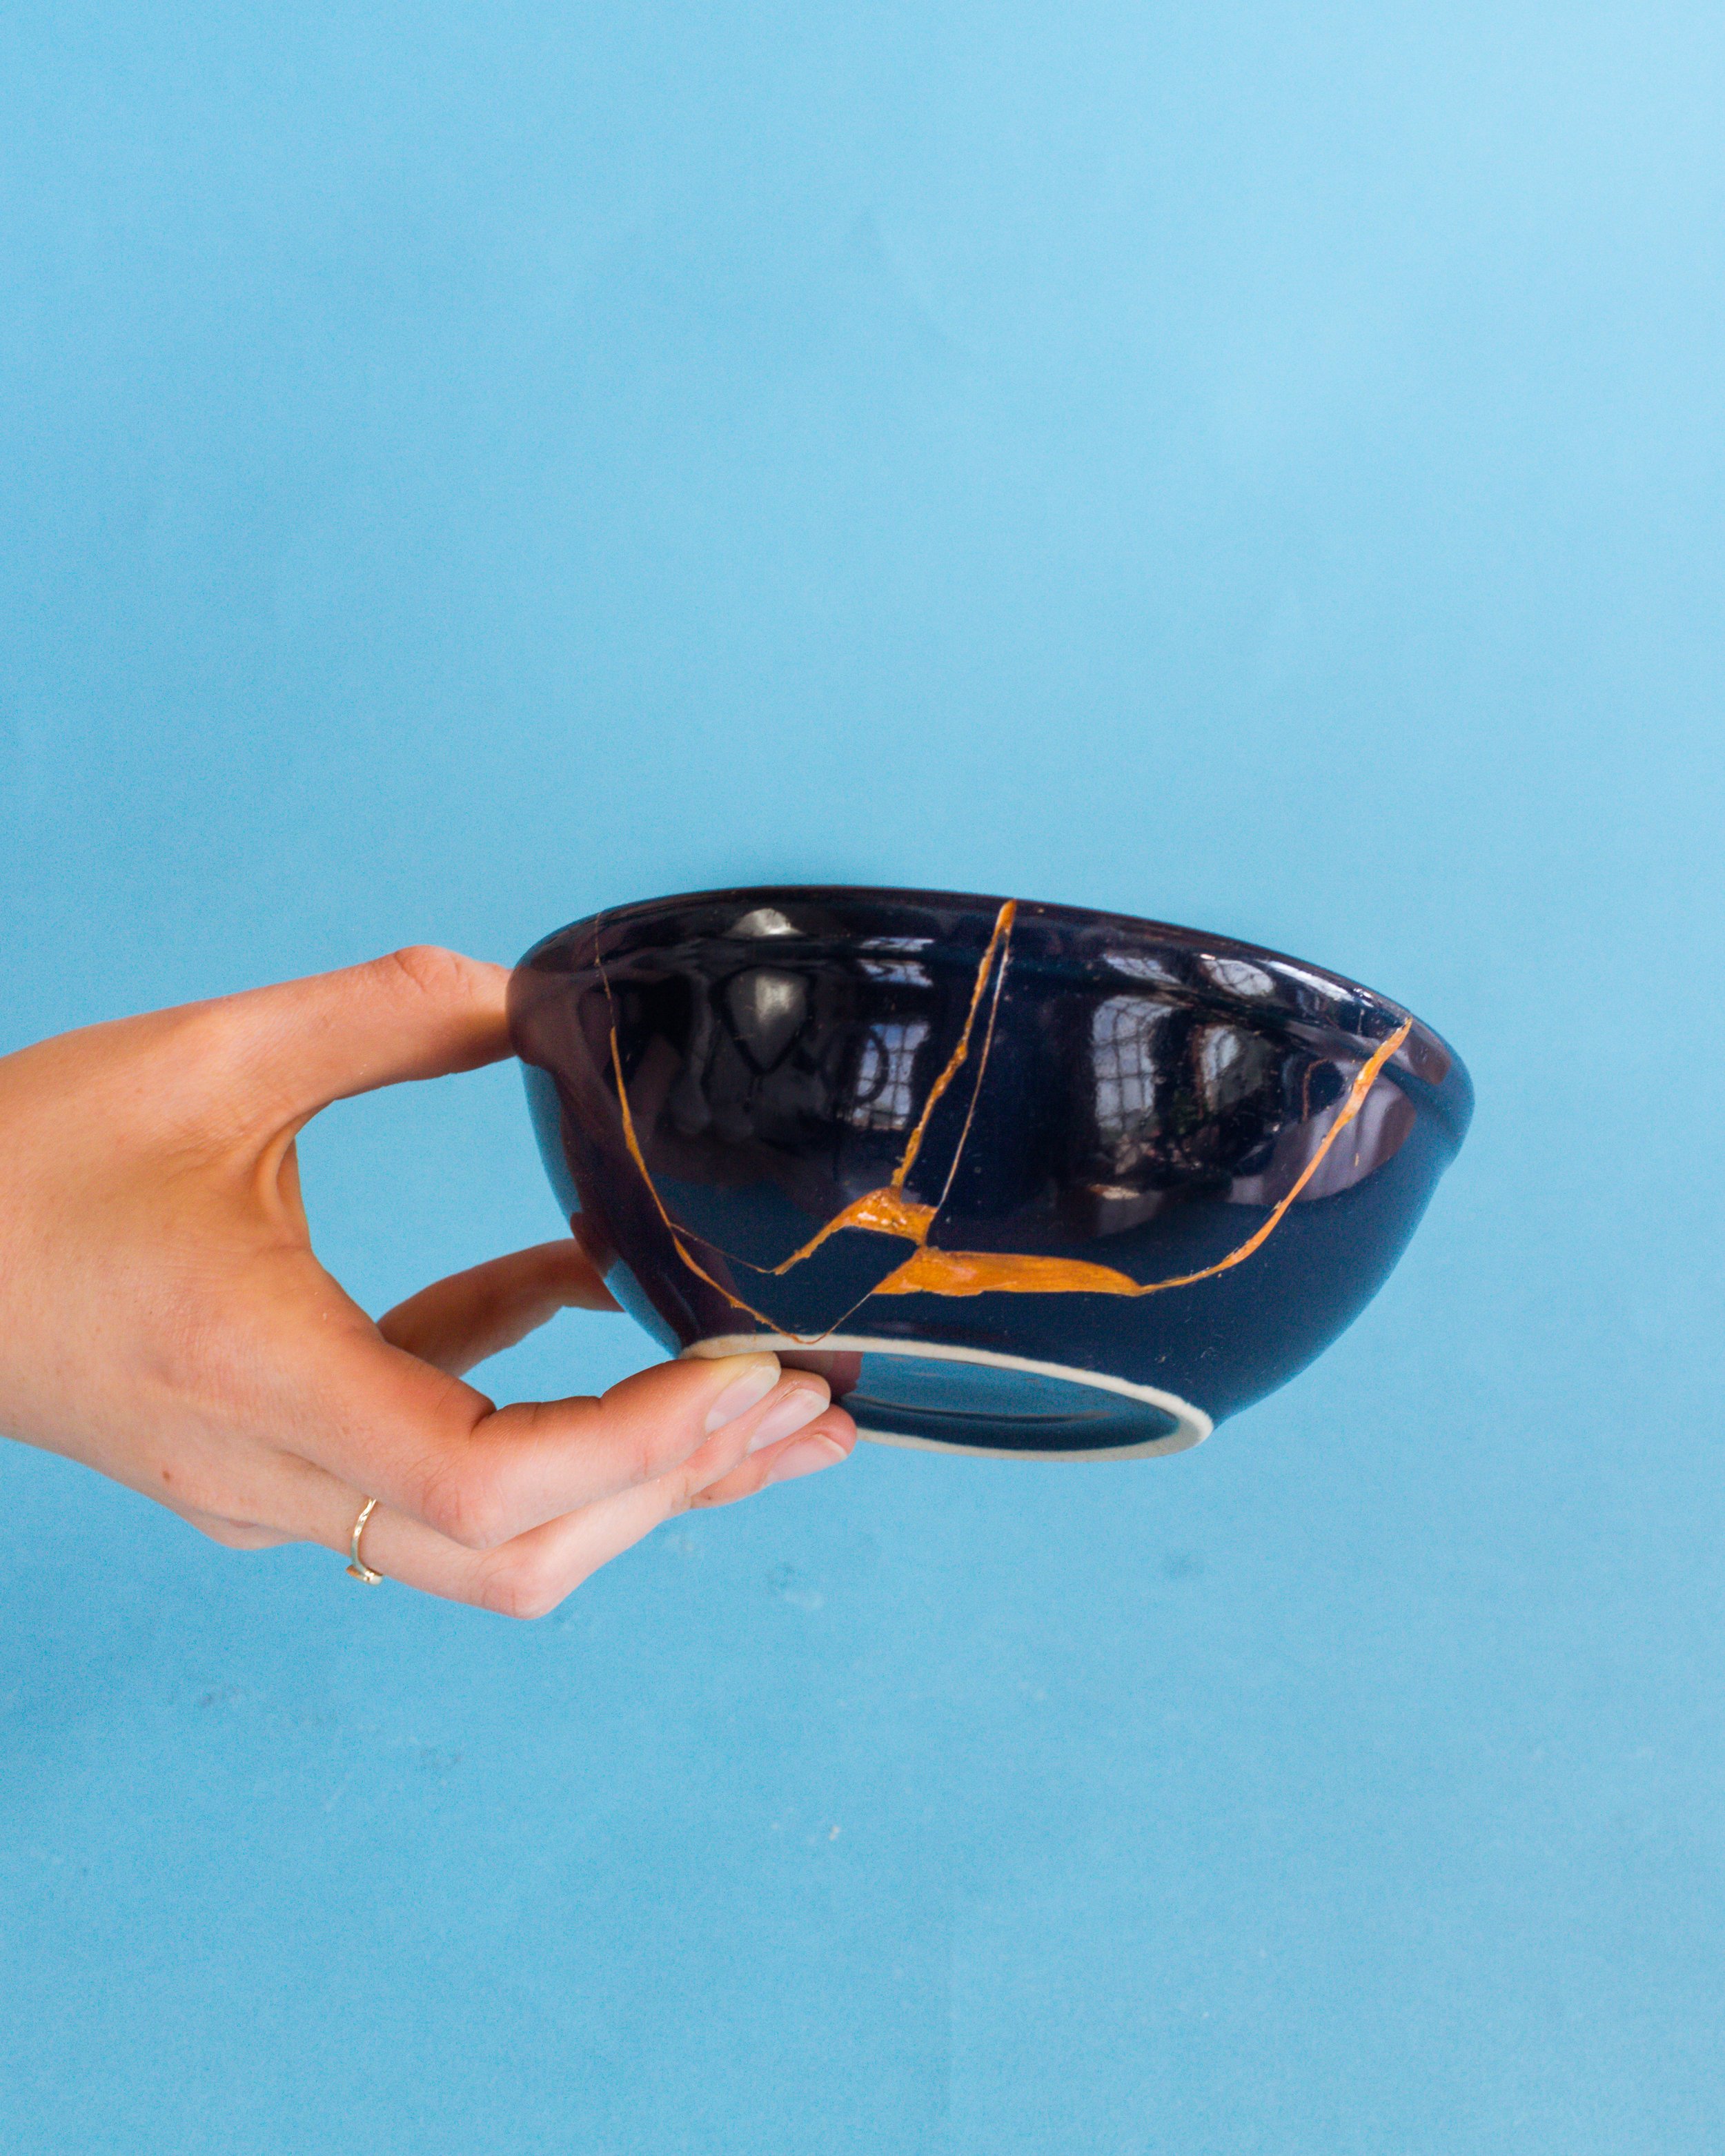
THE KINTSUGI METHOD
WHAT YOU’LL NEED:
Gold mica powder
Two part epoxy
Exacto knife
Rubbing alcohol
For those of you who don’t know, the kintsugi method is a way of fixing things where the cracks in the item are highlighted and celebrated by painting them with gold. We are not going to be doing this the traditional way, but in a more user friendly way using gold mica powder and two part epoxy. Start by squeezing out your two part epoxy onto a piece of cardboard and mixing in the mica powder. Next using a popsicle stick, we applied the mica glue mixture to our crack and added each broken piece!


Try to be as neat as possible when doing this, the glue doesn’t come off too easily once dry. I also used this mixture to fill in bigger cracks that didn’t have ceramic pieces to fill them.


And that’s it! Check out the video below to see more about these methods!
recommended posts


Donec id justo non metus auctor commodo ut quis enim. Mauris fringilla dolor vel condimentum imperdiet.