DIY Photo Backdrops
Do you need a cool photo backdrop for your prom, professional headshot, or just for fun?! You’ve come to the right place! Today we are going to be making three totally easy and affordable photo backdrops!
CLOTHING RACK BACKDROP
WHAT YOU’LL NEED…
Clothing rack
Bedsheet
Faux greenery
Binder clips
This first photo backdrop is super easy to put together! First, we know a lot of you live in dorms or small apartments which means you probably own a clothing rack. Grab that, remove all of your clothes, and set it aside for later. Next, grab a sheet off of your bed. If the sheet is wrinkled, go ahead and steam/iron it. If you don’t have an iron, you can hang the sheet in your bathroom to release the wrinkles! Once that is done, hang your sheet over the clothing rack.

The final step is to add faux greenery. Go ahead and use binder clips to attach the faux greenery along the top of your clothing rack. And that’s it!
WATERCOLOUR AND BOKEH LIGHT BACKDROP
WHAT YOU’LL NEED…
Watercolour paper
Watercolour paints
Paint brushes
Foam core
Hot glue
Popsicle sticks
Christmas lights
Exacto knife
Start by laying your watercolour paper sheets on a hard surface and paint whatever pattern you’d like on the paper. Make sure that you lay out the pieces of watercolour paper the way you’d like them to be laid out on your backdrop so that the pattern connects properly!
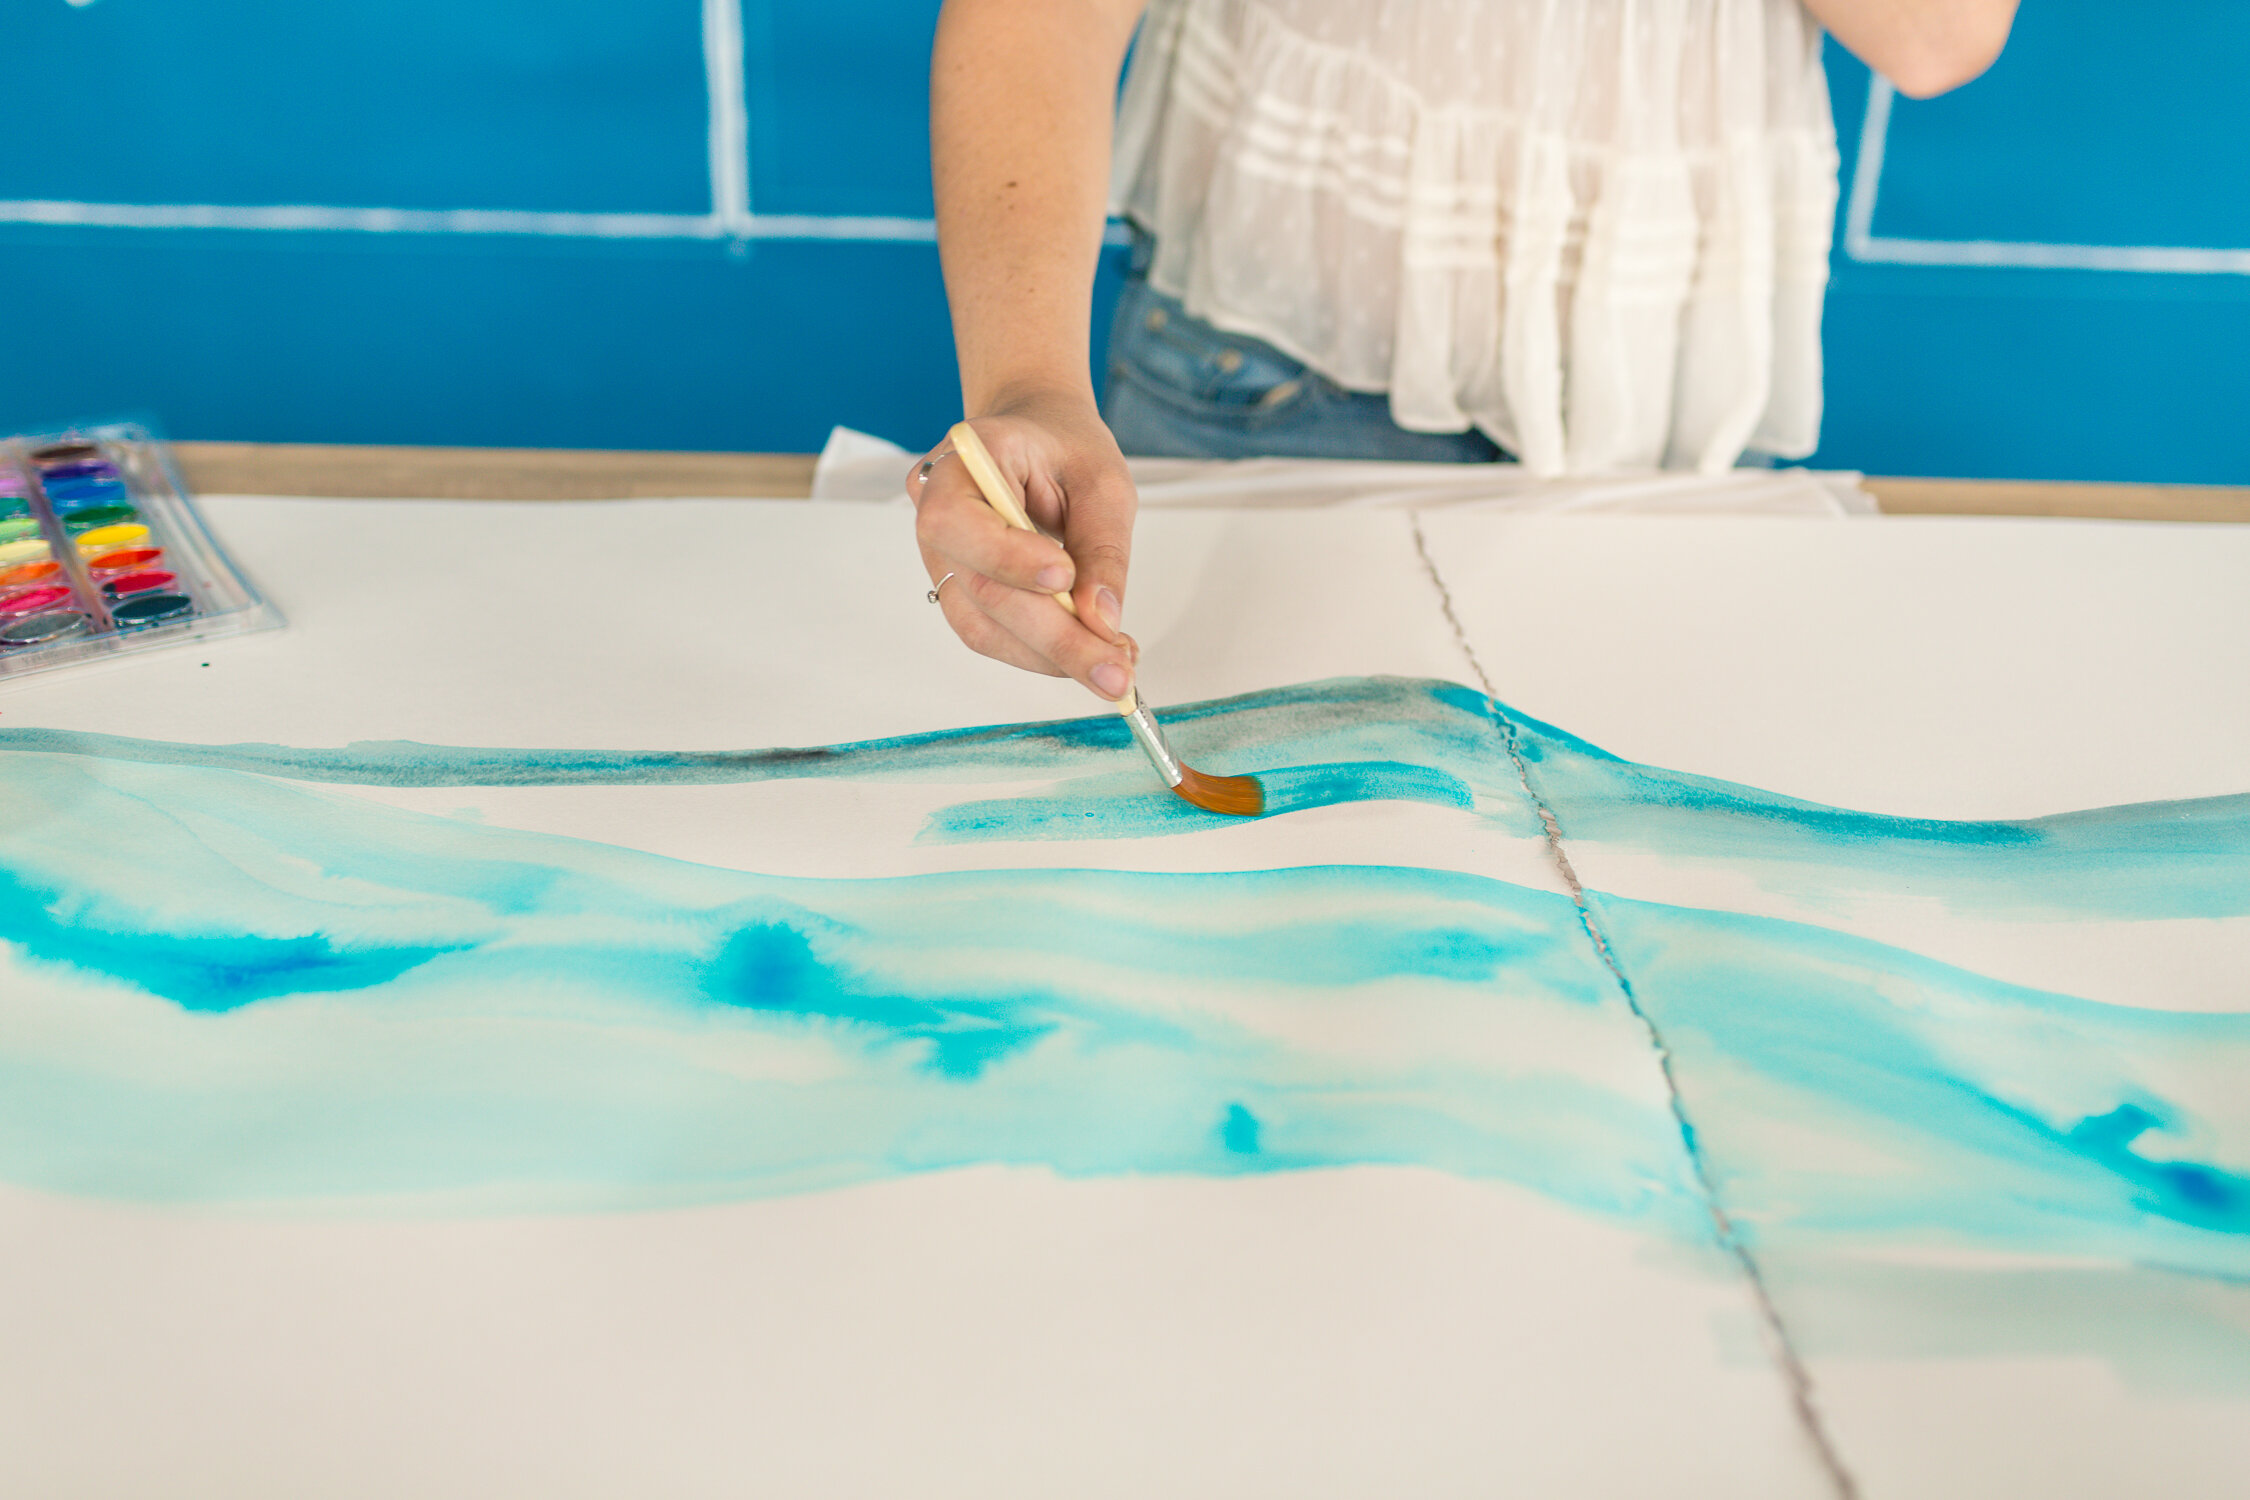

Once everything is dry, use an exacto knife to cut the raw edge off of where your pieces of paper will connect. This will help to conceal the seams between the two pieces.
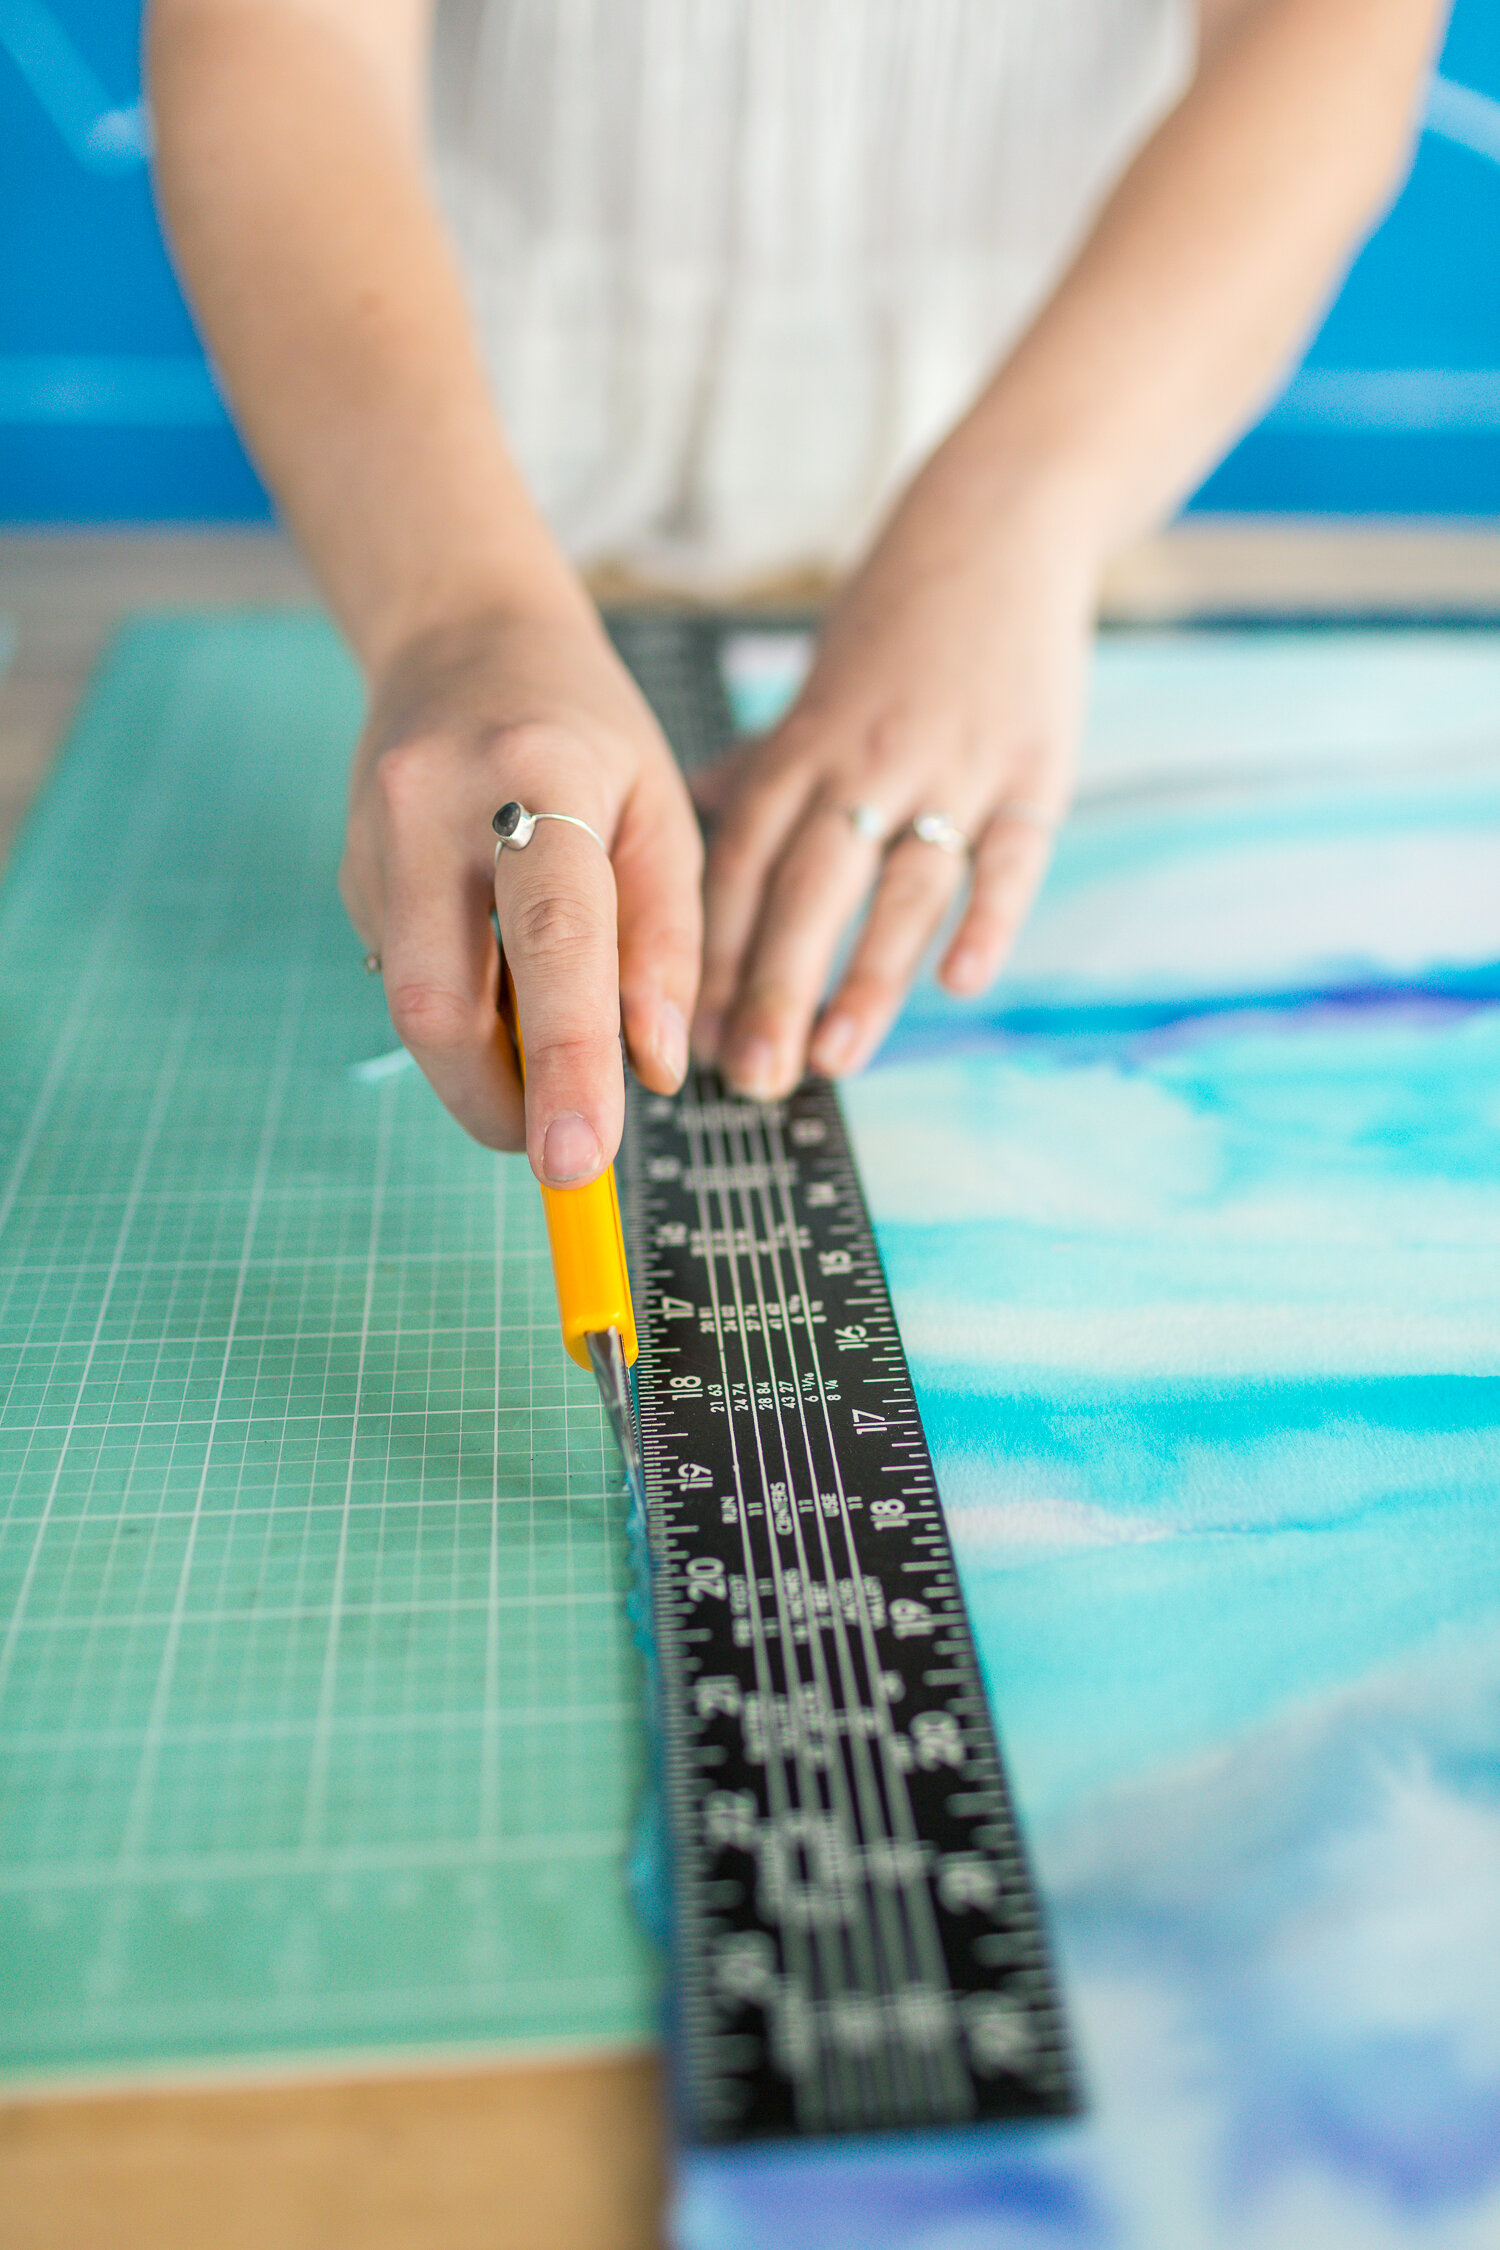

Next, glue your paper to a piece of foam core. If you are using multiple pieces of foam core, you can go ahead and use popsicle sticks to attach the multiple pieces of foam core together.
Time to add lights! Use a pen or an object with a sharp tip and poke holes in your board from the back. Next, stick your lights through the holes.

Plug in your lights and you’re ready to shoot!


GIANT ROSE BACKDROP
WHAT YOU’LL NEED…
Craft foam
Scissors
Scissors
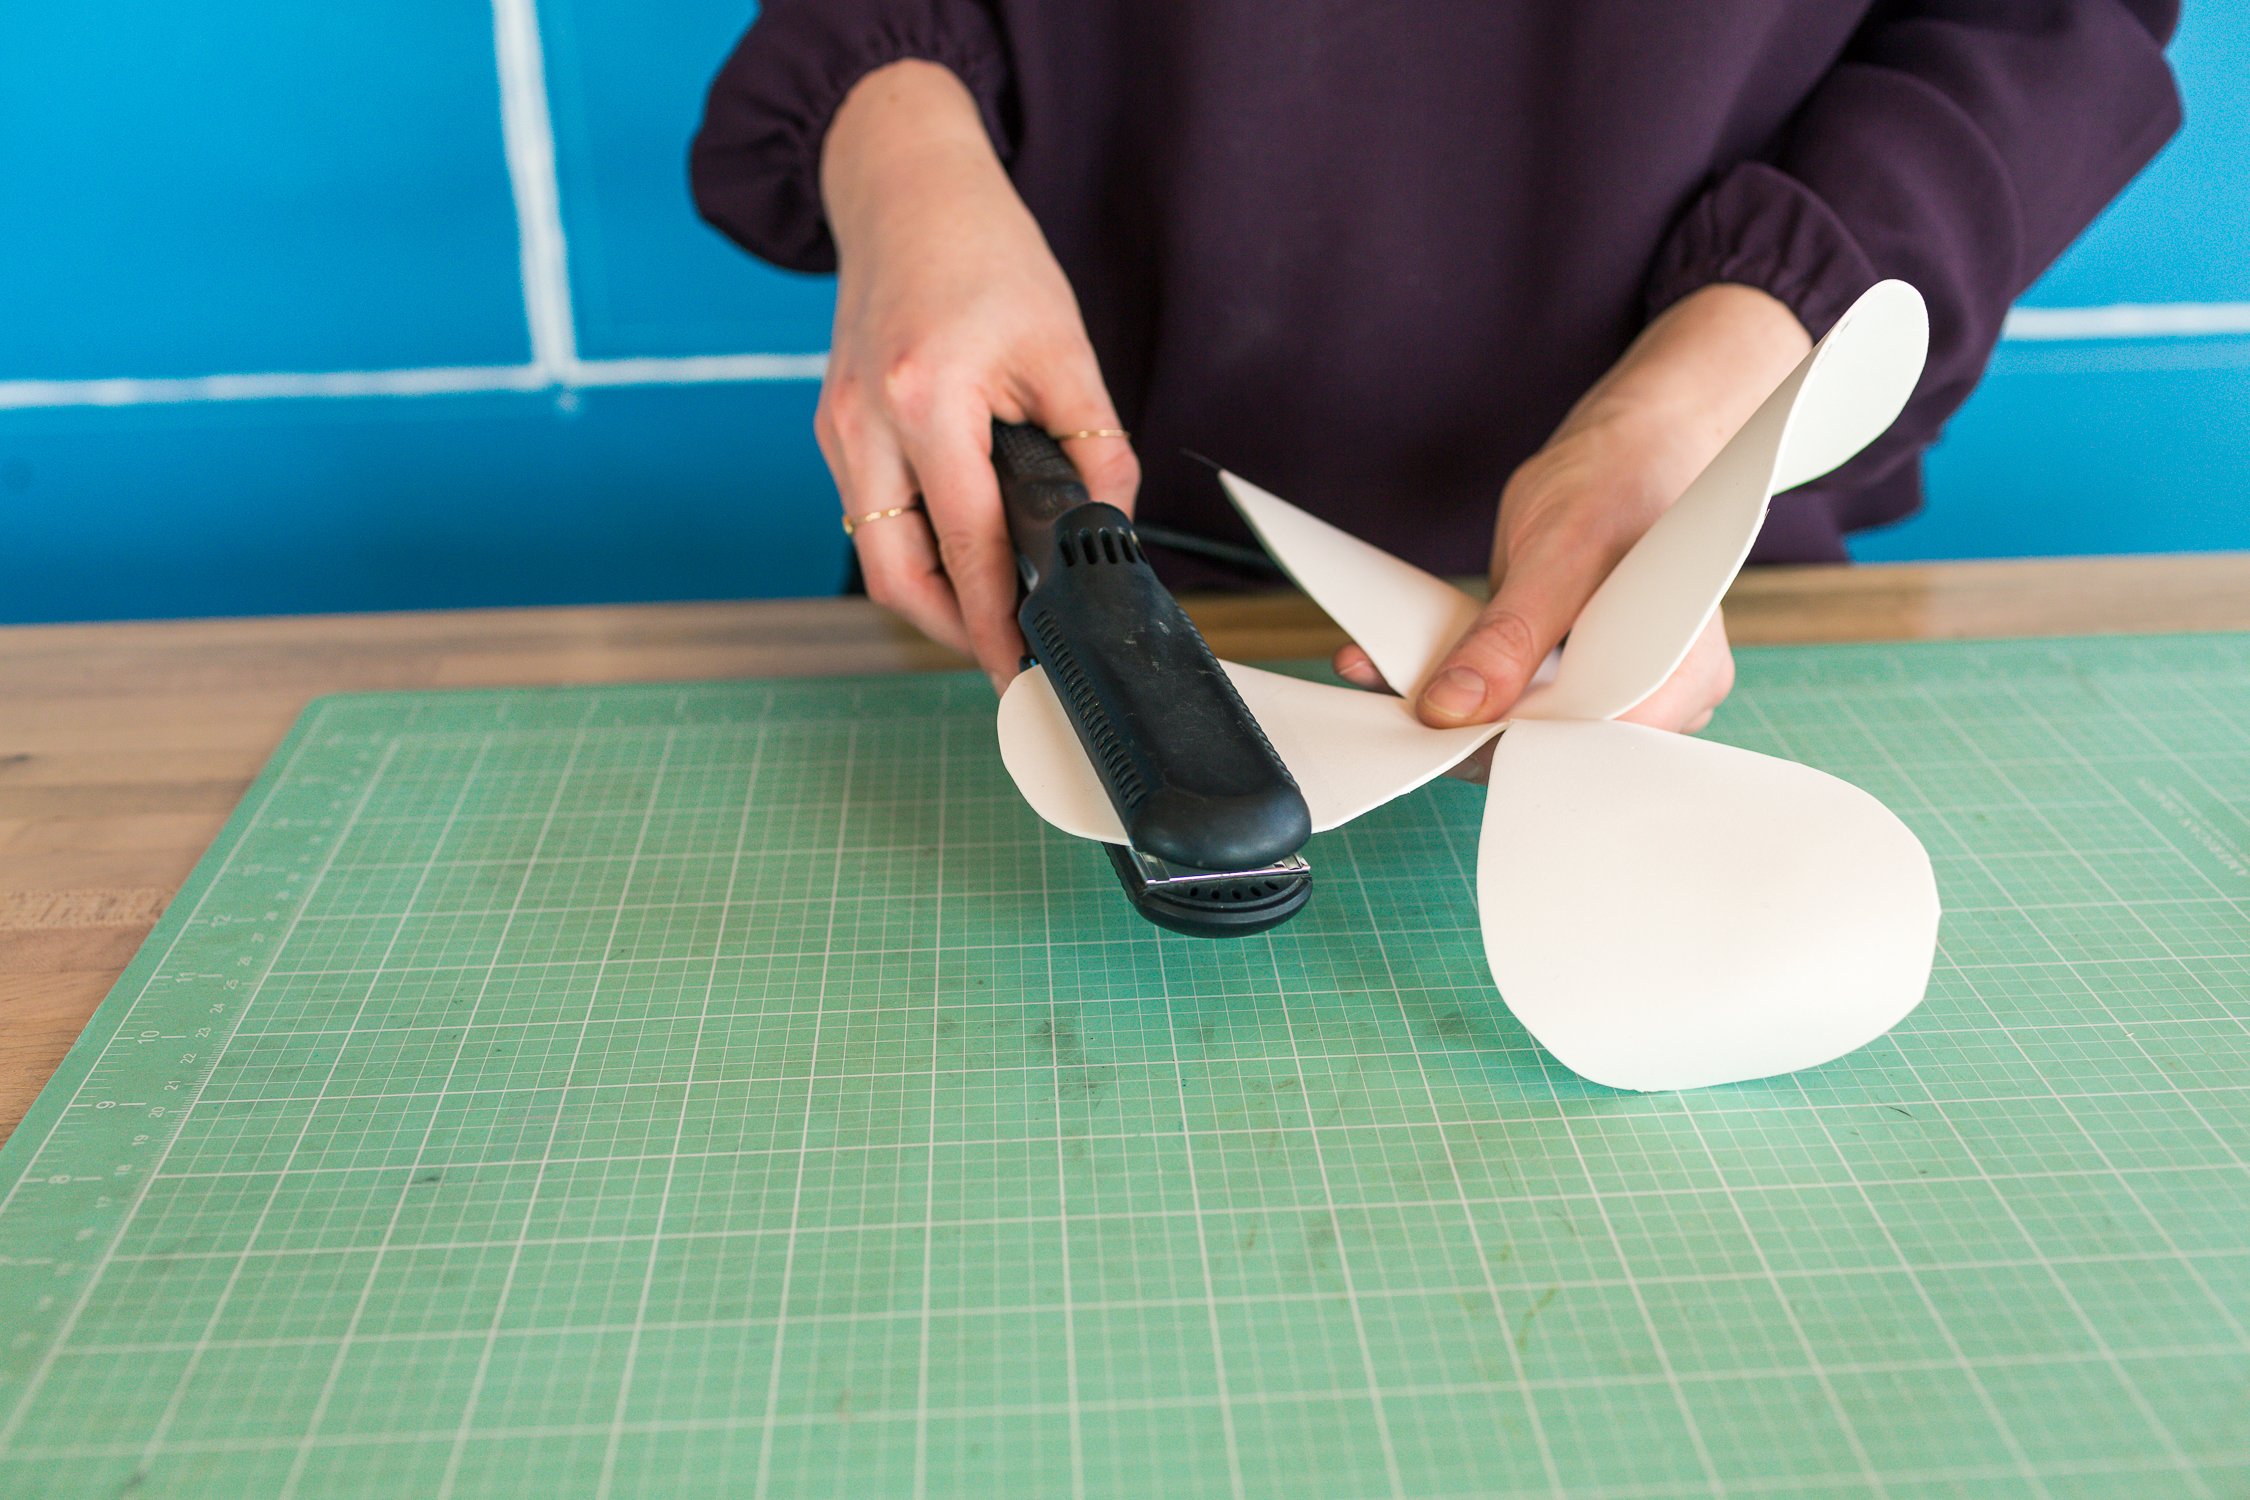
Start by downloading our flower template, and cutting it out. We printed our template out in two different sizes. Next, go ahead and cut out a bunch of pieces of foam using our templates as guides. We used three cut out templates per flower.

Next, grab a hair straightener and place it over the end of each petal. Don’t squeeze too tight, as we don’t want to melt the foam. Once the foam is warm, go ahead and curl the foam using your fingers. This will give the petals a more organic look. Do this to all of the petals!
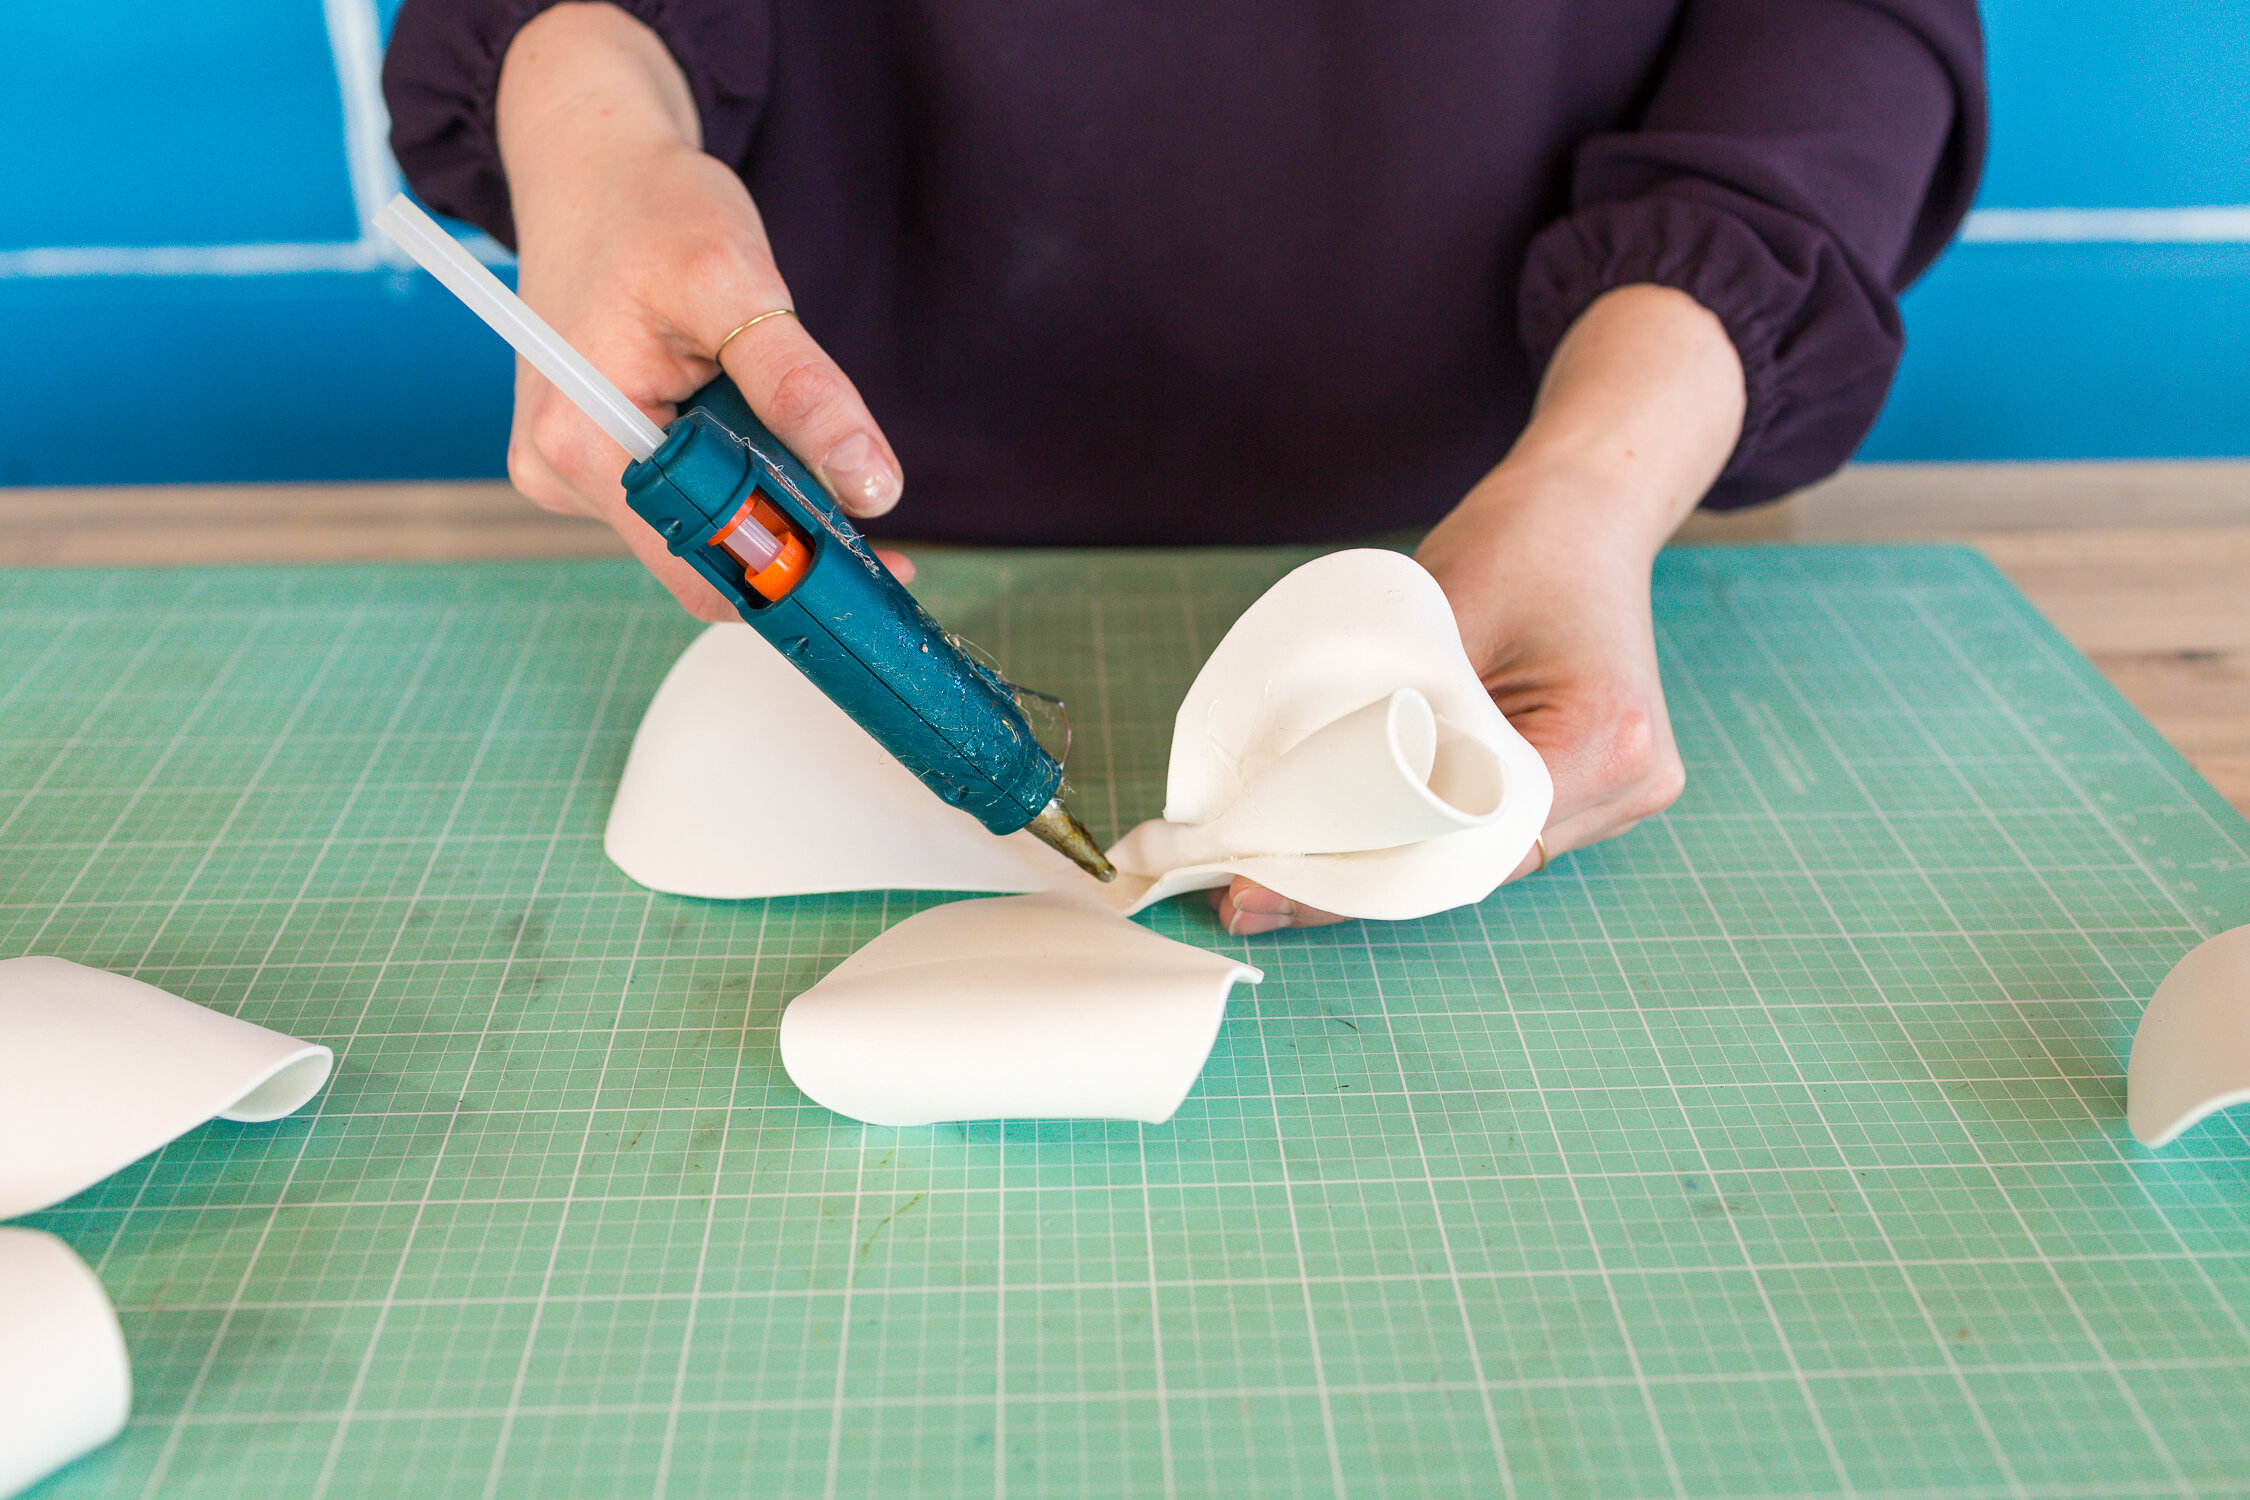
Time to build the flowers. Start by putting hot glue onto the inside of the first petal and rolling this tightly. Next, put glue onto the next petal and roll this a bit more loosely. Keep doing this, wrapping the petals more and more loosely as you move forward. Do this until you’ve stacked three cut outs total onto one flower. Make sure you add hot glue to the middle of each new template you add to the flower. Also be sure to alternate where you add the newest template to make the flower look the most realistic as possible! Repeat all of this until you have your desired amount of flowers.
Next, grab a trifold poster board and hot glue your flowers onto your board. Try alternating the sizes of the flowers to give everything a more organic look.


And that’s it! You’re all ready to take some amazing photos!


Check out the video below to see more!
Recommended posts


Commodo cursus magna, vel scelerisque nisl consectetur et. Donec id elit non mi porta gravida at eget metus.