EXTREME IKEA MAKEOVER!
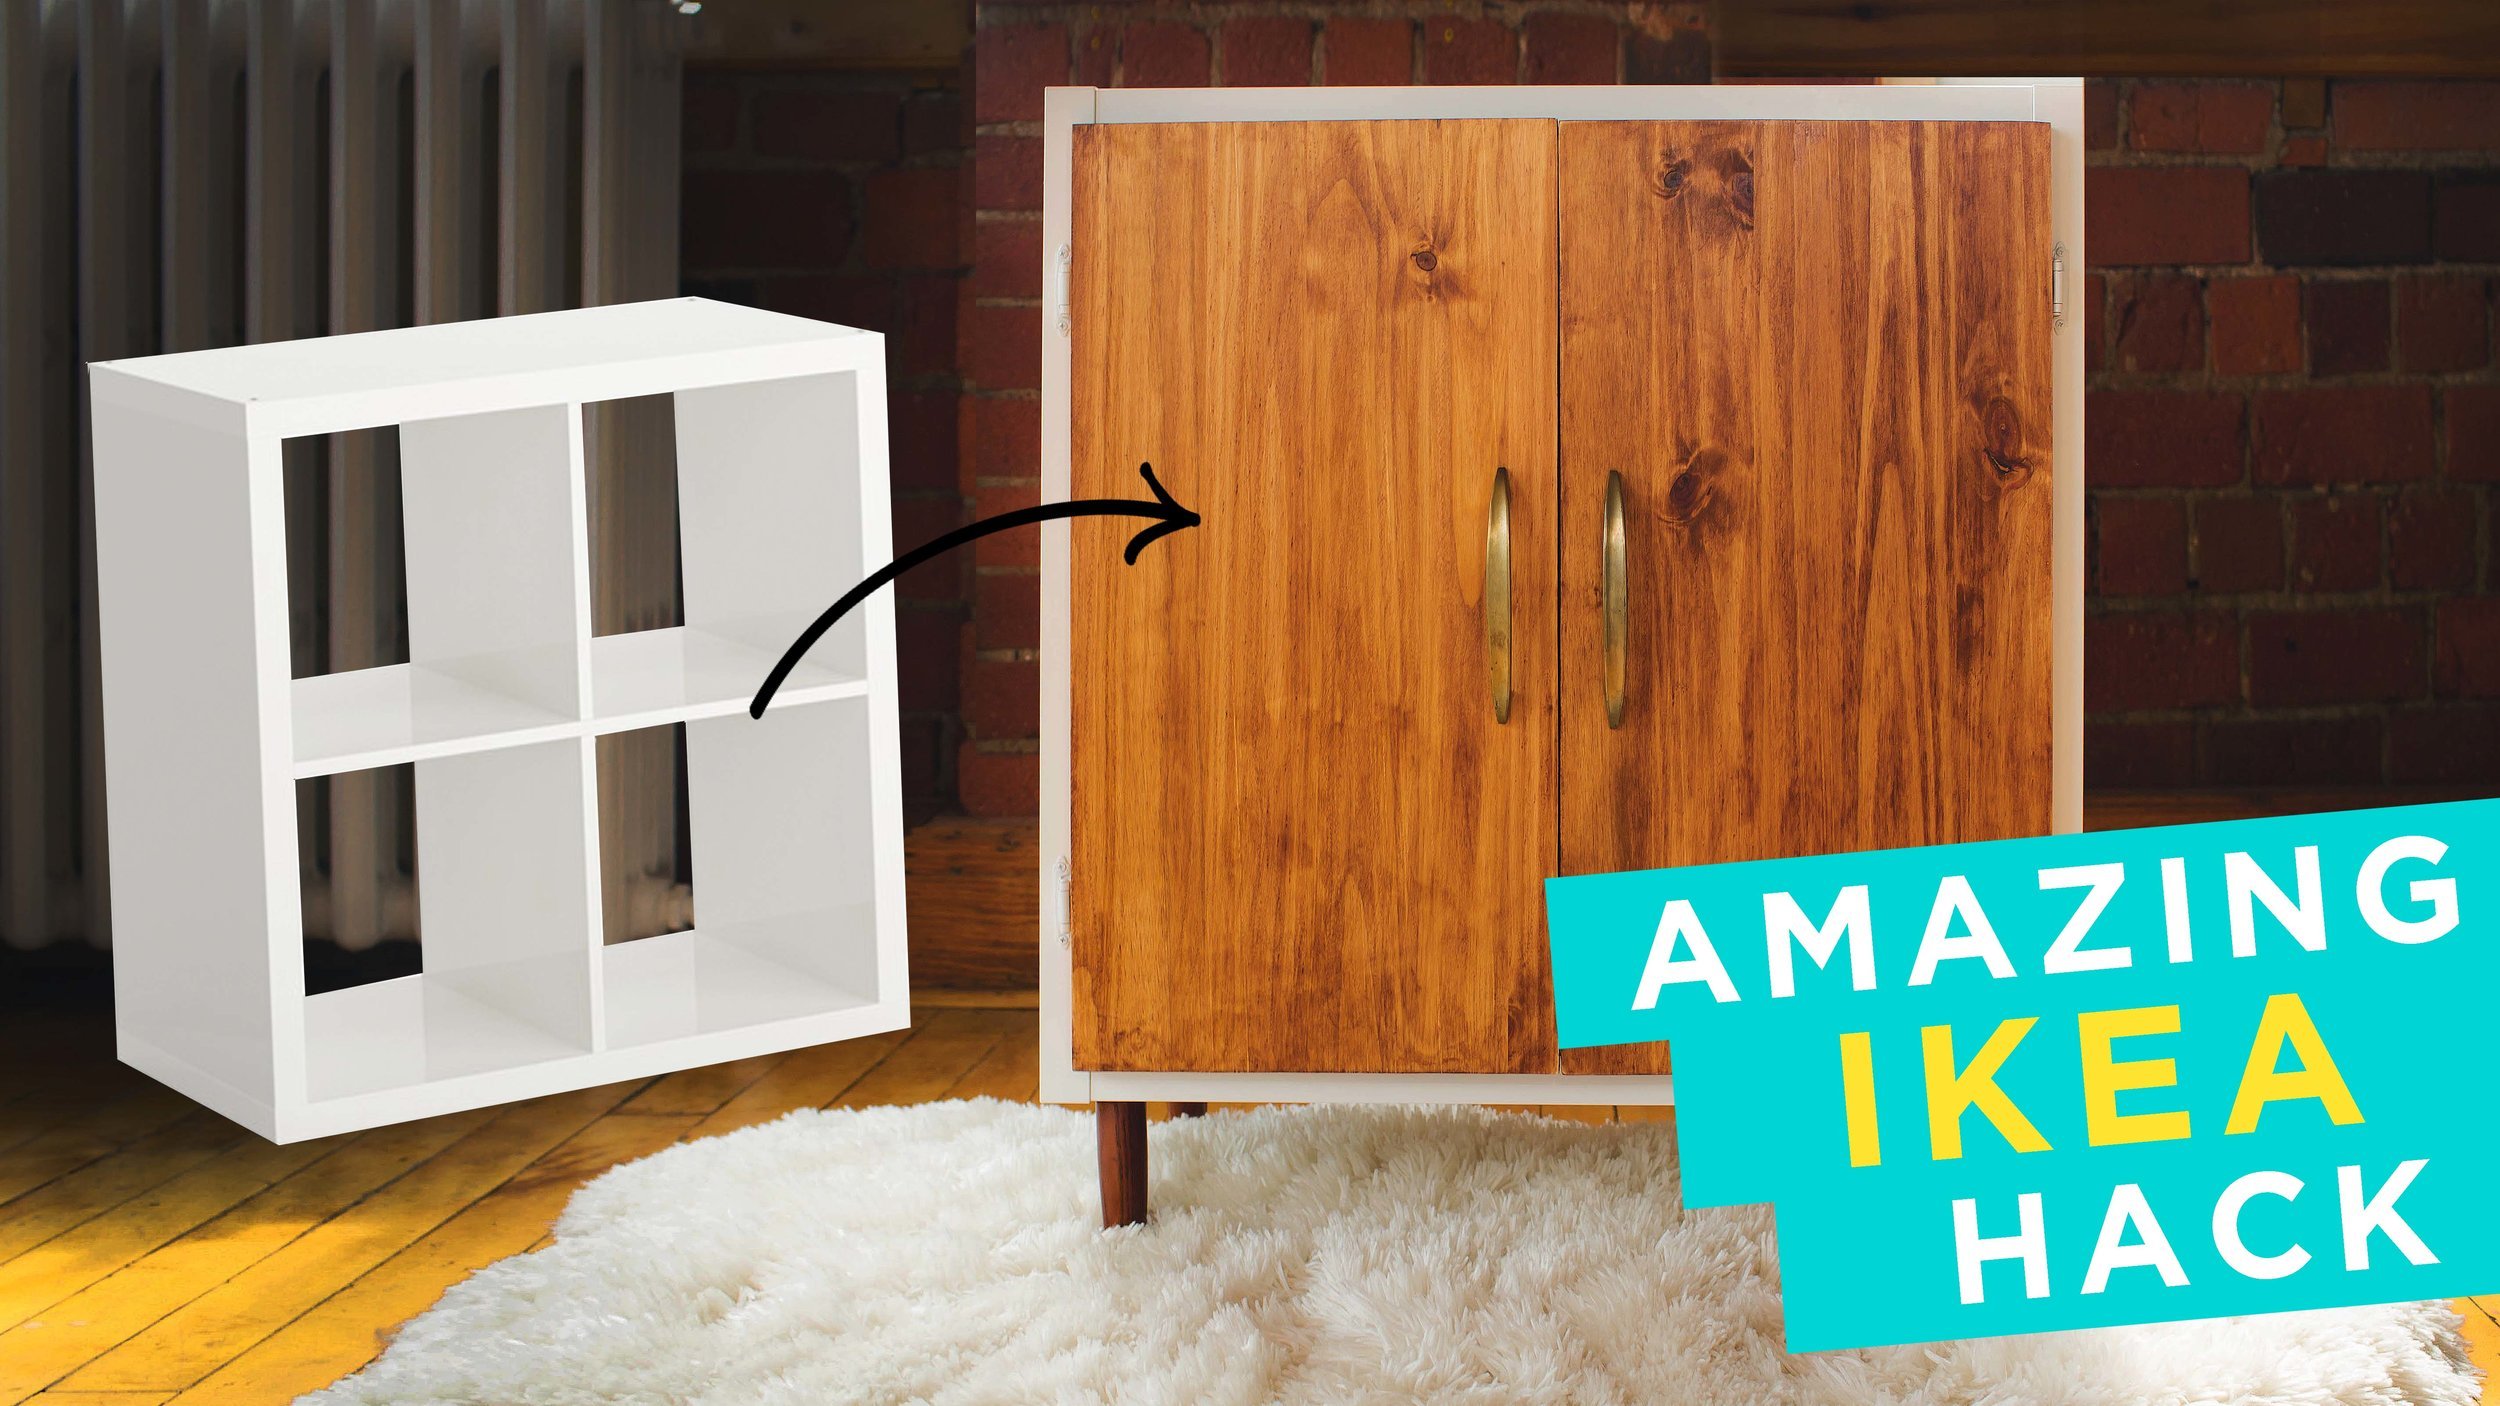
We think that this is one of the best makeovers we’ve done in a while. If you guys can remember when we did our ‘As Is’ section upcycle, we missed out on buying a great KALLAX IKEA shelf. We were bummed, you guys really wanted to see us DIY it, and so we’re doing it today! Storage, dorm decor, and IKEA all in one? Heck yeah. Let’s get started!
Difficulty: ✂✂✂
Cost: $50-$150 (dependant on whether you own a KALLAX or not)
Materials: IKEA KALLAX organizer, 29x29" MDF, four 6 inch furniture legs, furniture leg plates, two pieces of clothing rod hardware, stained dowel, pine wood 3/4 of an inch thick + cut to 14 inches by 27 3/4 inches, chestnut stain, door hinges, mid-century modern handles, c-hooks.
Tools: Drill, sandpaper, hammer, nails, screws.

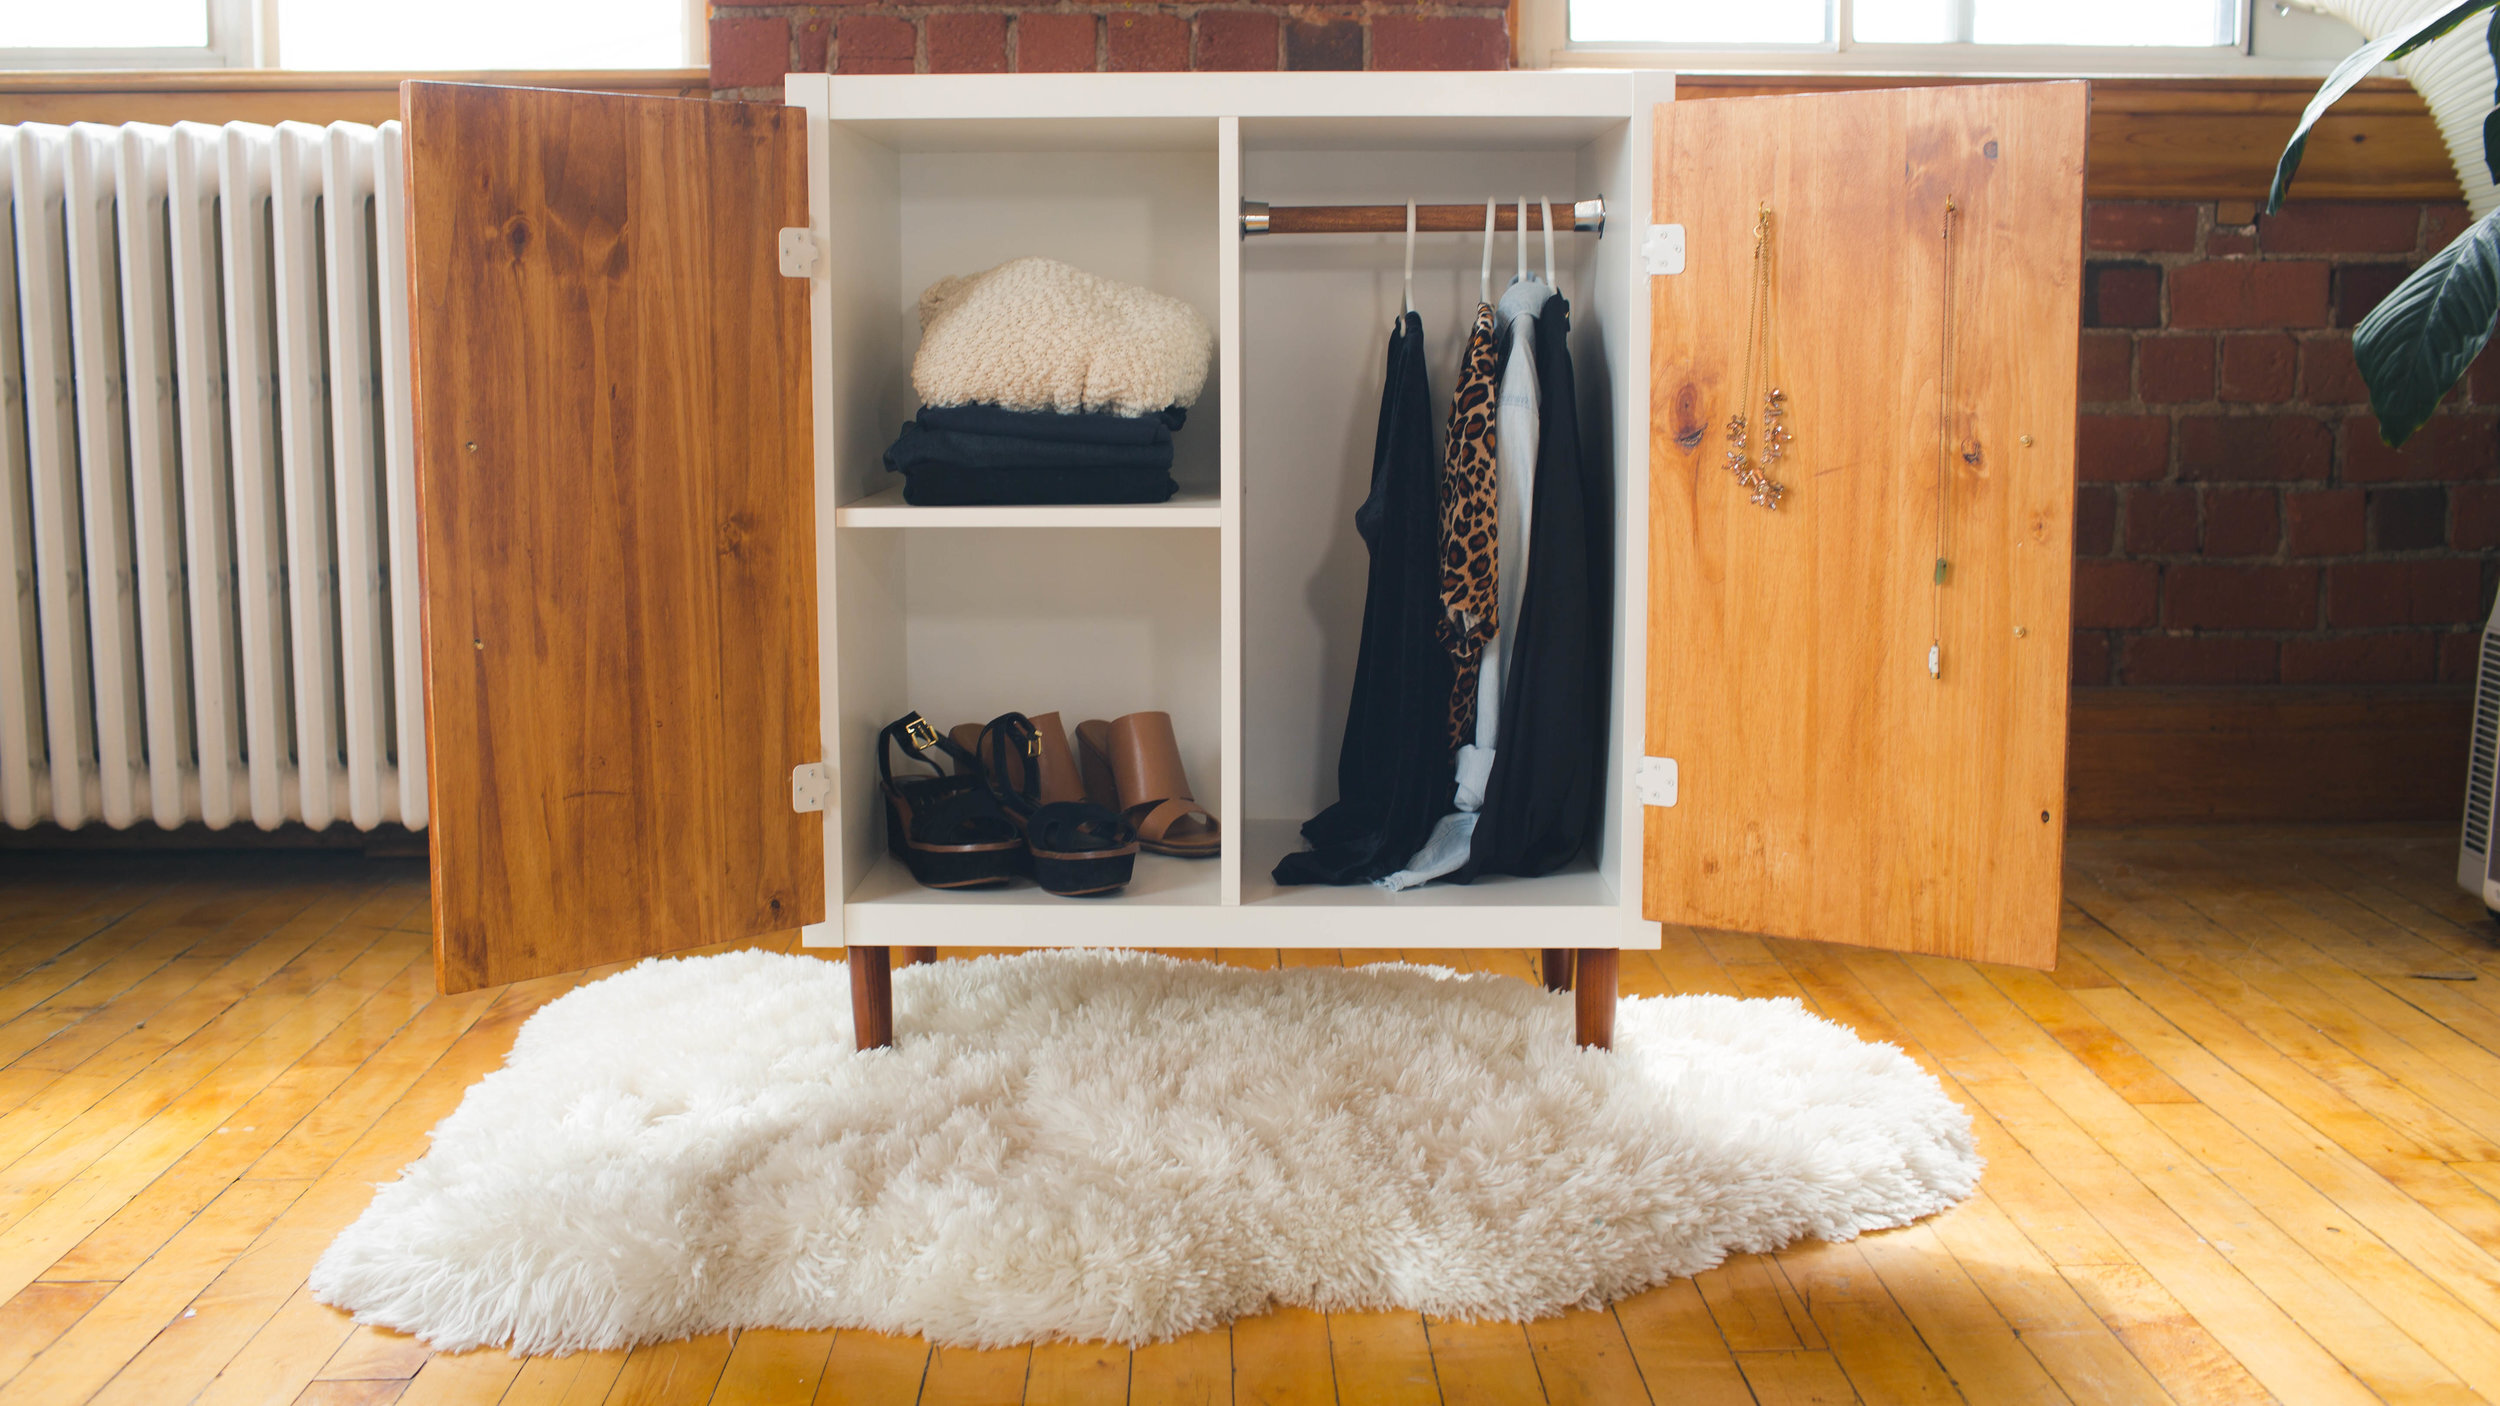
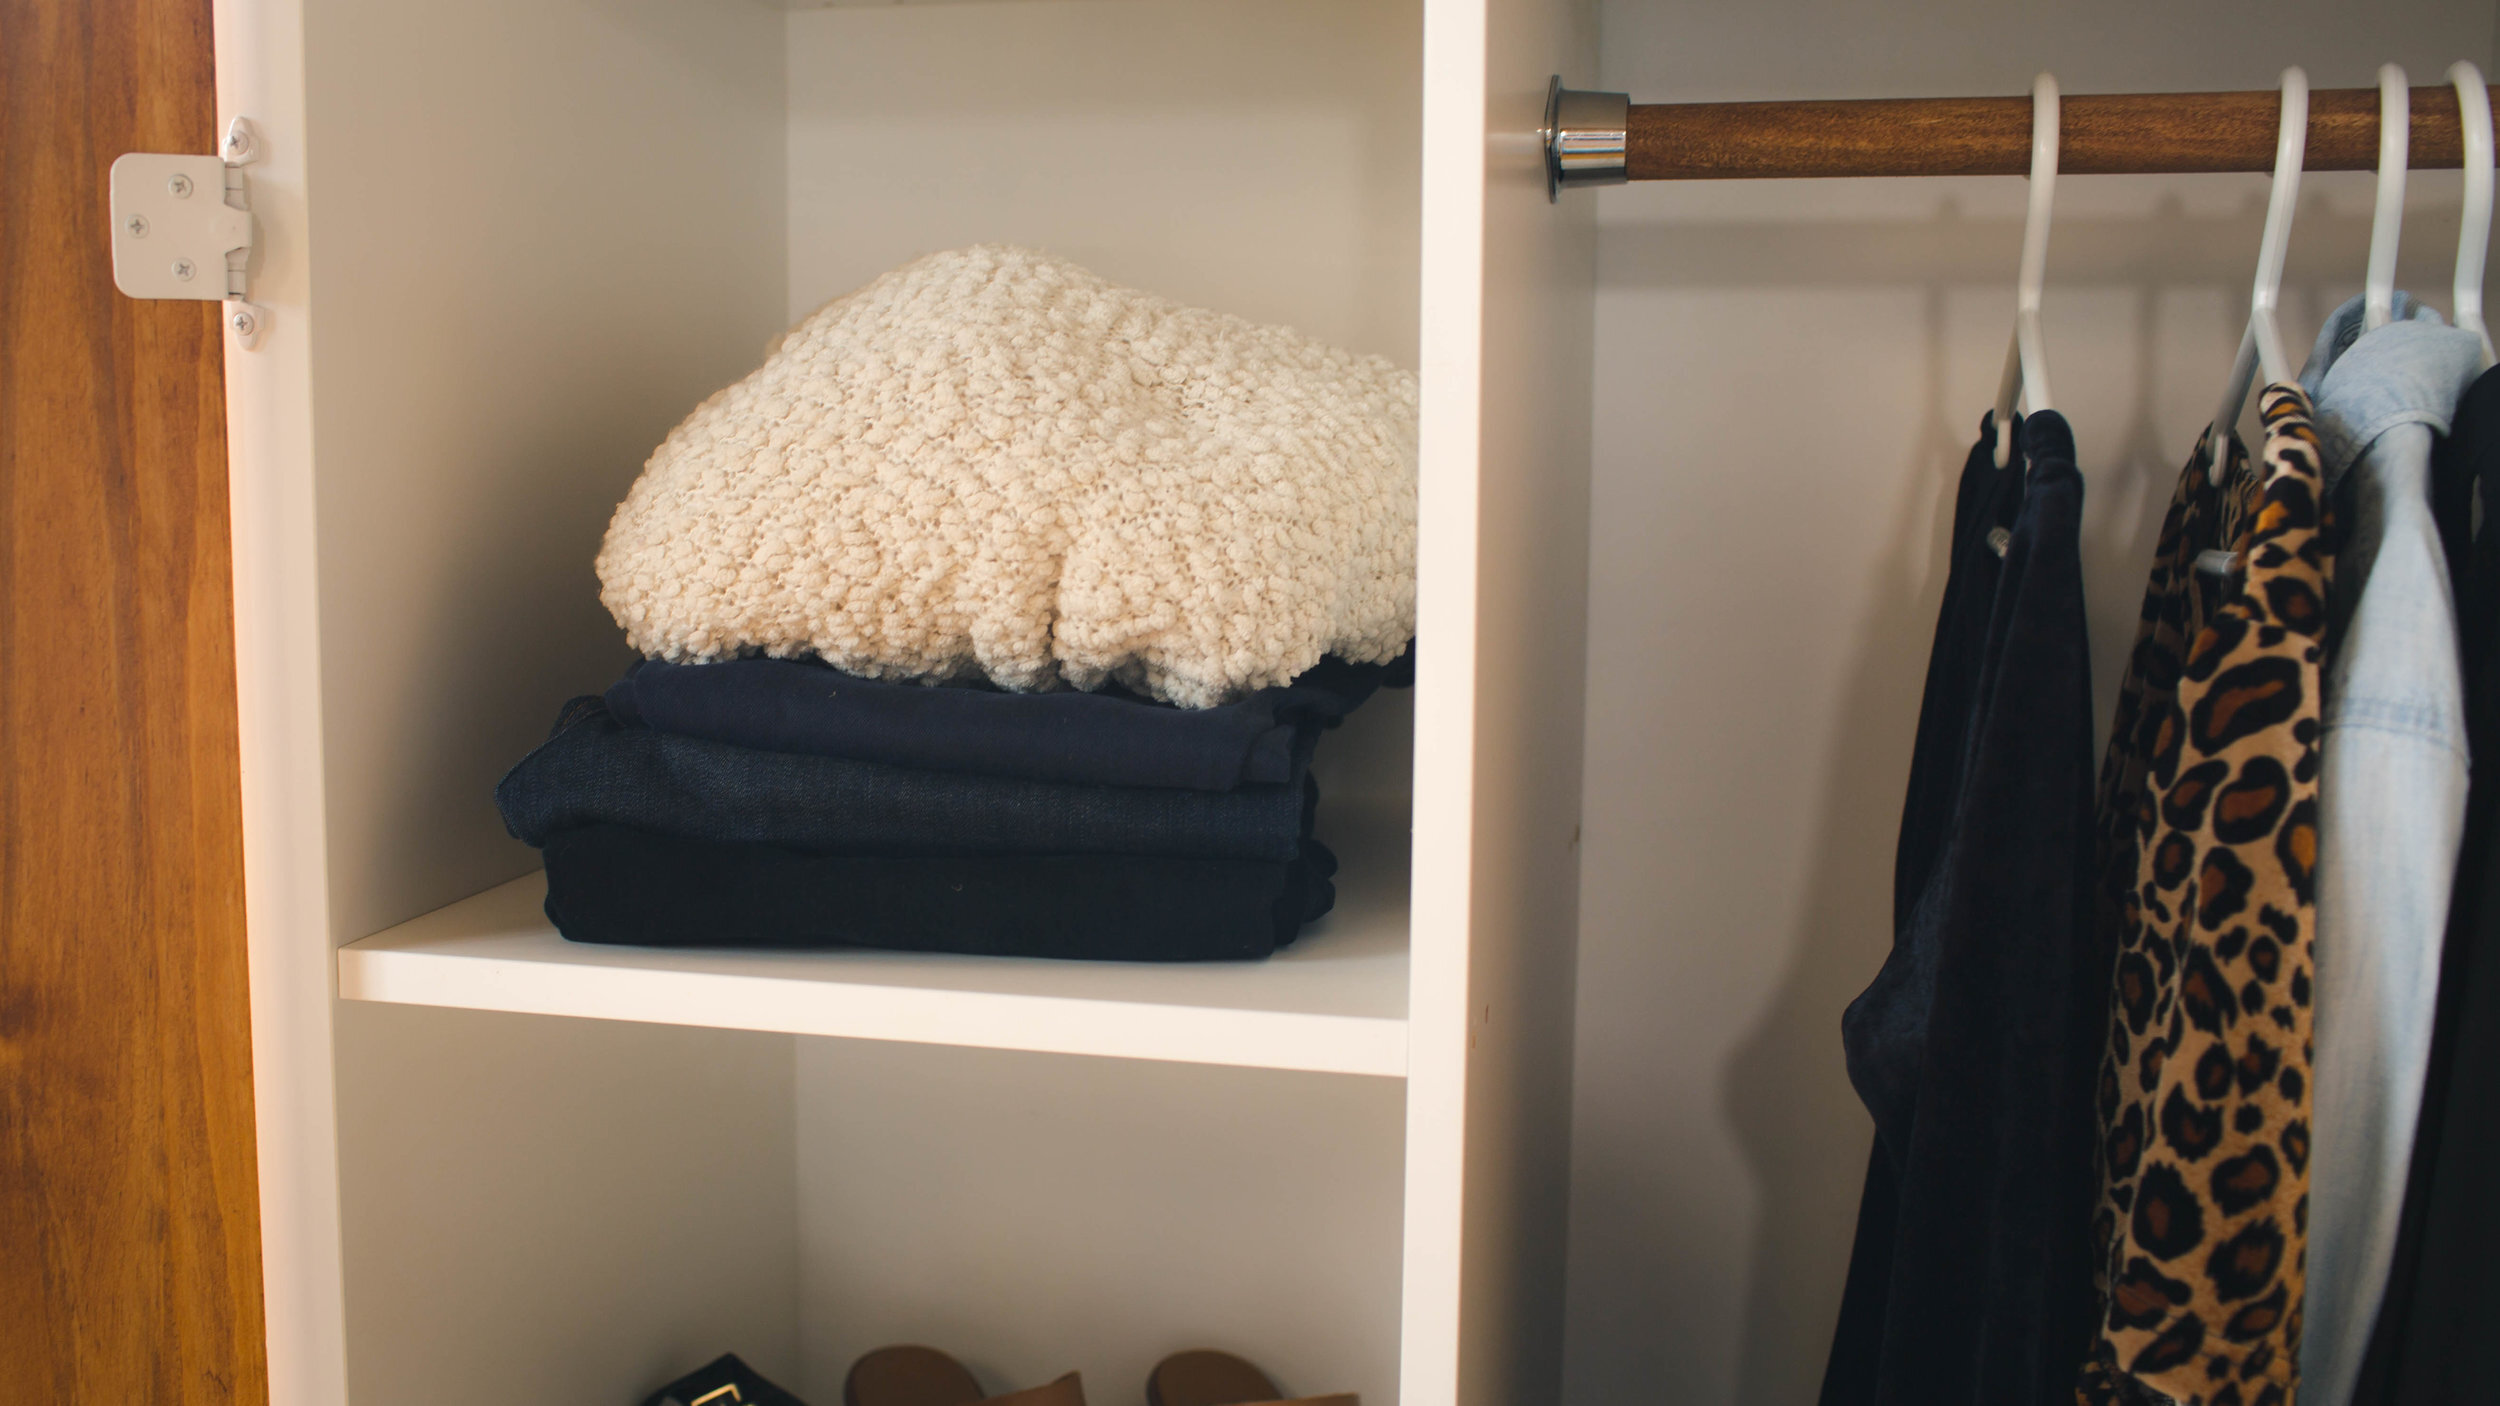
The standard Ikea cube shelf comes with one long shelf through the middle and two smaller shelves on the top and bottom.

Carefully unscrew the top and pull out the top small shelf. Use pliers to remove or trim down any exposed wooden dowels. Re-screw the top back in place. Flip the cube on it’s side so that the single long shelf runs vertically. Now we’re adding a backing onto our shelving unit.
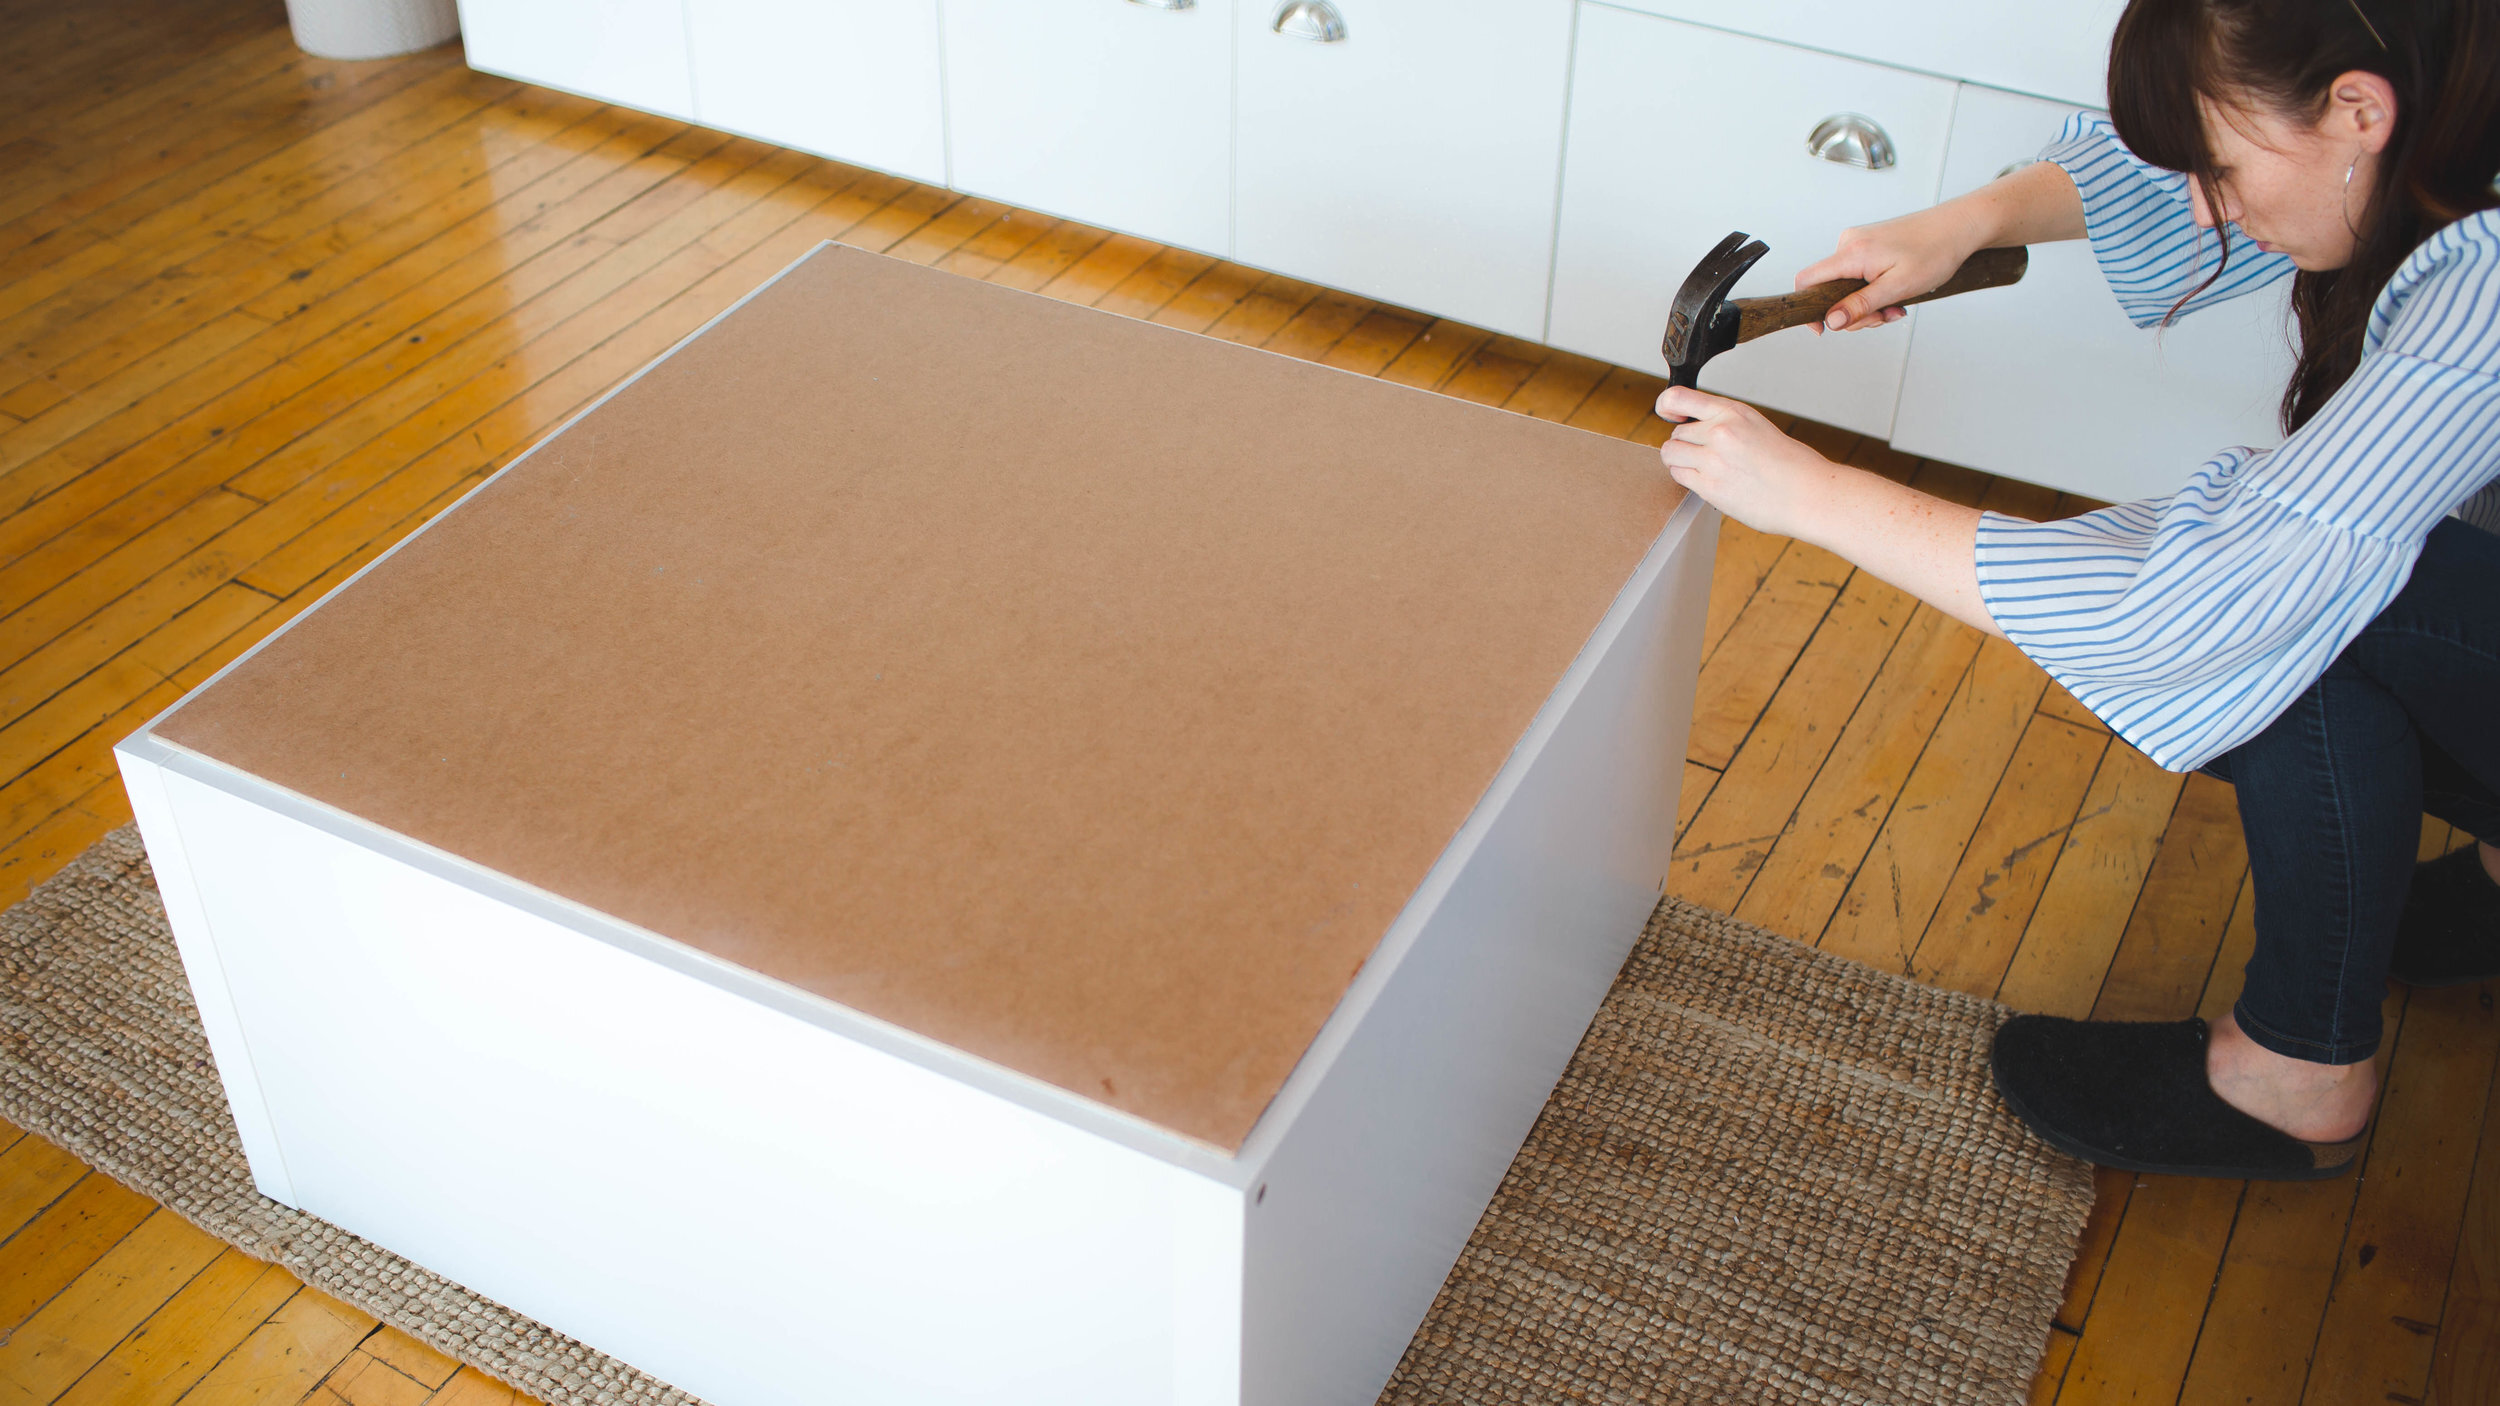
We had this piece of white MDF pre-cut to 29” x 29”at the hardware store. Hammer some small finishing nails into the MDF with the white side facing down. Now that we have a back, it’s already starting to come together!
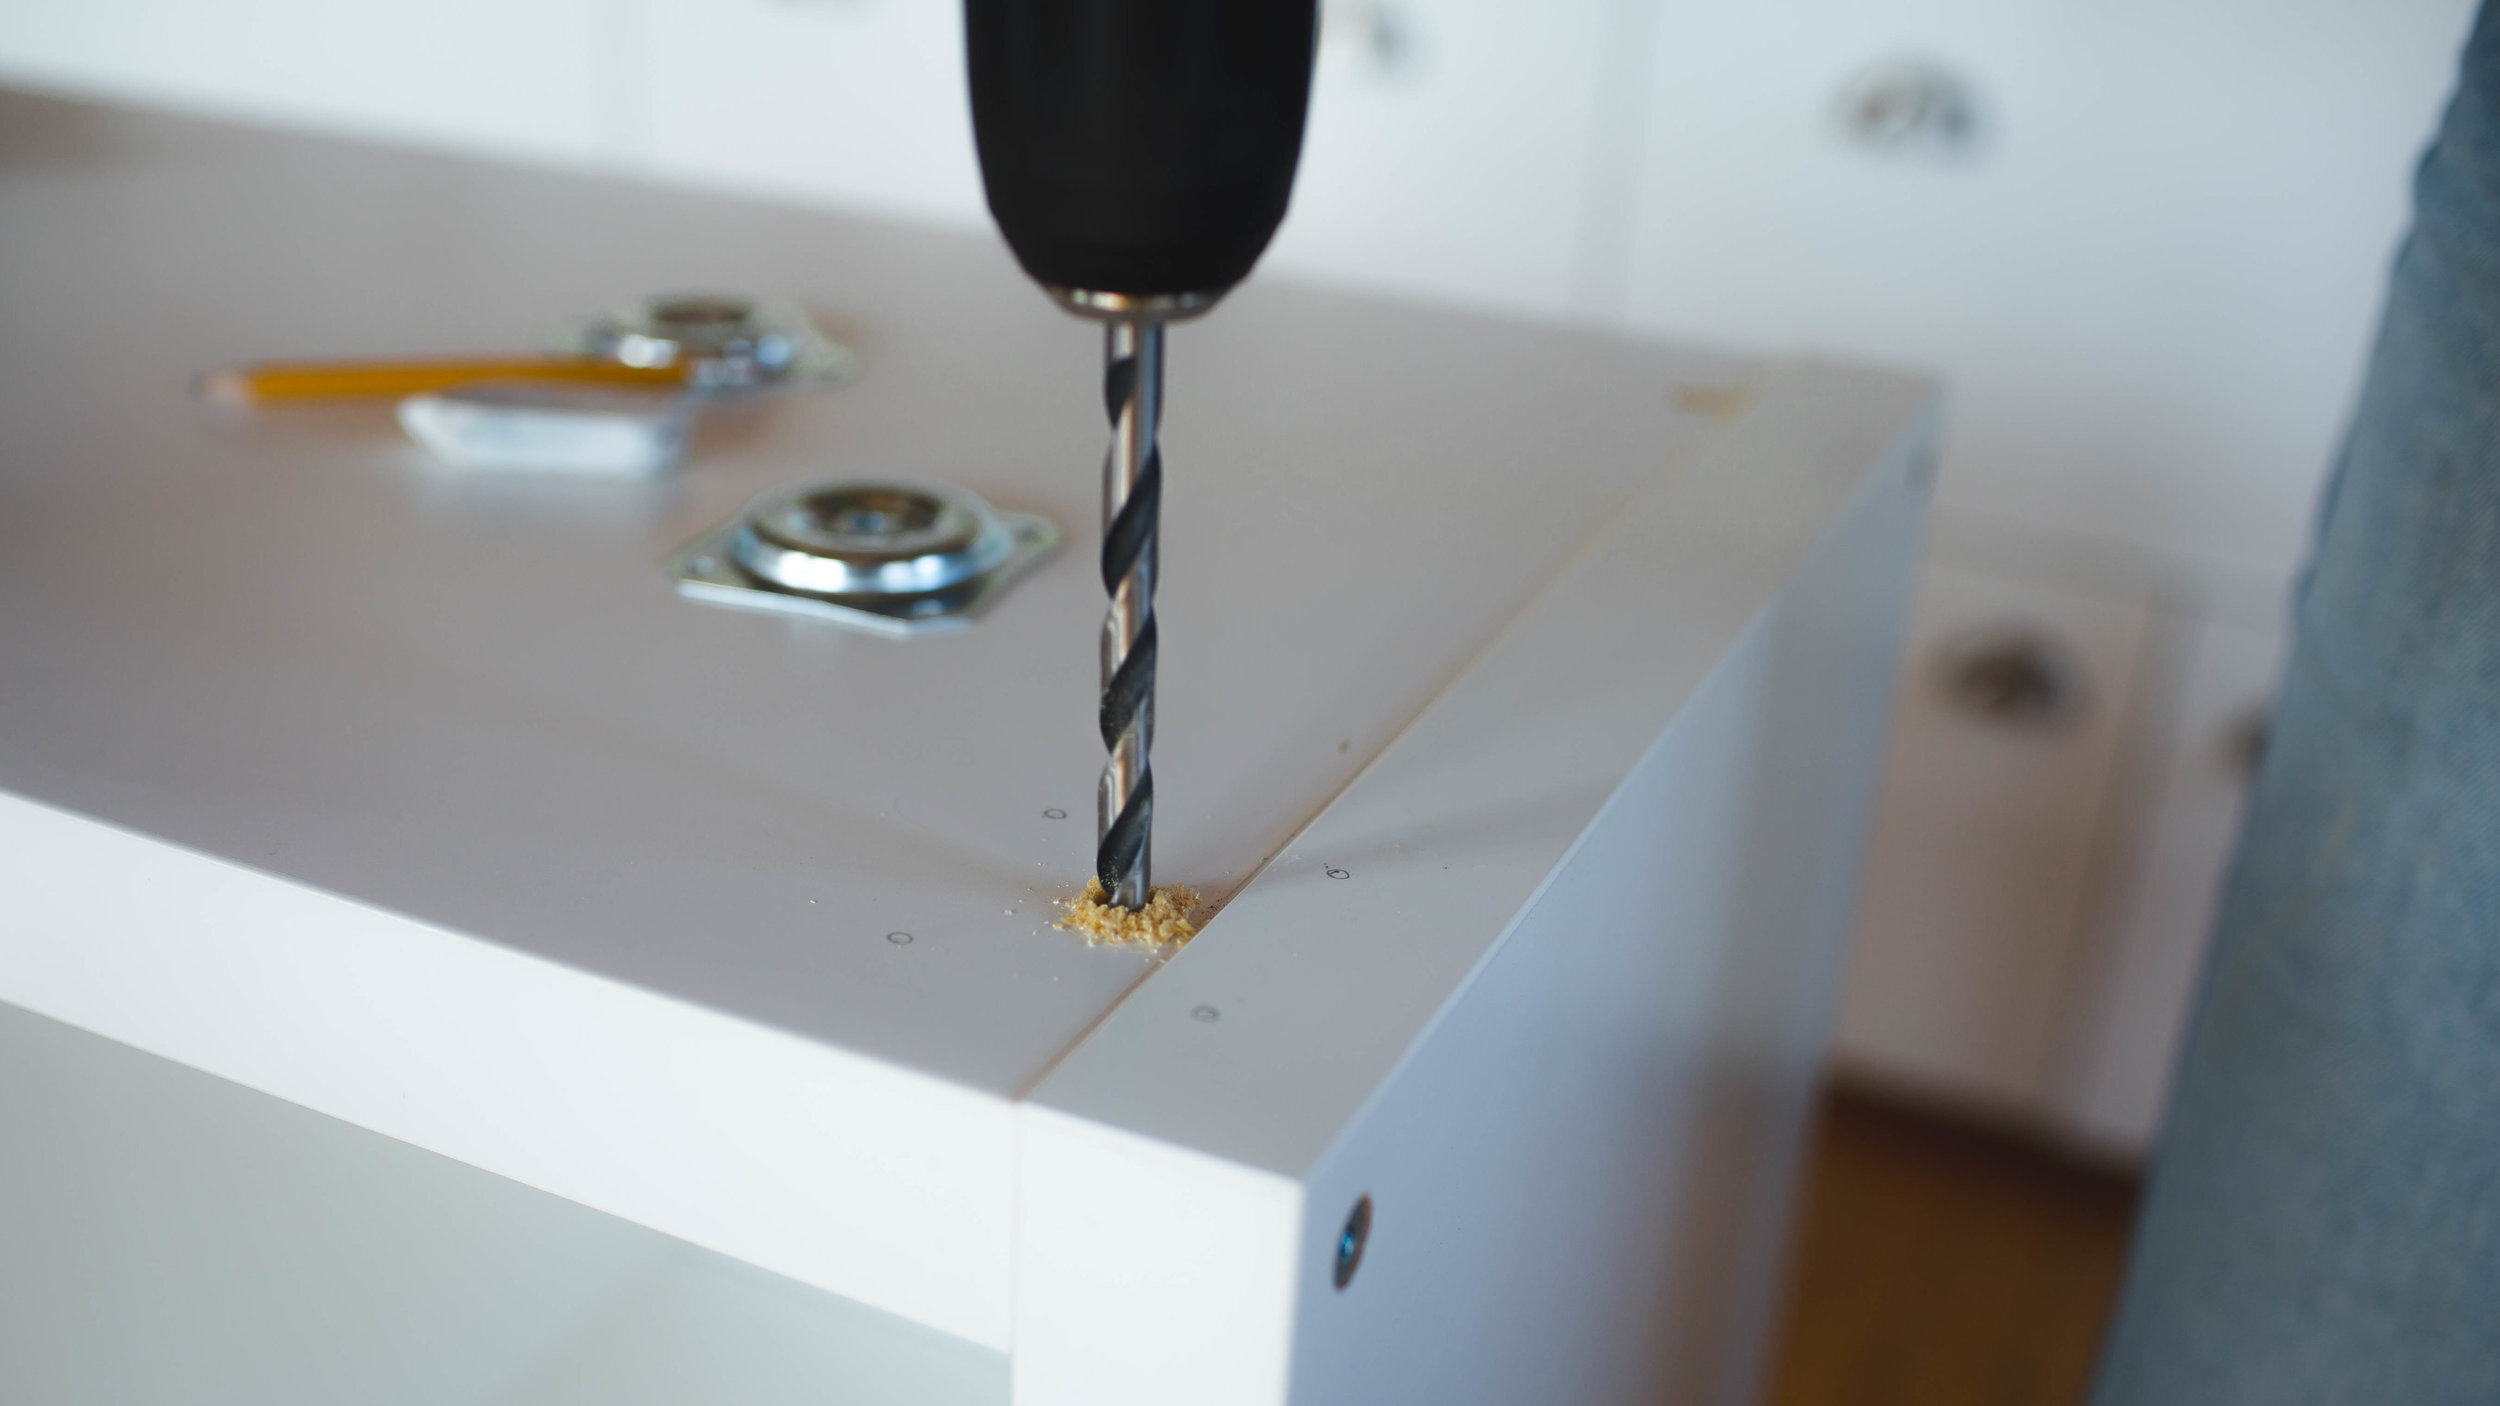
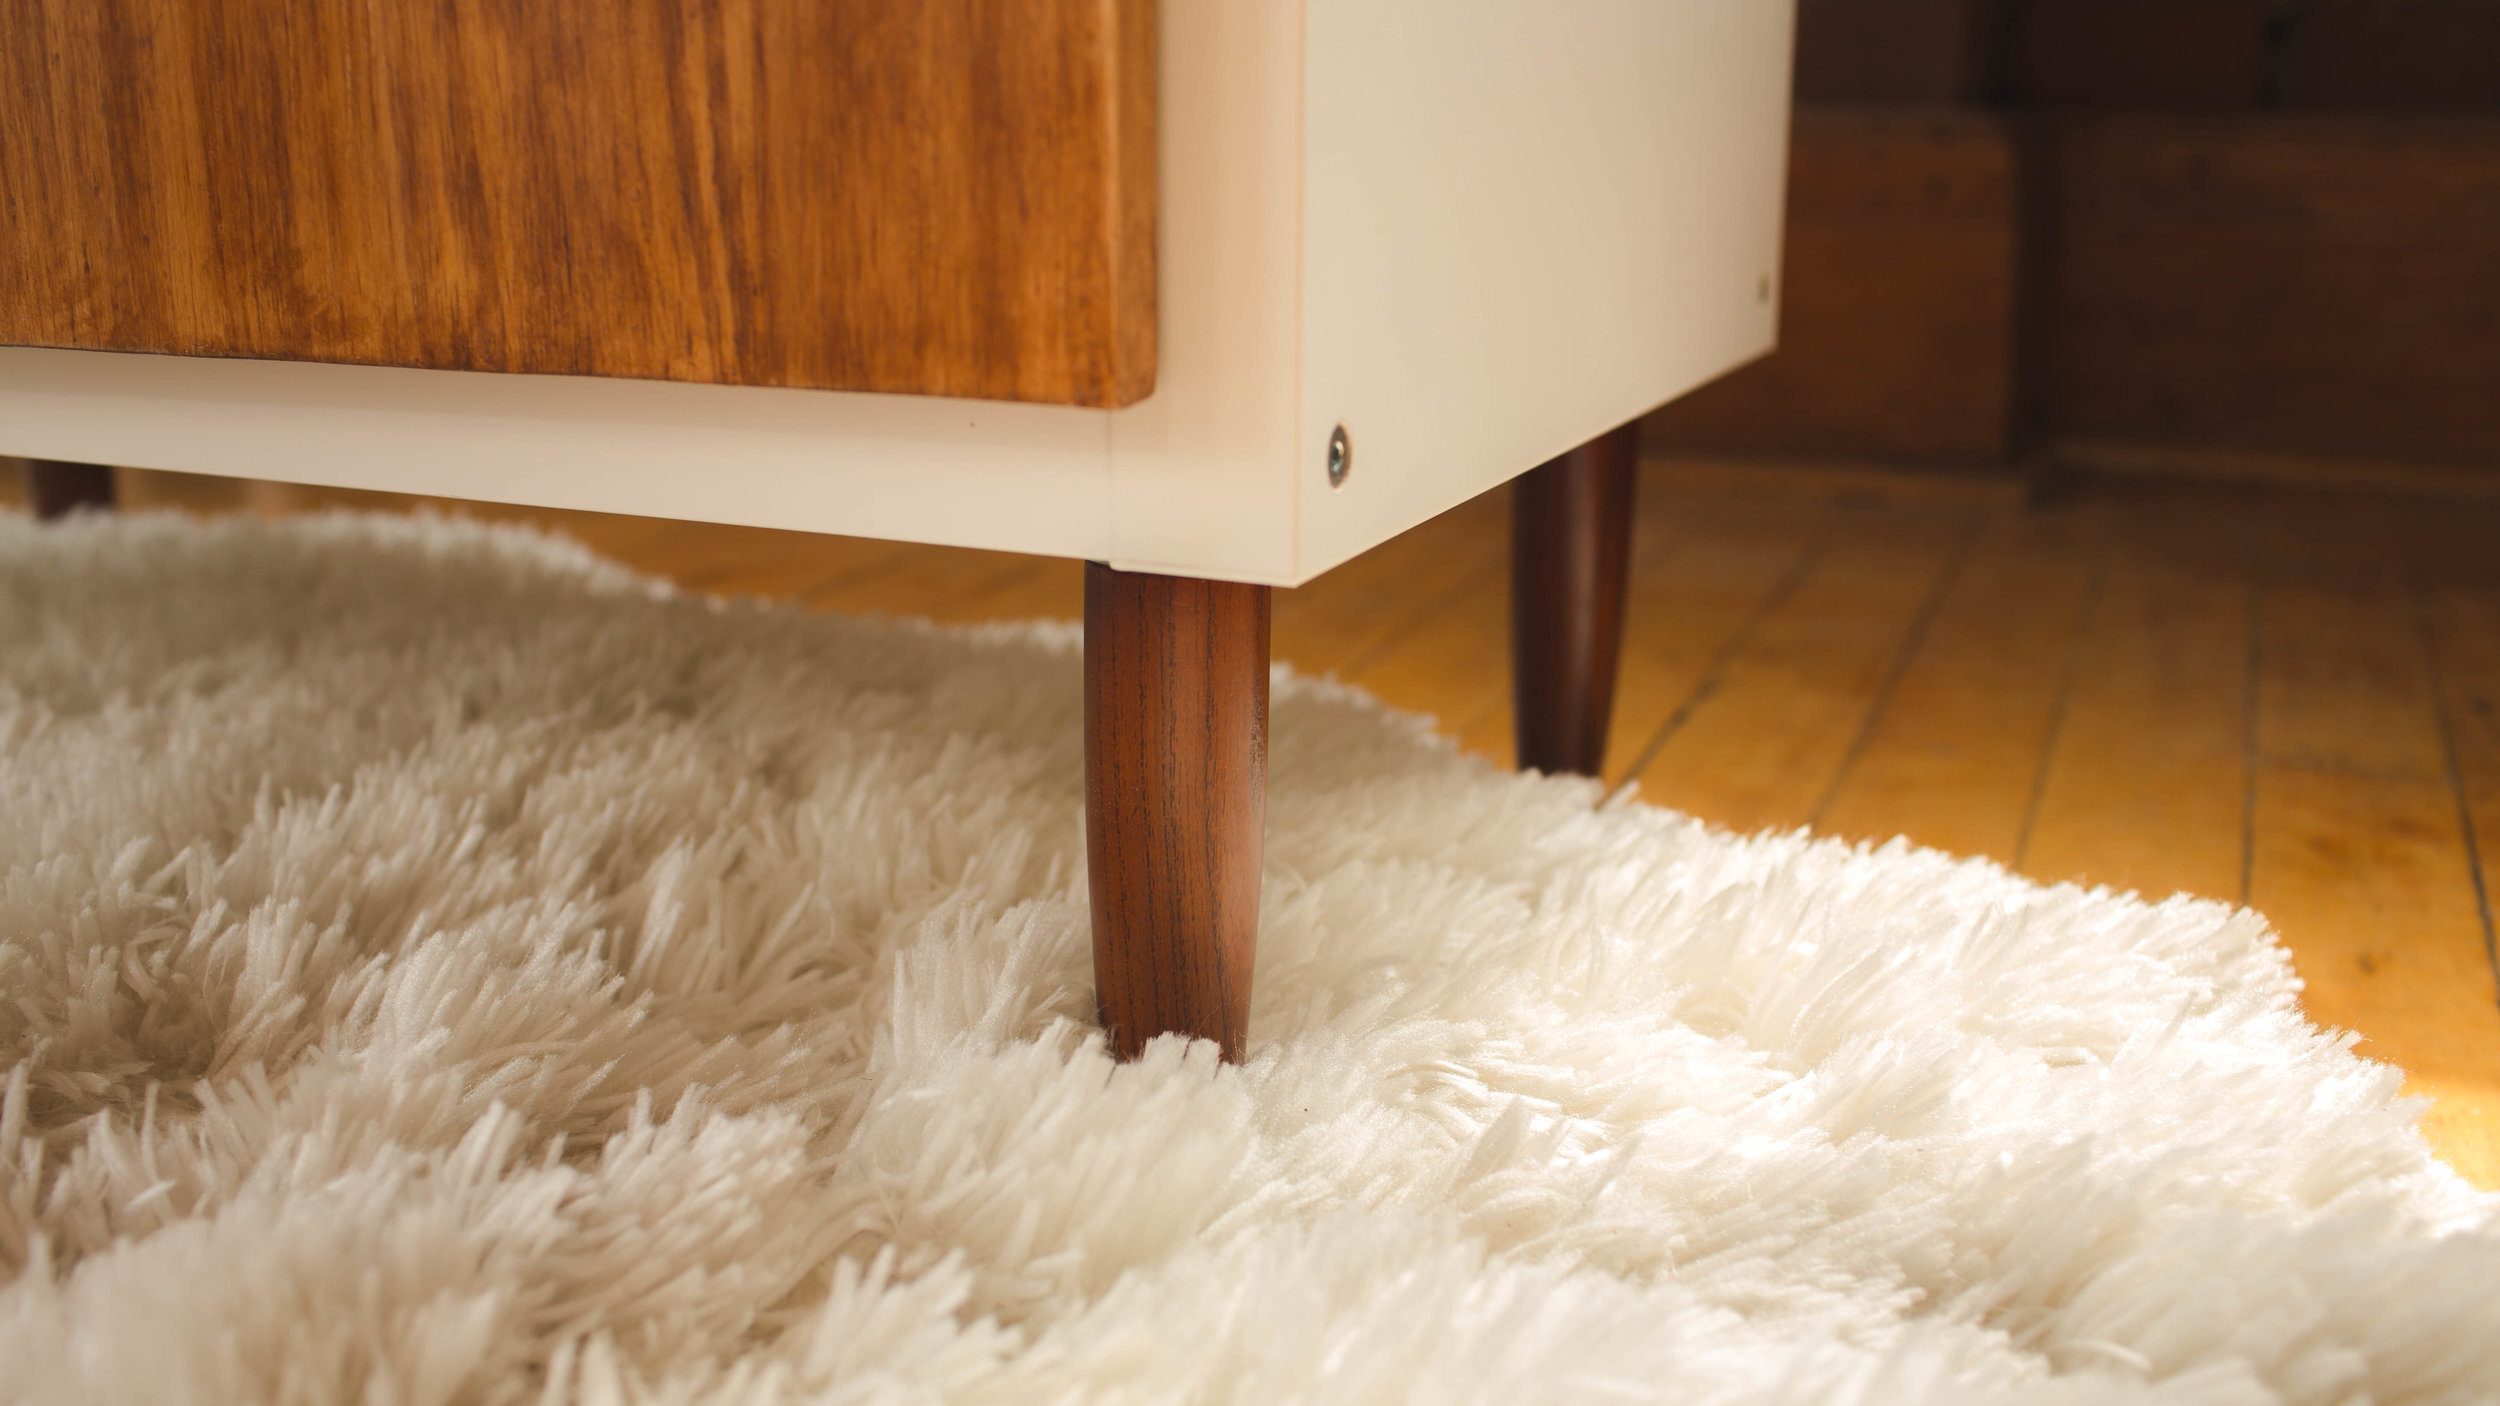
Next we need to add the legs! We purchased four 6 inch furniture legs along with four pieces of hardware to attach the furniture legs. The hardware gets screwed onto the shelf, and the legs get screwed into the hardware.
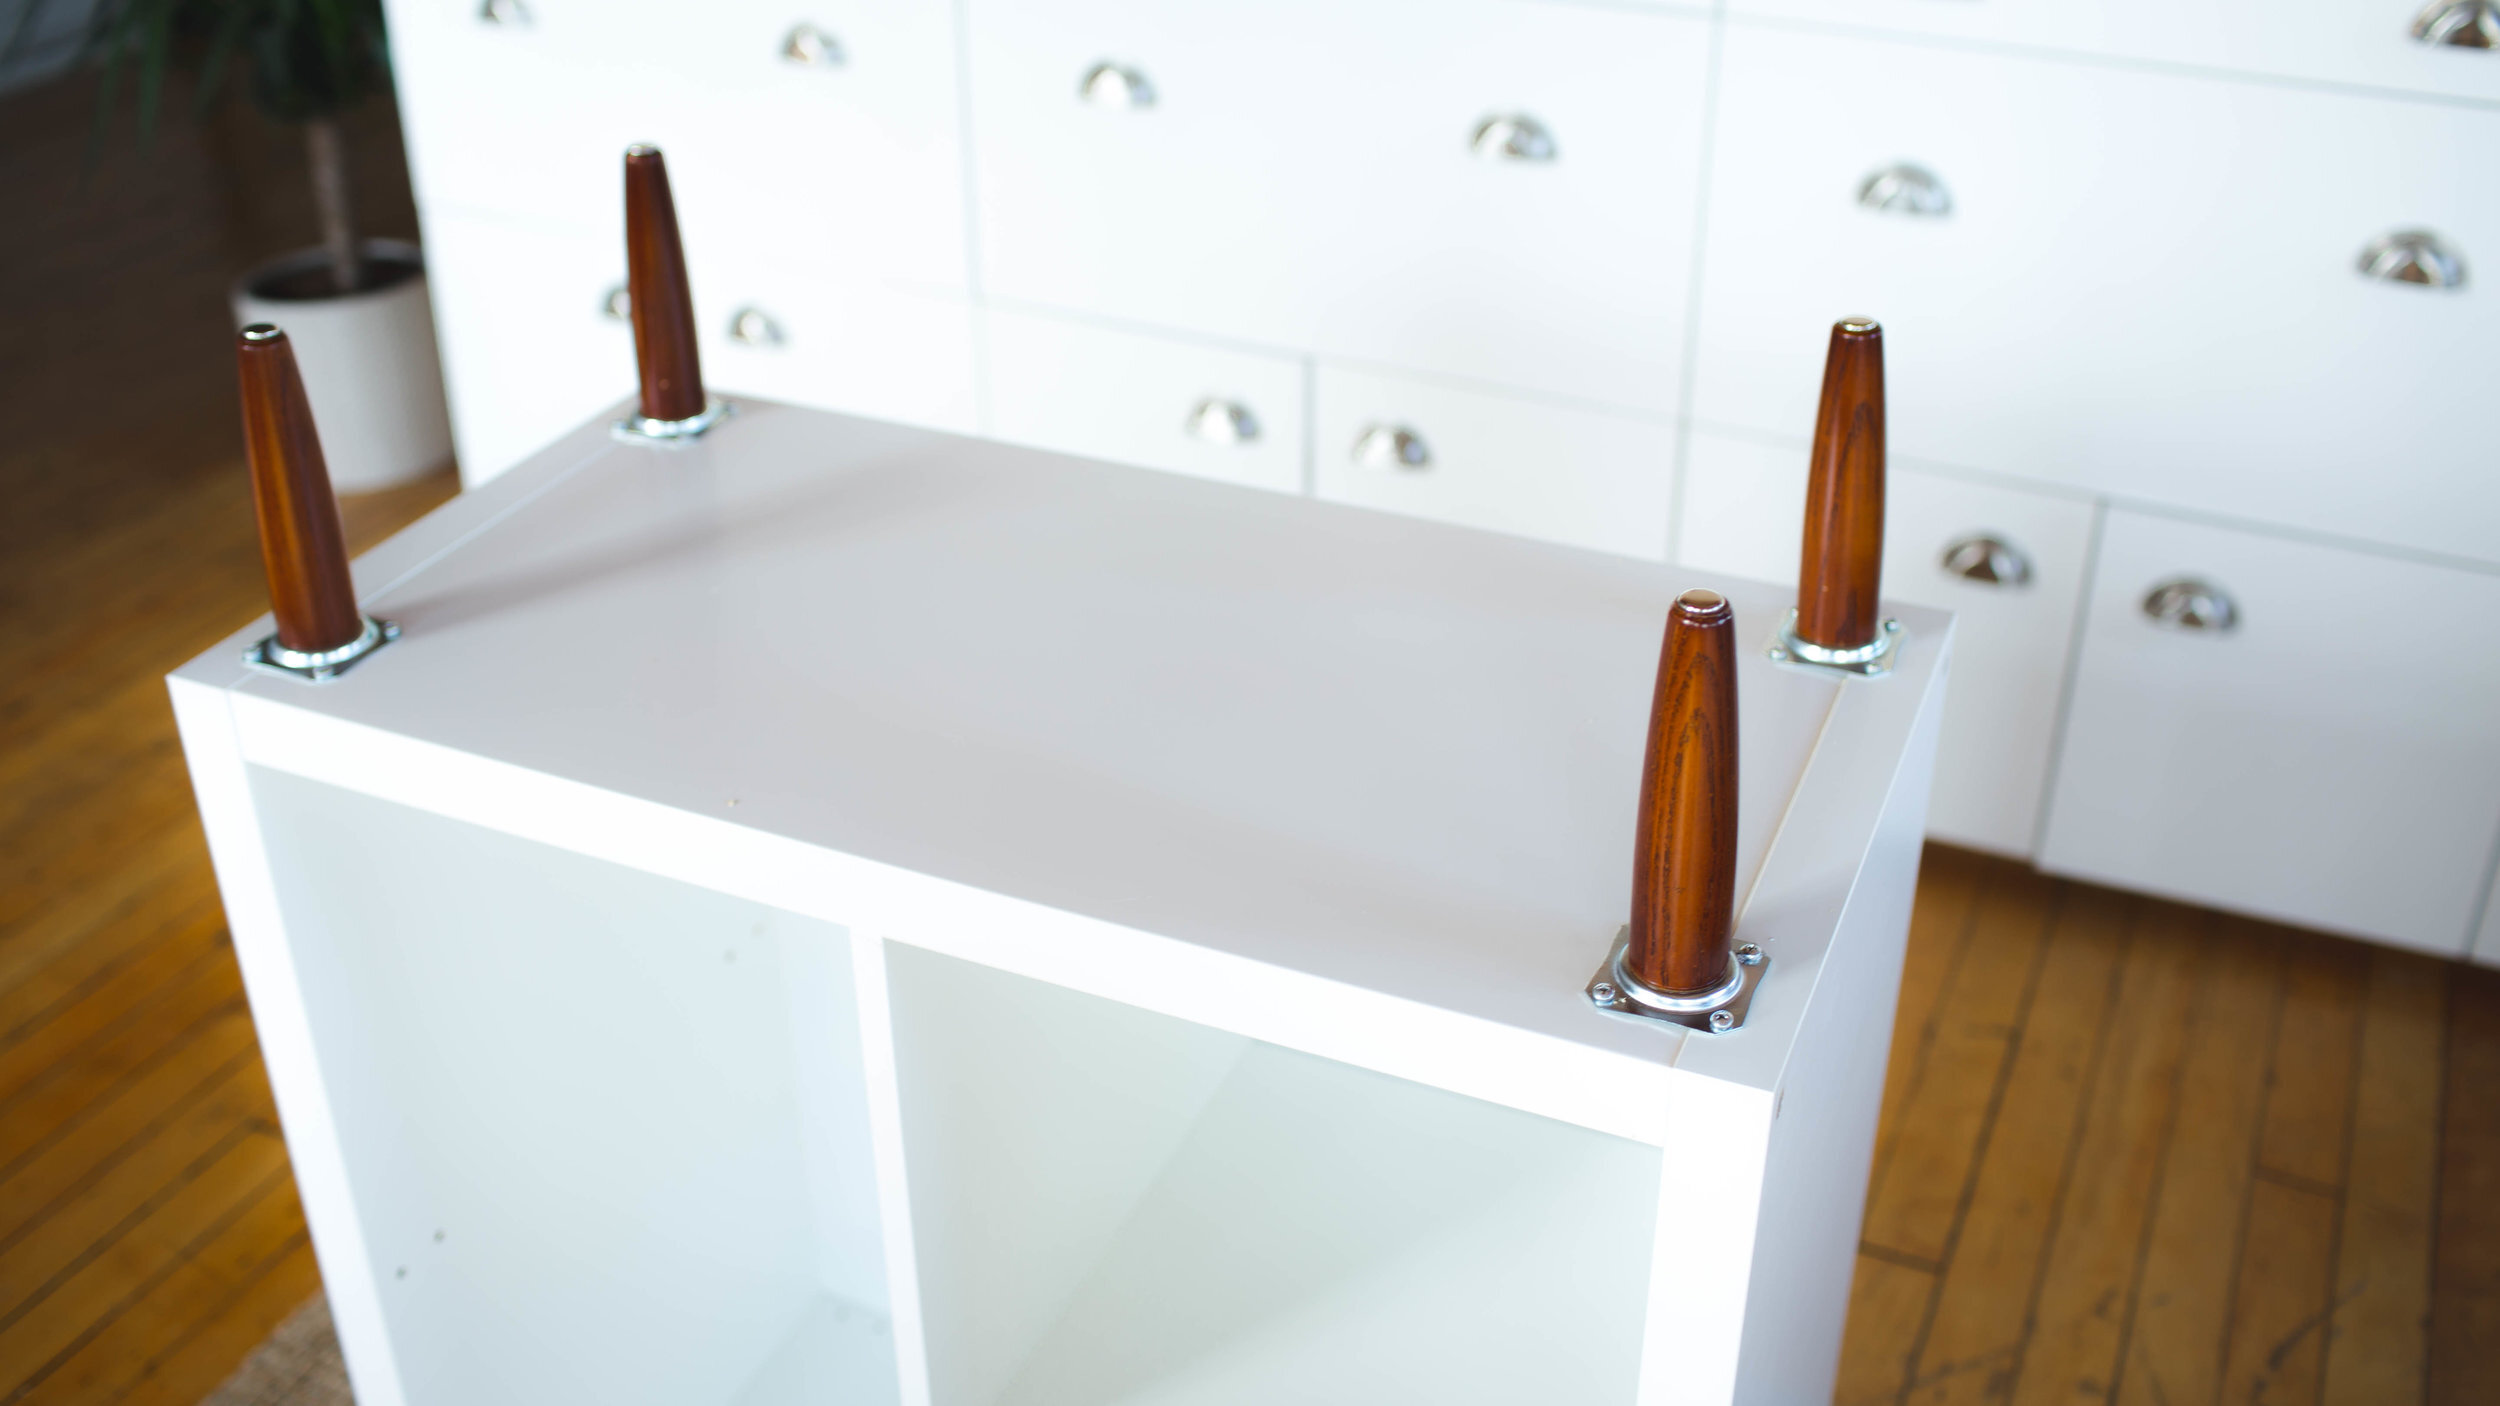
We spaced our plates ¾” in from side. Mark each of the holes with a pencil. When the legs are screwed into the plates, you’ll see the end of the leg sticks out farther than the plate. To make space for this bit to go, we’ll be drilling a deeper hole in each corner of the cabinet in the center of the plates. Adding tape to your drill bit can help make sure you don’t drill all the way through the bottom of the cabinet. Drill a hole into each of the center dots. Screw the plates in place on top and then screw in the feet.
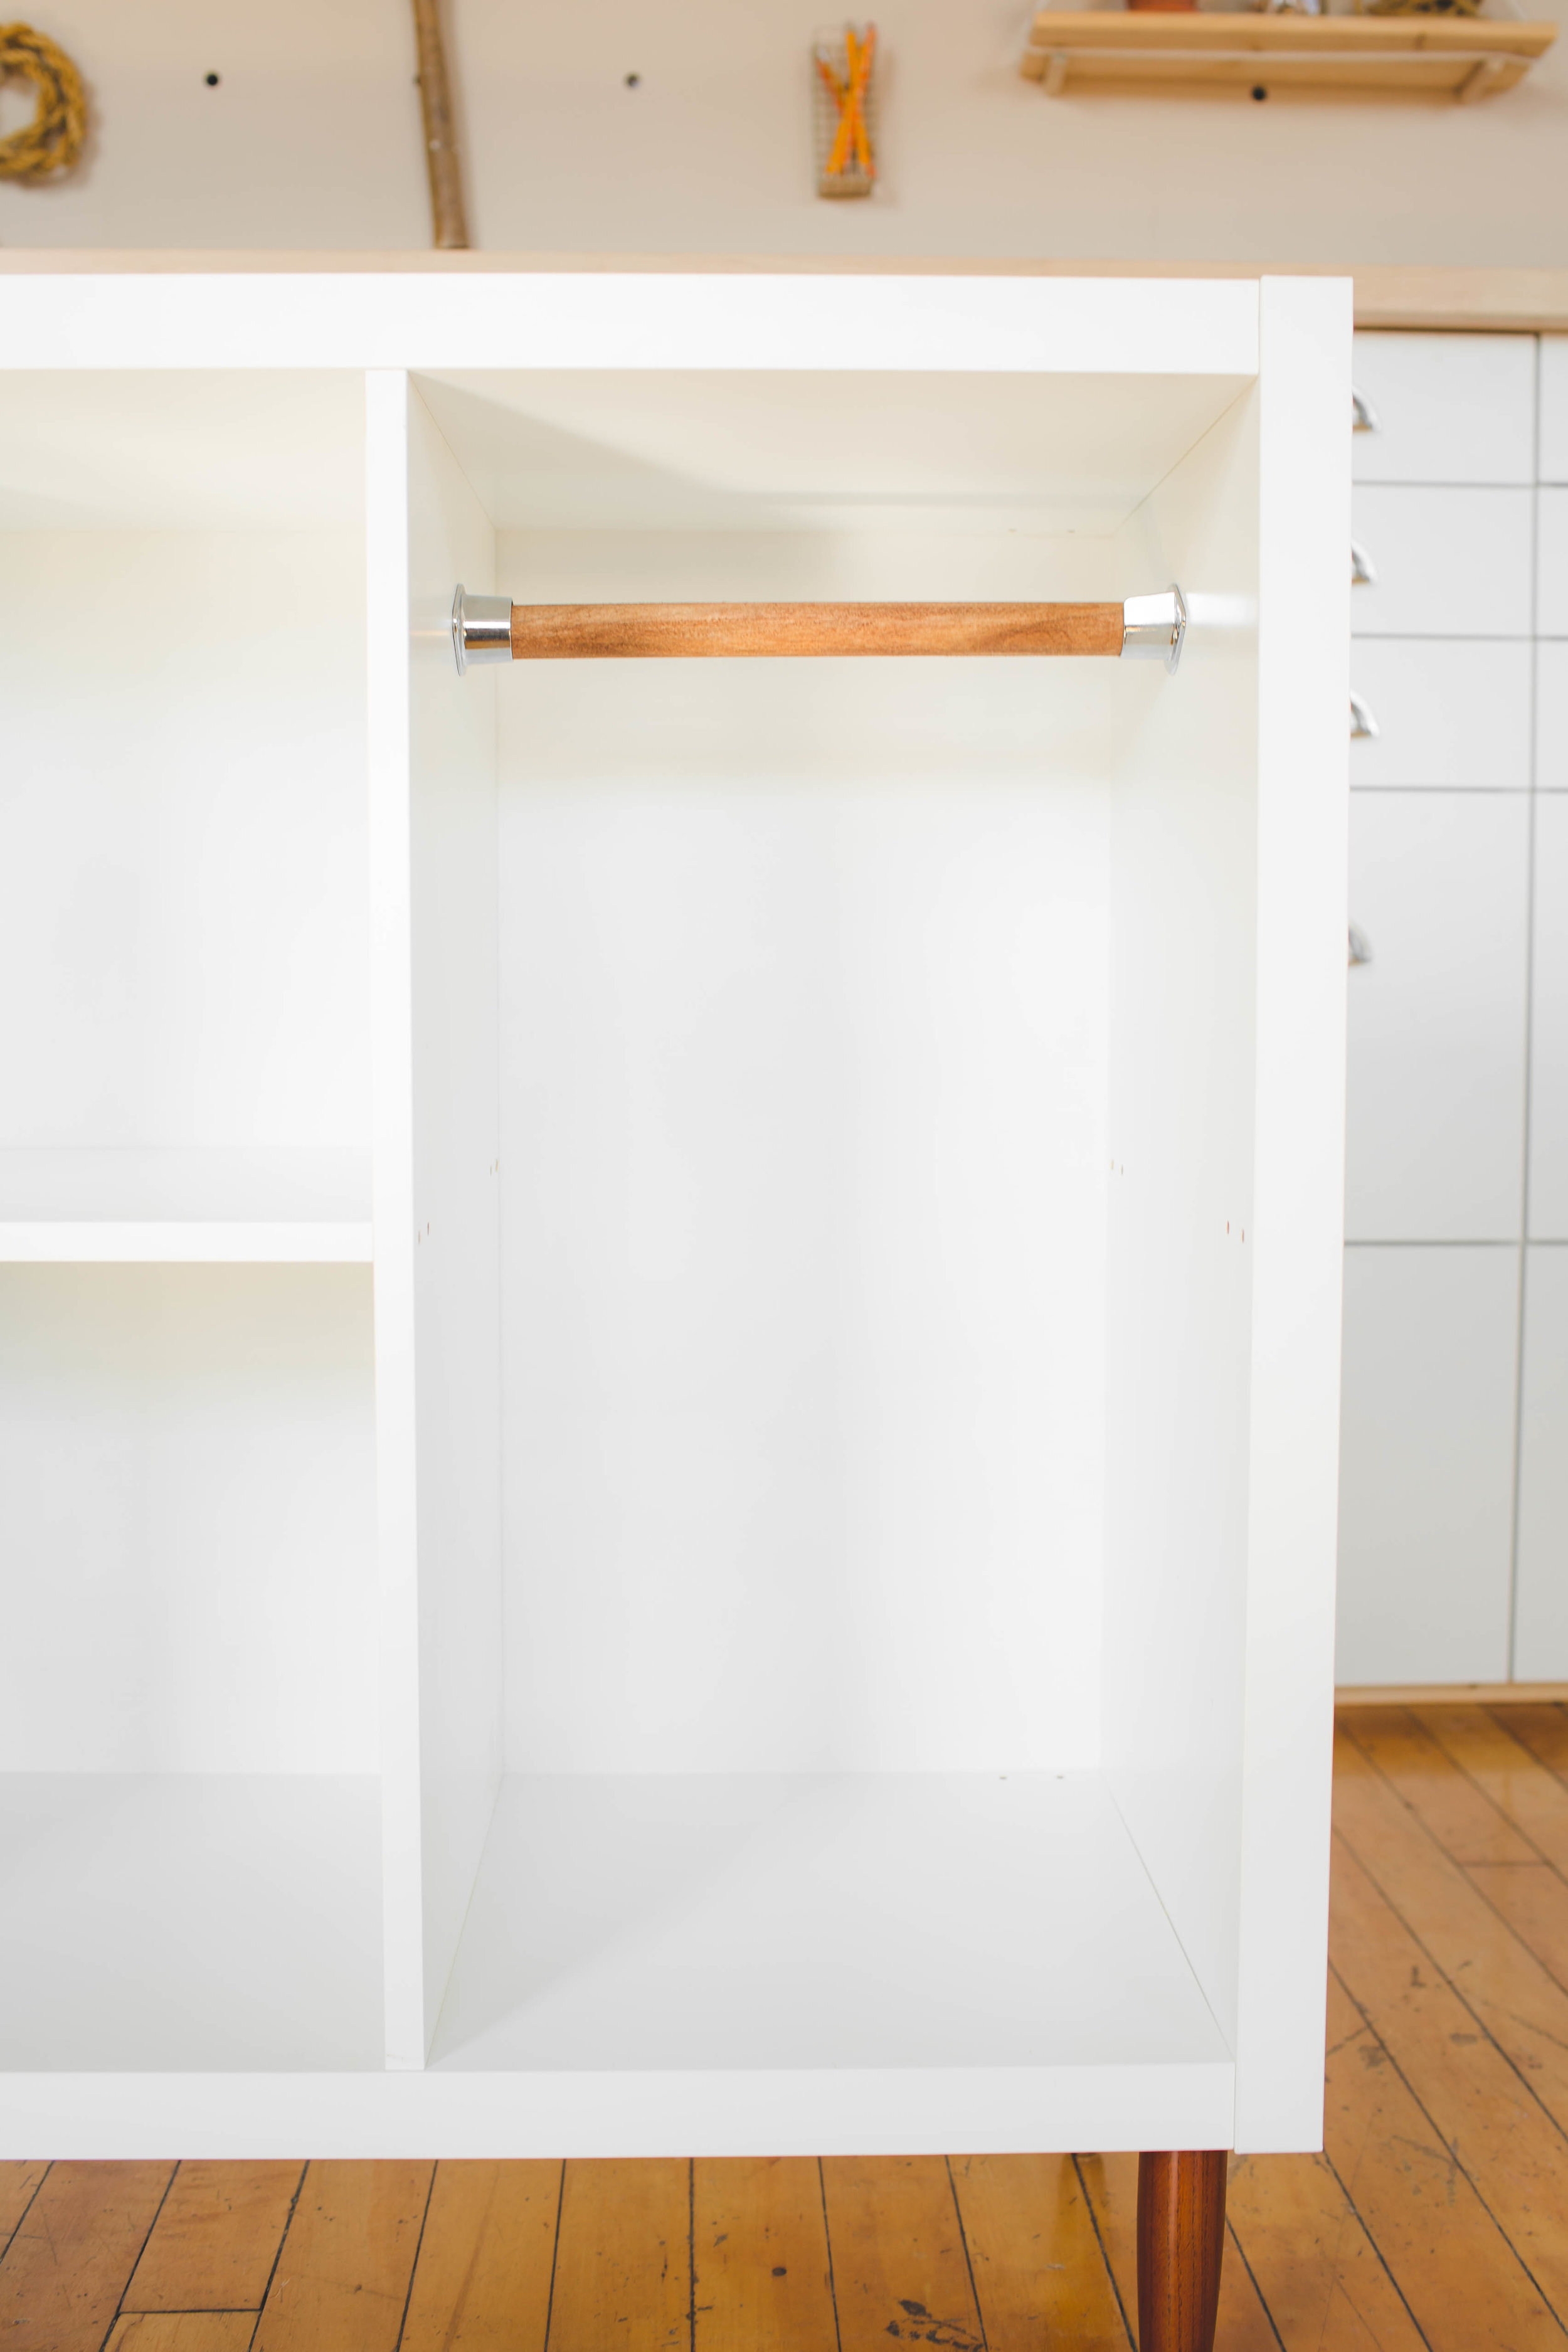
By taking out one of the shelves in the Kallax storage unit, we have now created this long section perfect for hanging clothes! To hang our clothes, we need to add a rod. We bought two pieces of hardware that hold clothing rods! For the actual rod, we cut a wooden dowel to fit nicely inside of the unit and stained it with the stain we are going to use for the door.

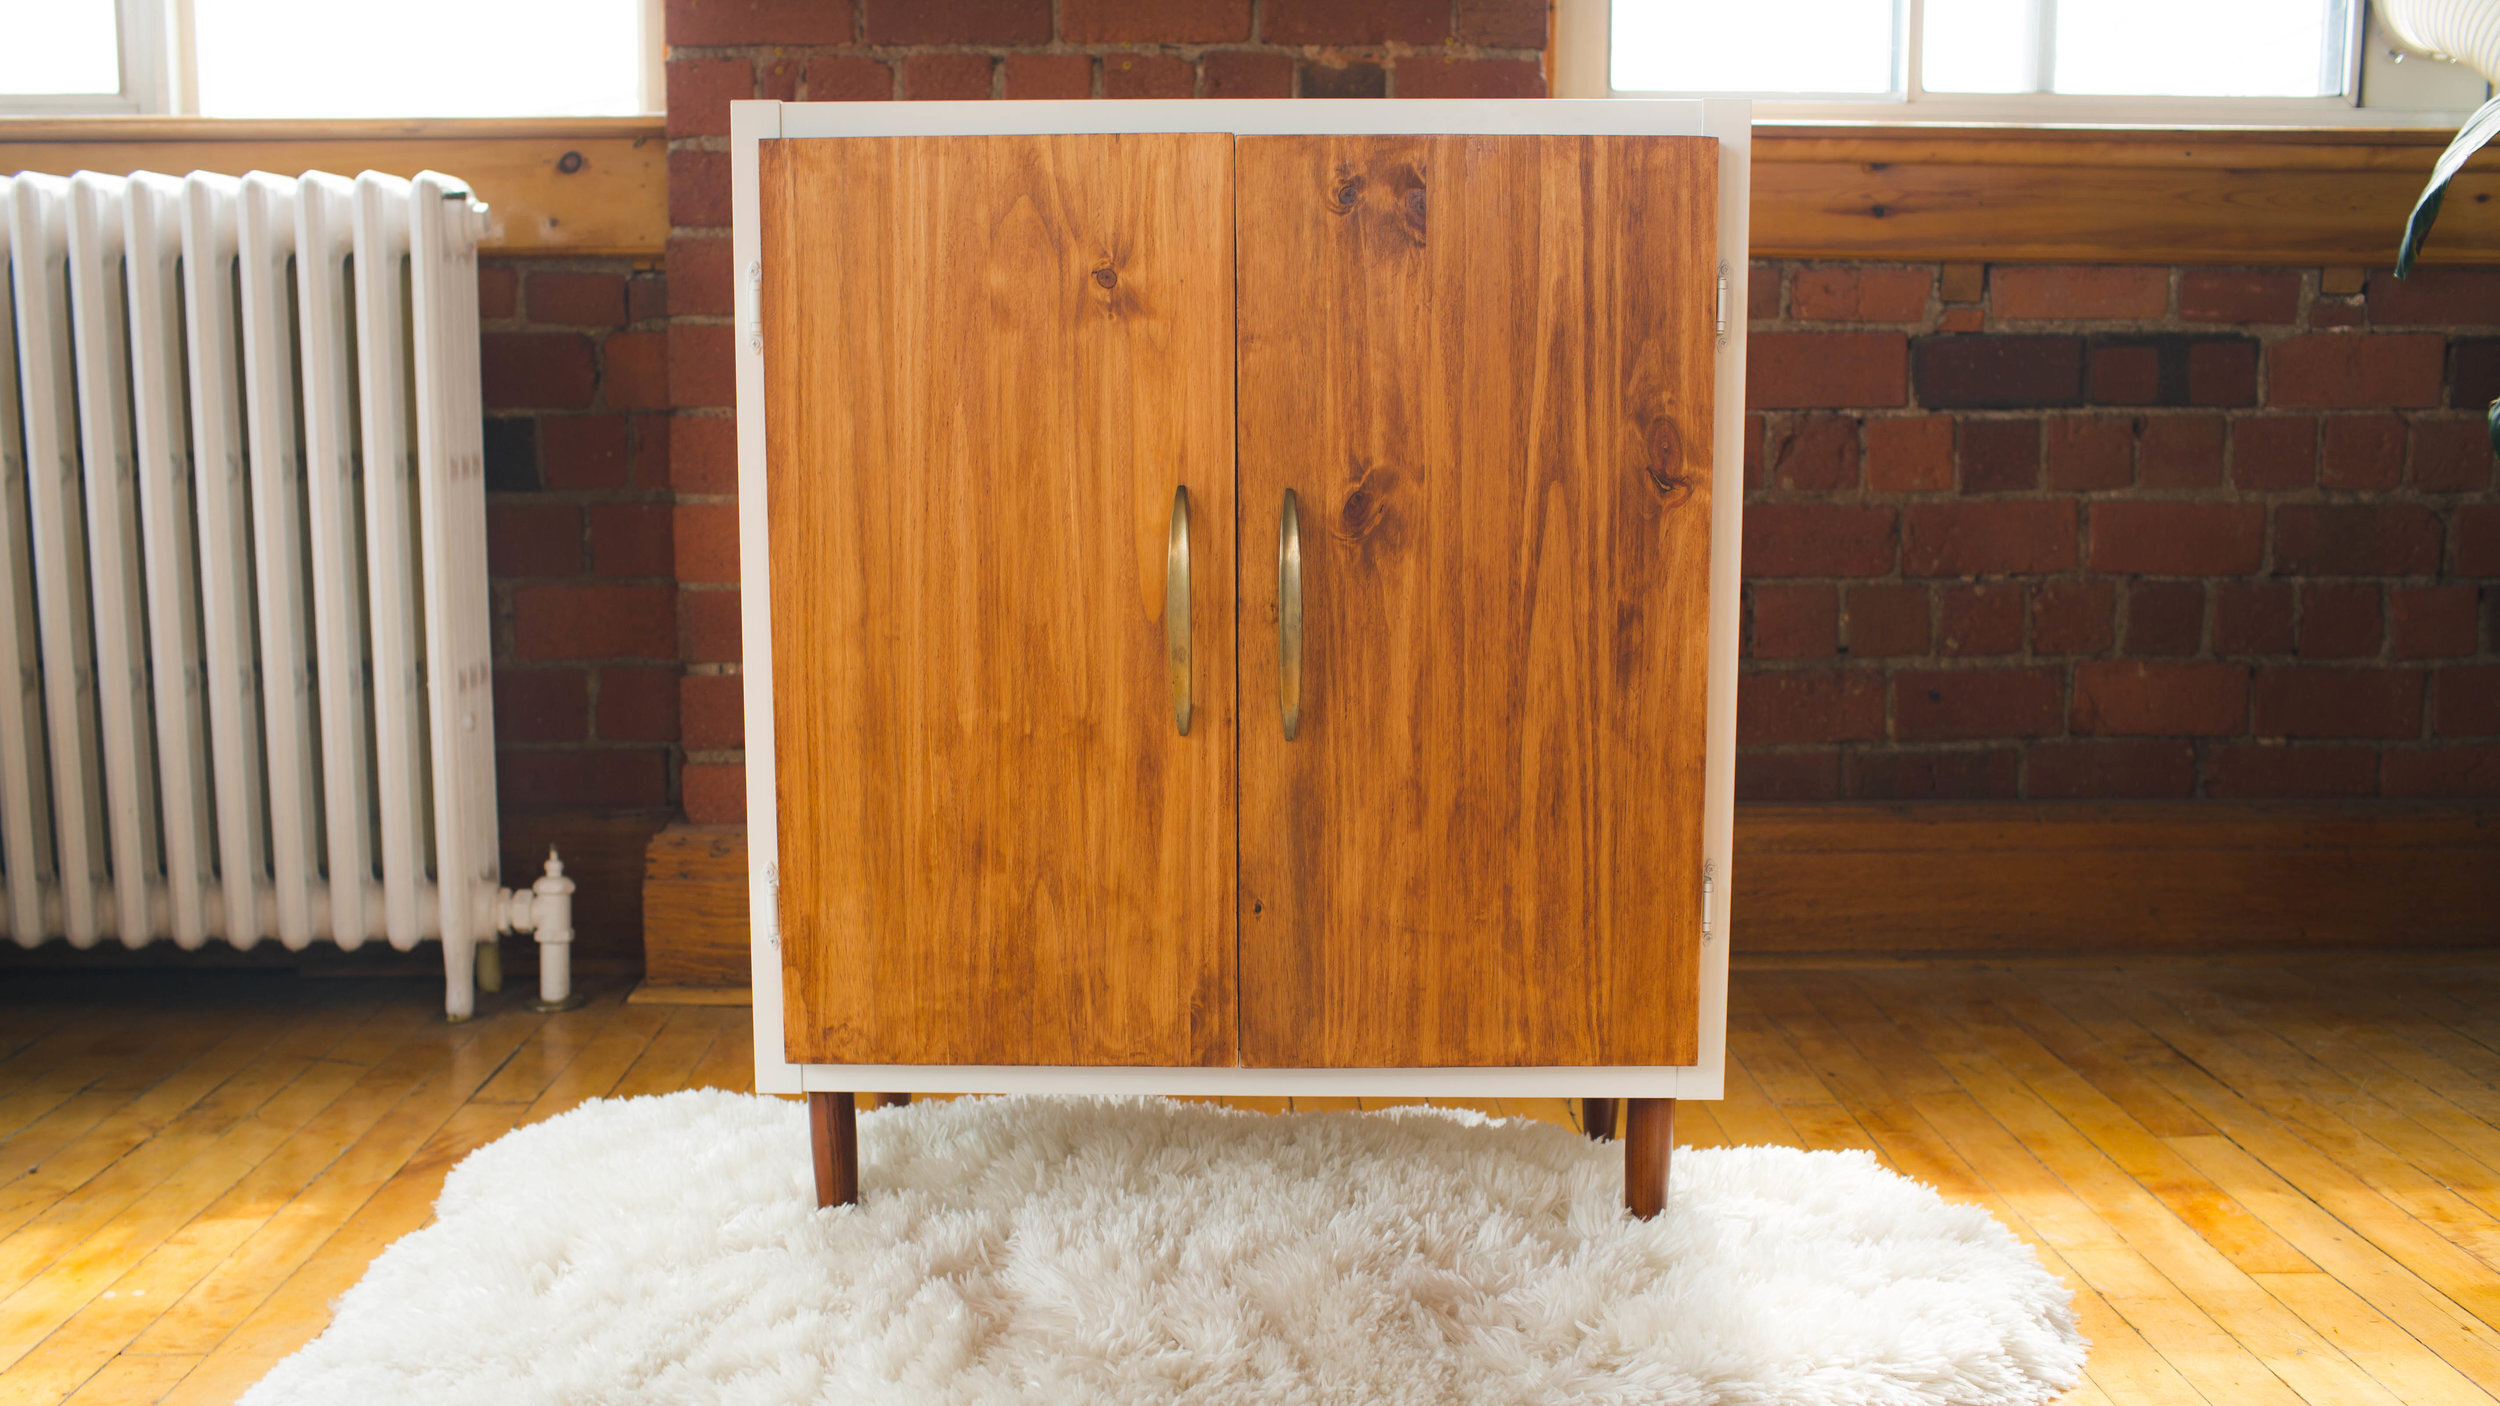
The next step is to make the doors! We are going to be using pine wood that is about 3/4 of an inch thick, cut to 14 inches by 27 3/4 inches. Before attaching them, we stained them chestnut to match the legs.
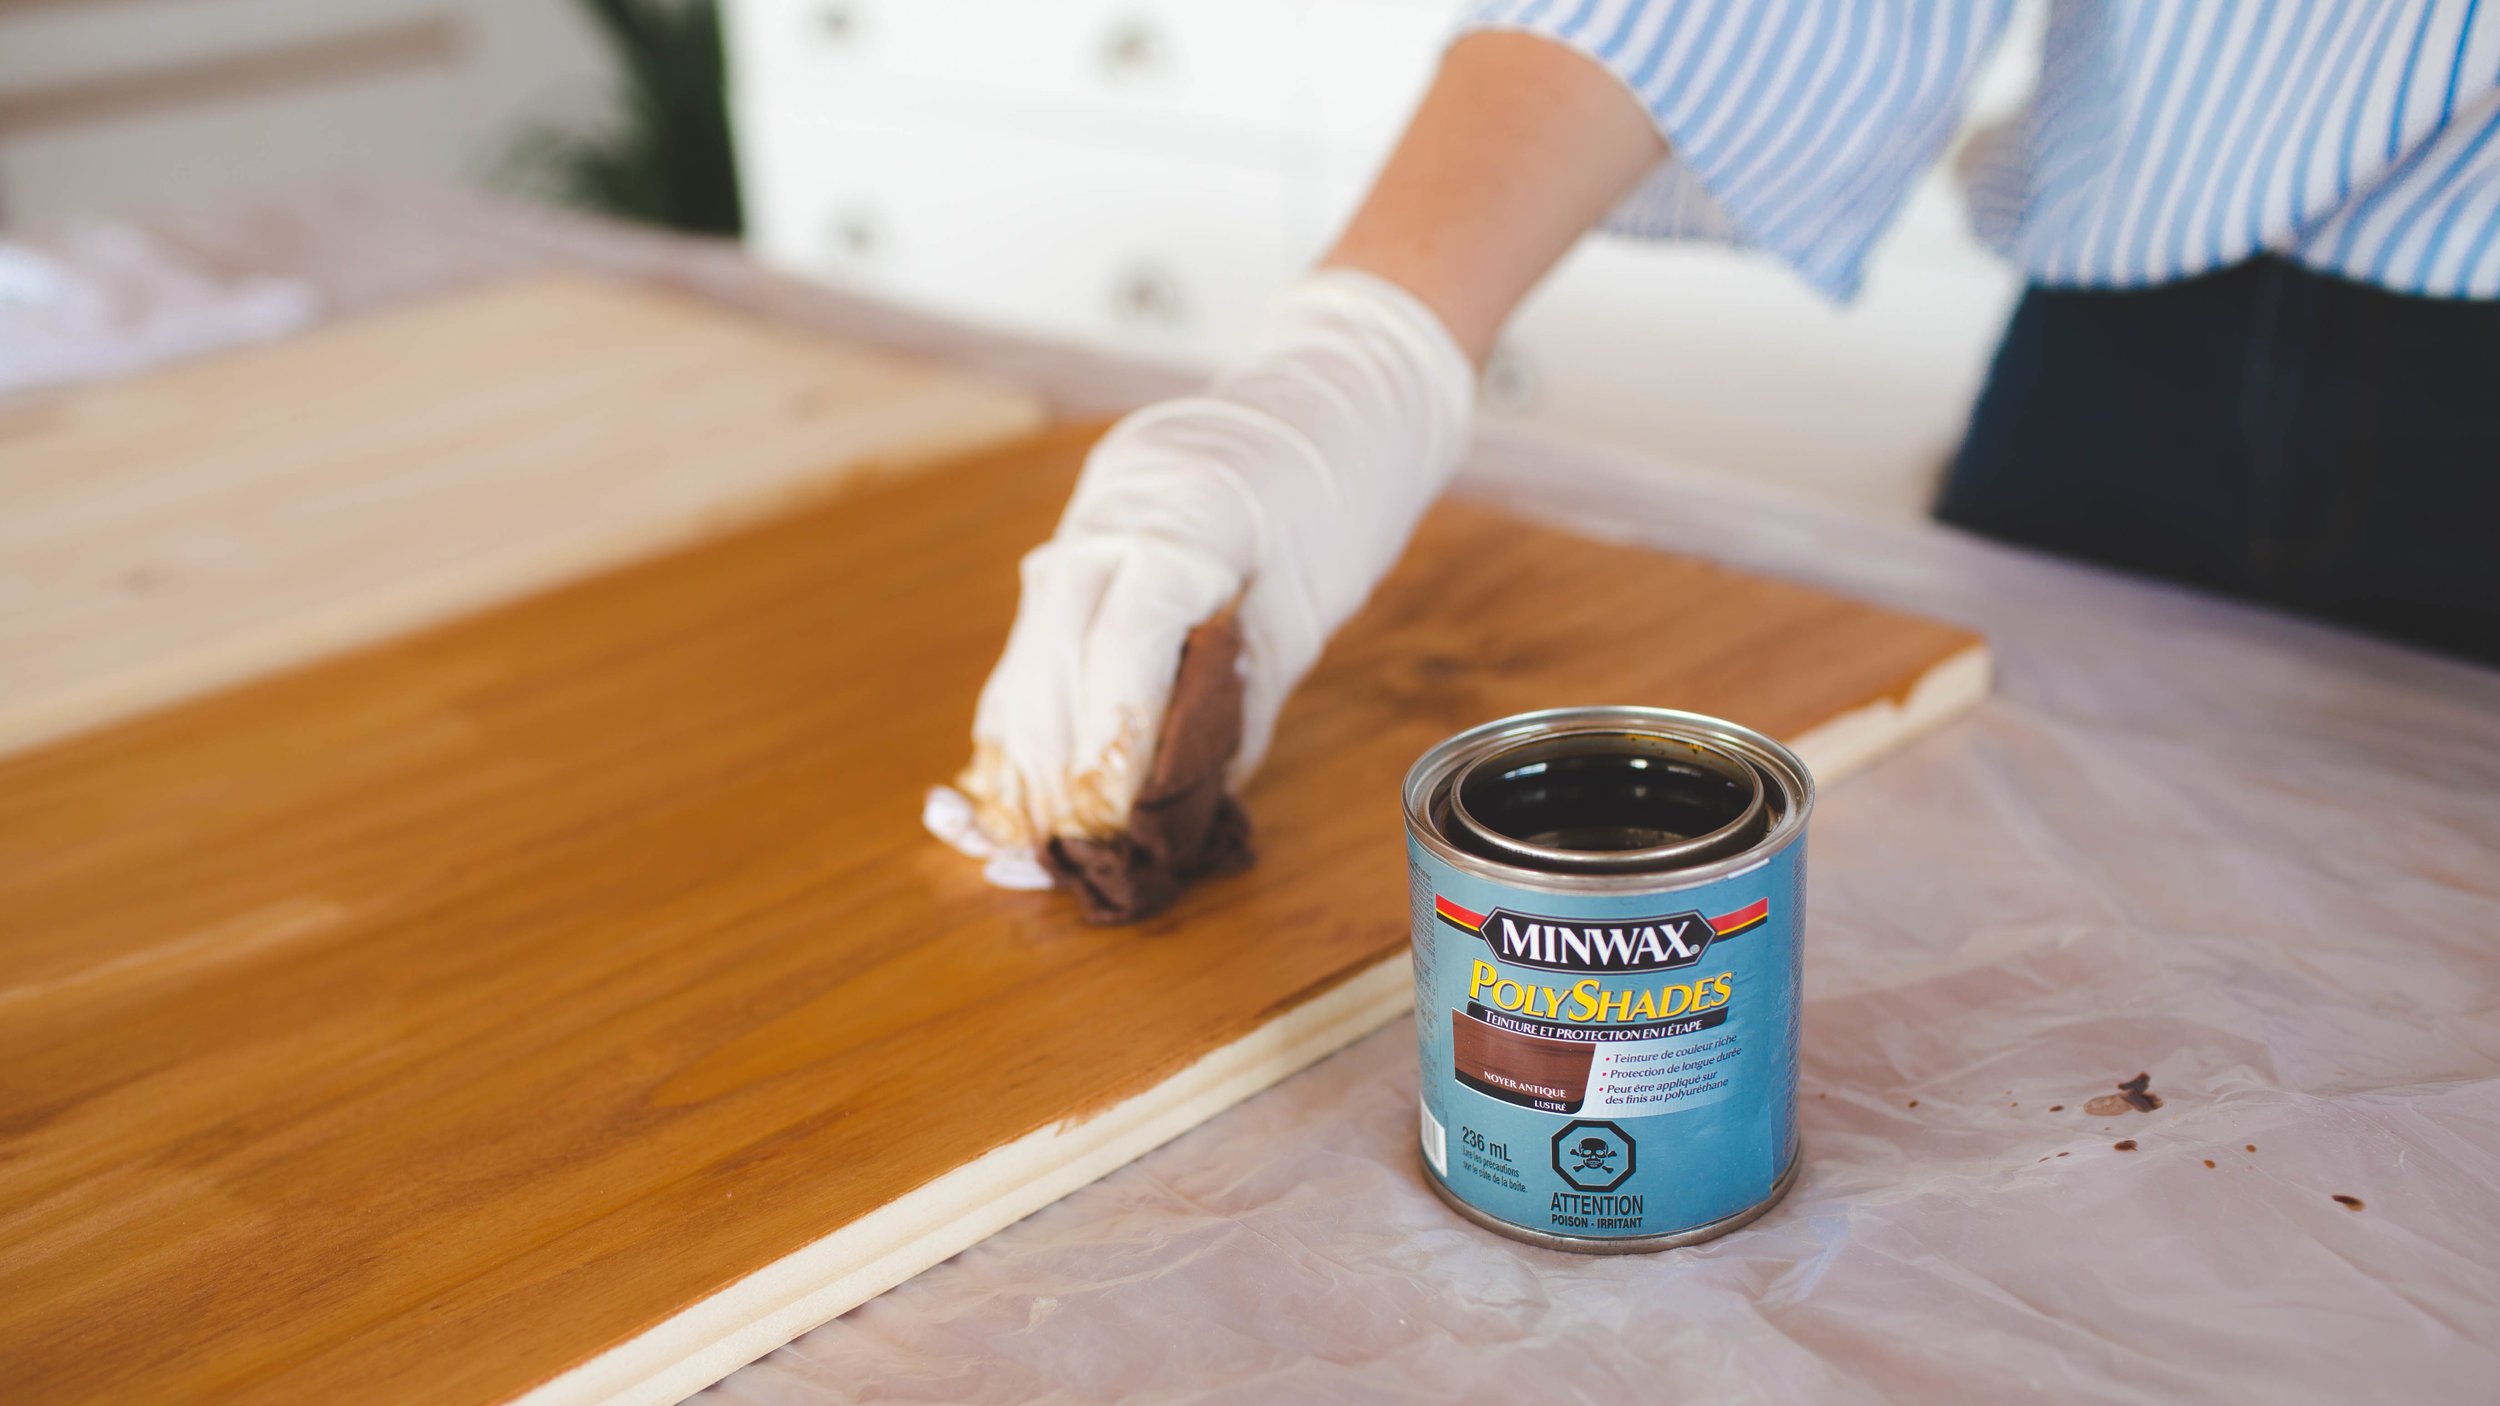
We did 3 coats of stain followed by clear top coat, ,lightly sanding in between coats. Next, it's time to attach the hinges!
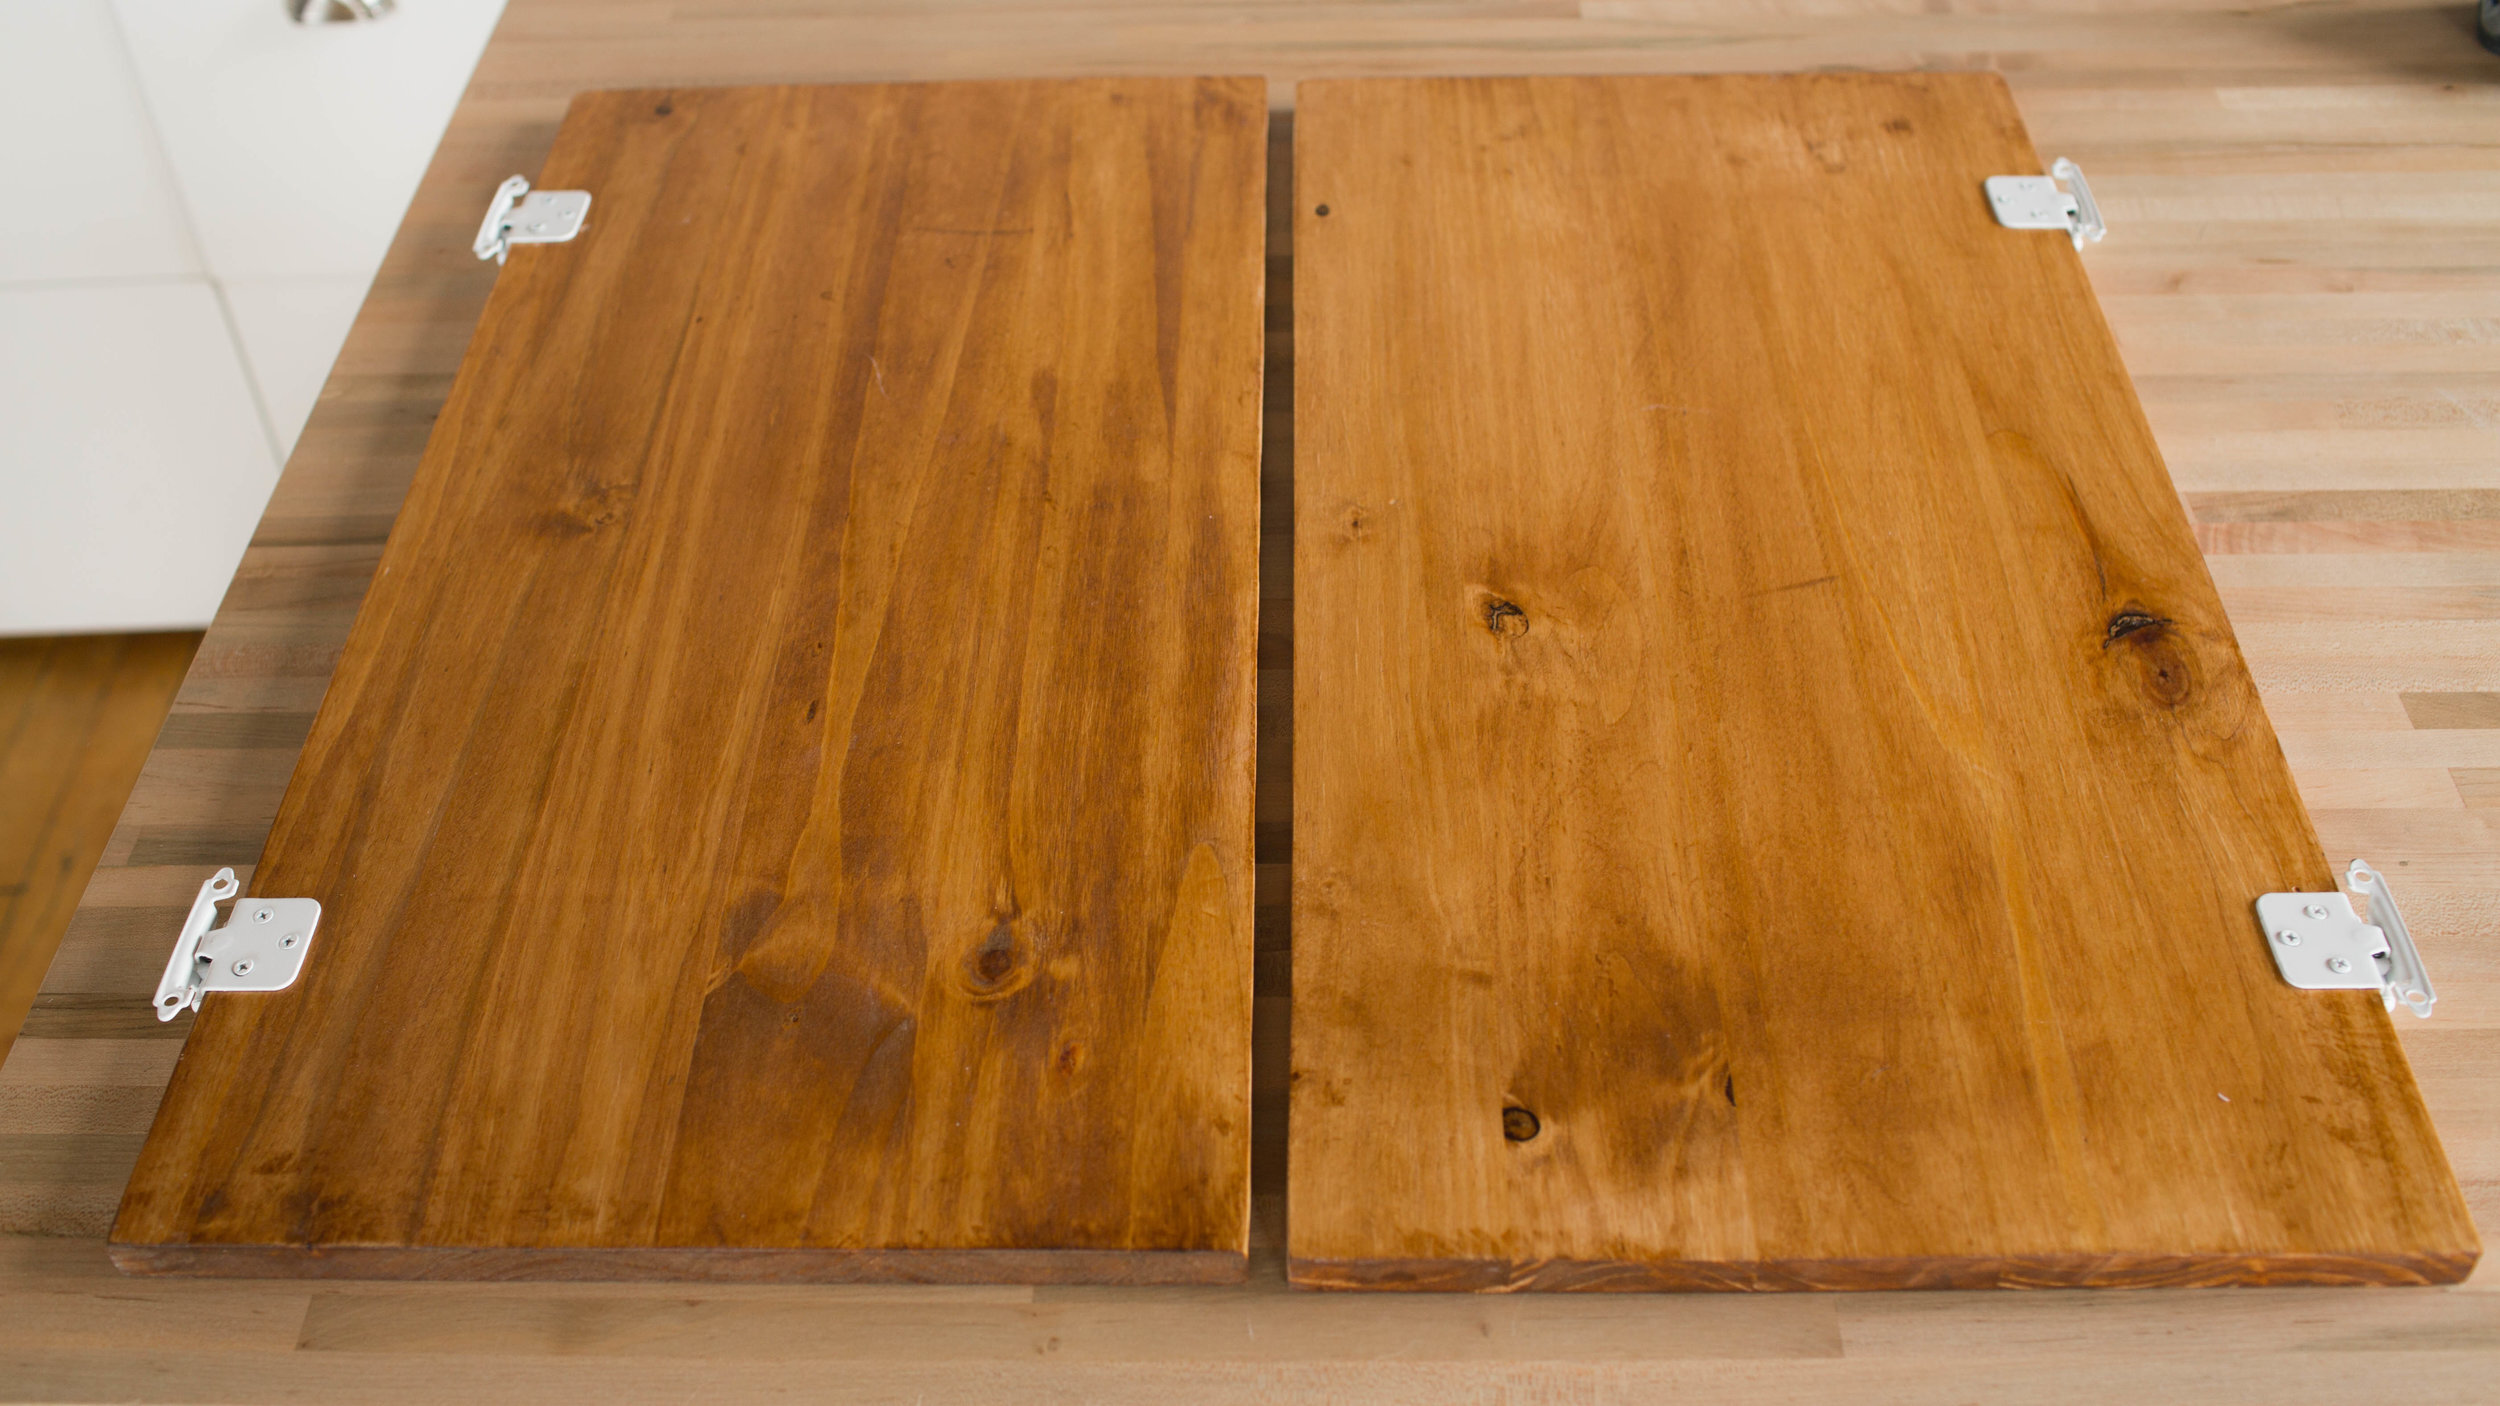
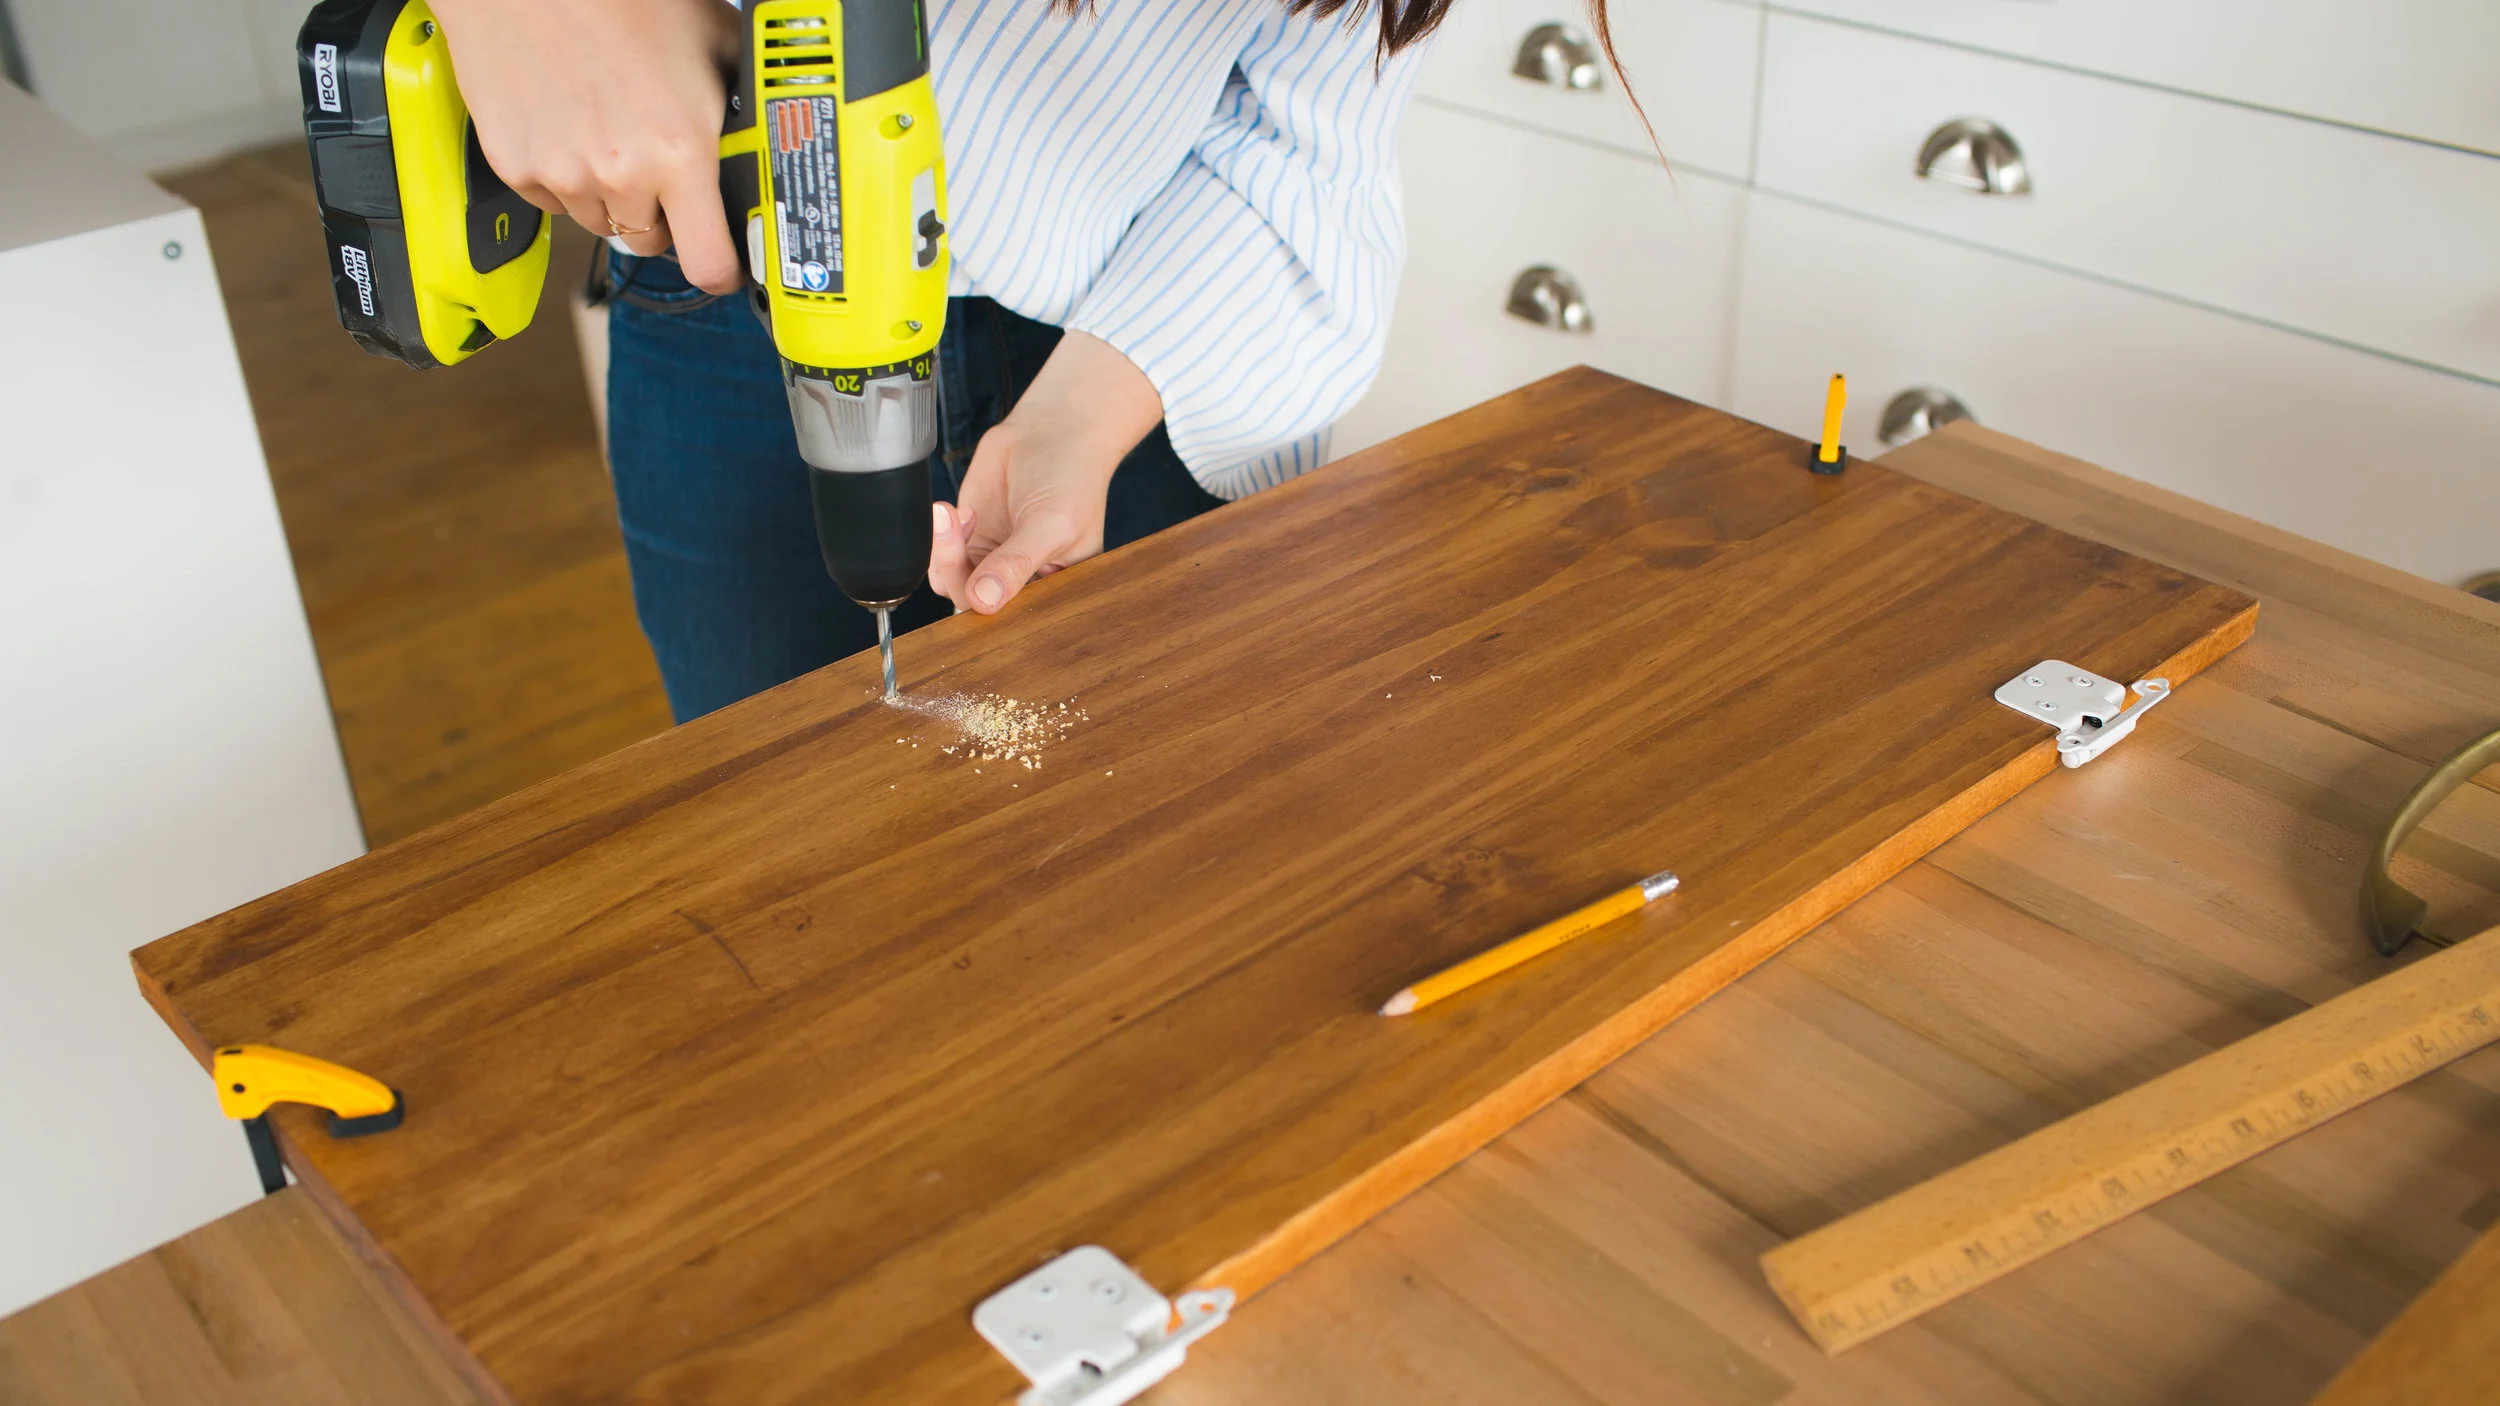
We decided to place our hinges 4” up from the bottom of the door. Screw them into place with a screwdriver or drill. Before we add them to the cabinet, we’re going to put on the handles. We centered the handles midway down the door and marked where the holes would need to go. We drilled two holes for each handle and then added them on. Lying the cabinet on the floor, face up, makes this next step a lot easier. Centre the doors on the front of the cabinet. We had roughly a 1” space all the way around the doors. Once you’re happy with the placement, screw the hinges to the cabinet. If you find it hard to stop the screws from sliding around when you’re trying to drill them in, an awl is super helpful for making a groove for the screw to sit in.
As a final step, we screwed some gold c hooks into the door for added storage!


Check out the video below for more! Tag us in your DIYs using the hashtag #SorryGirlsSquad!
recommended posts


Praesent id libero id metus varius consectetur ac eget diam. Nulla felis nunc, consequat laoreet lacus id.