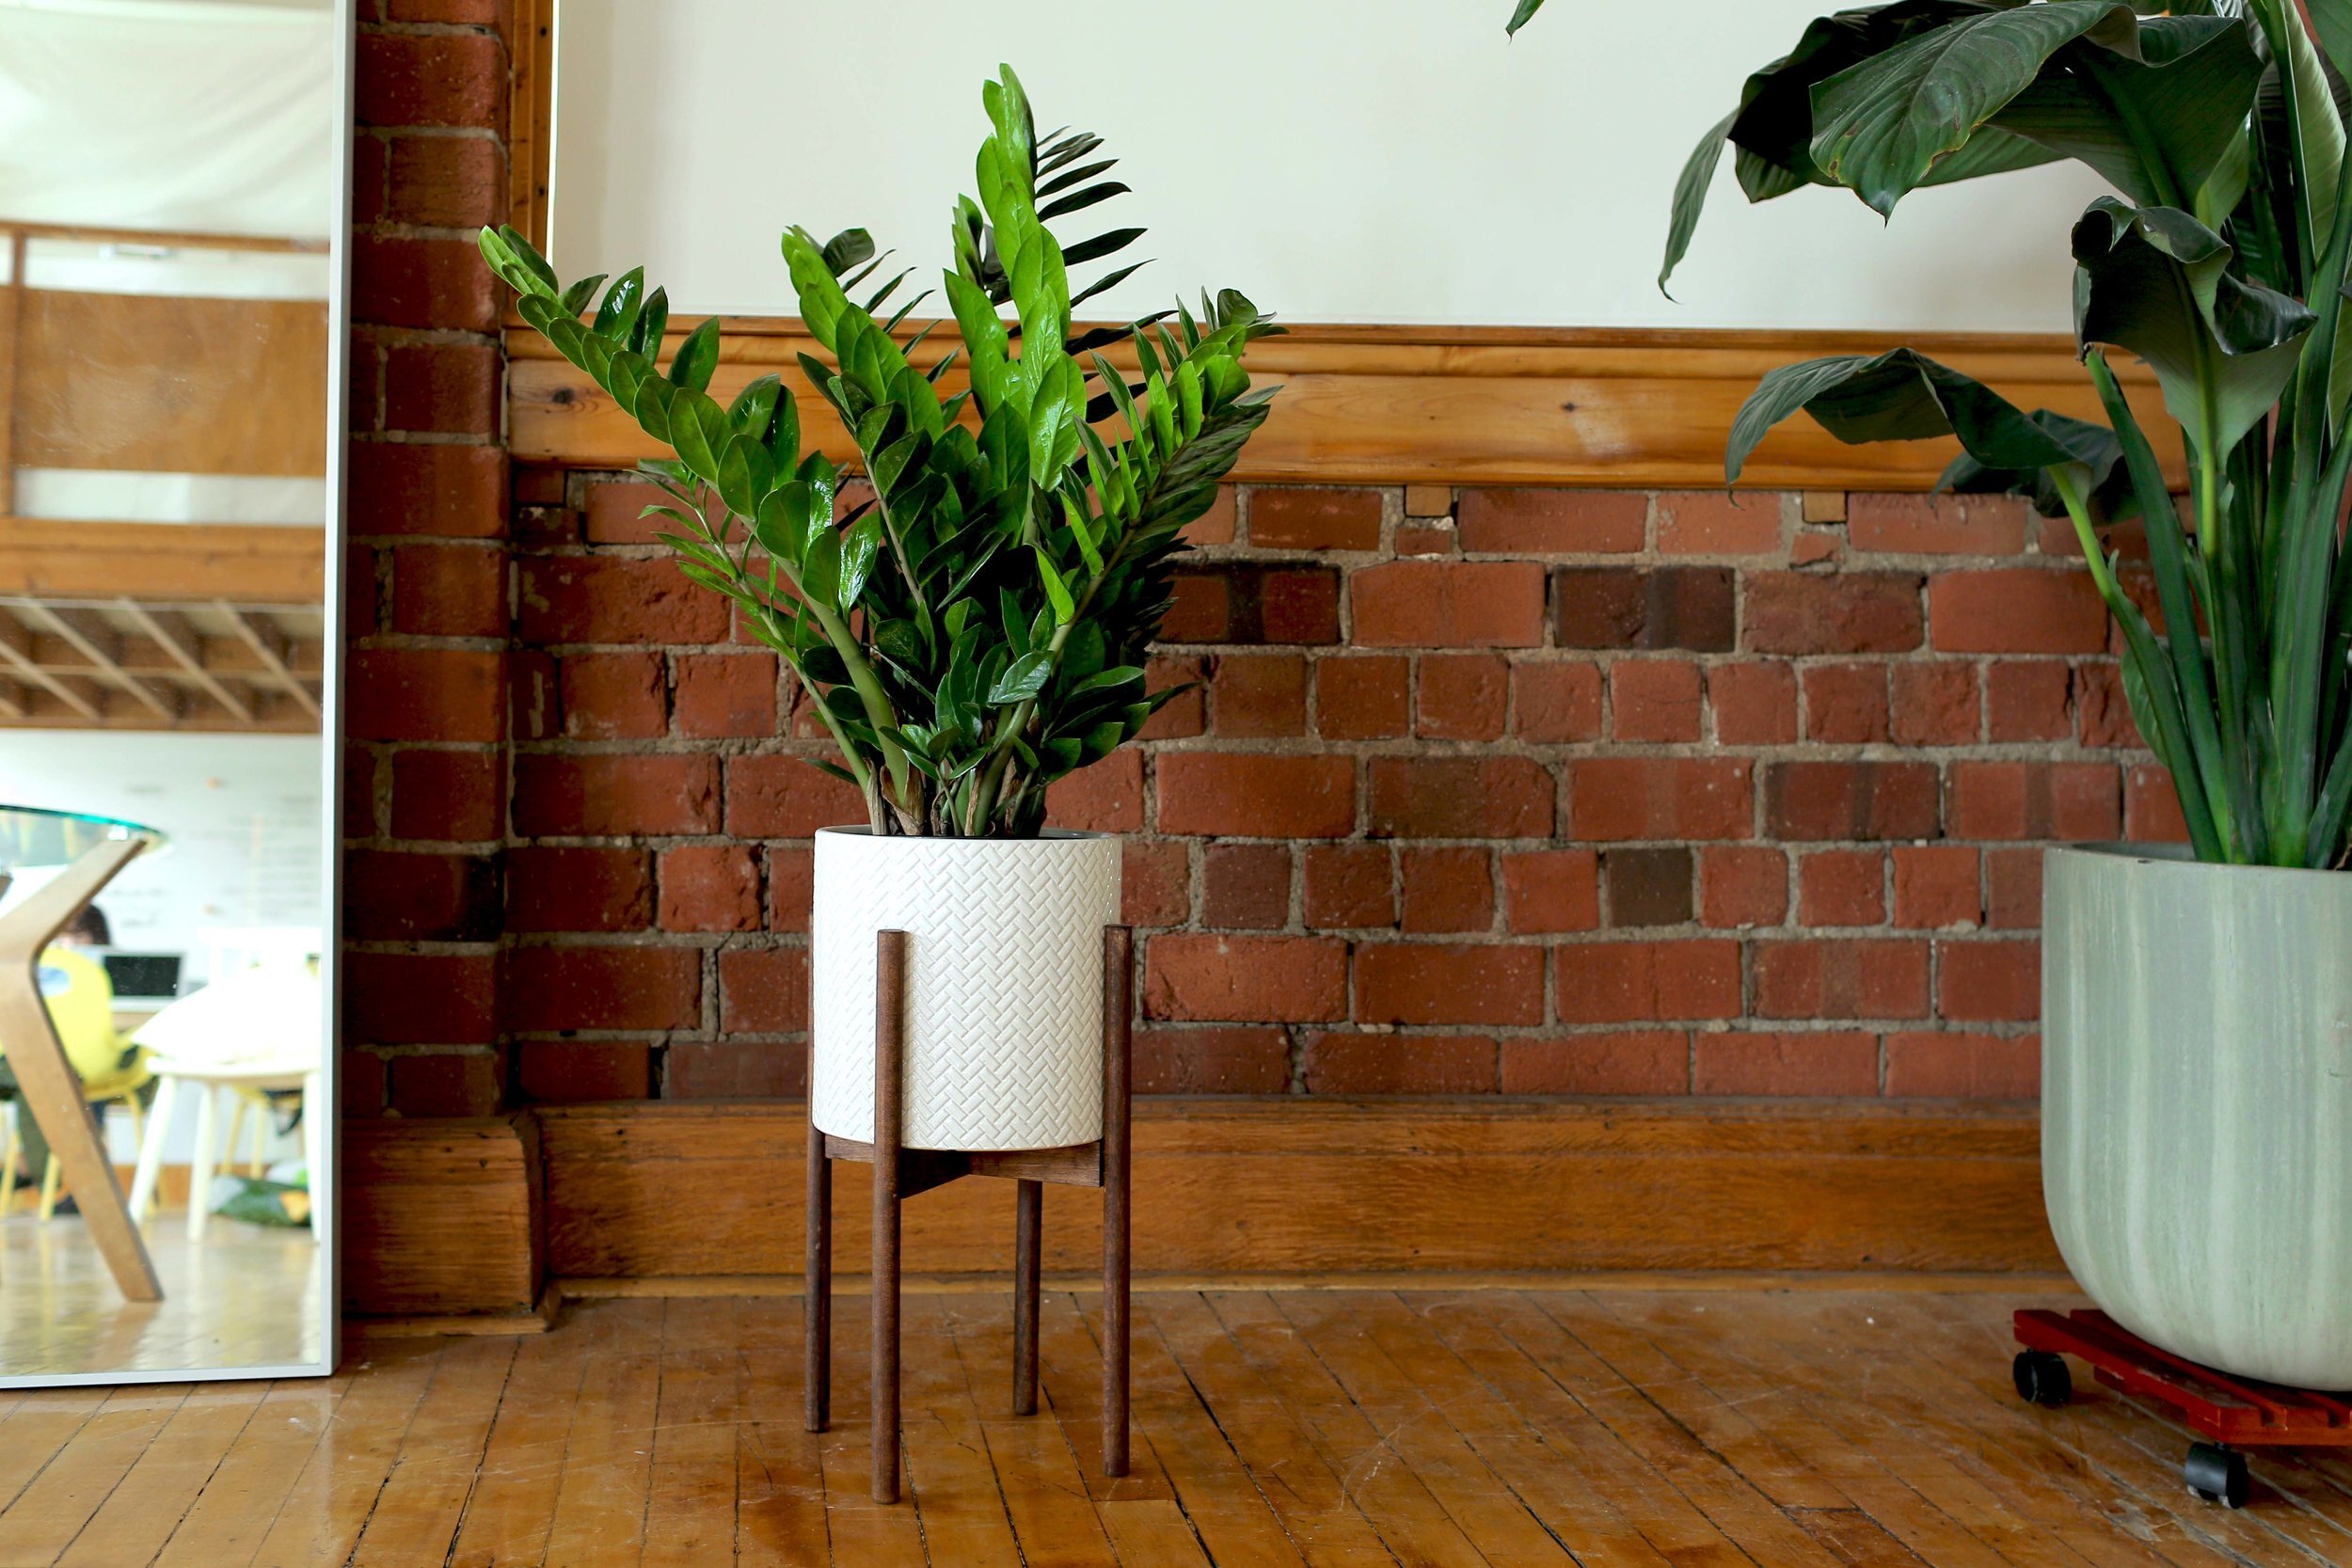
DRAINAGE POT + PLANT STAND DIY

Mid-century modern plant stand, something everyone is dying for but NOT for that price tag. We're here to show you how easy it is to make, plus a little hack on how to make your super cute pots more practical by adding drainage!
COST:
Drainage pot: $25-$35
Mid Century Modern Plant Stand: $55-$65
DIFFICULTY:
Drainage pot: ✂
Mid Century Modern Plant Stand: ✂ ✂
MATERIALS:
Drainage pot:
Cute pot
Scrap piece of wood
Water Collection Plate/Terracotta Plate
Paint
Mid Century Modern Plant Stand:
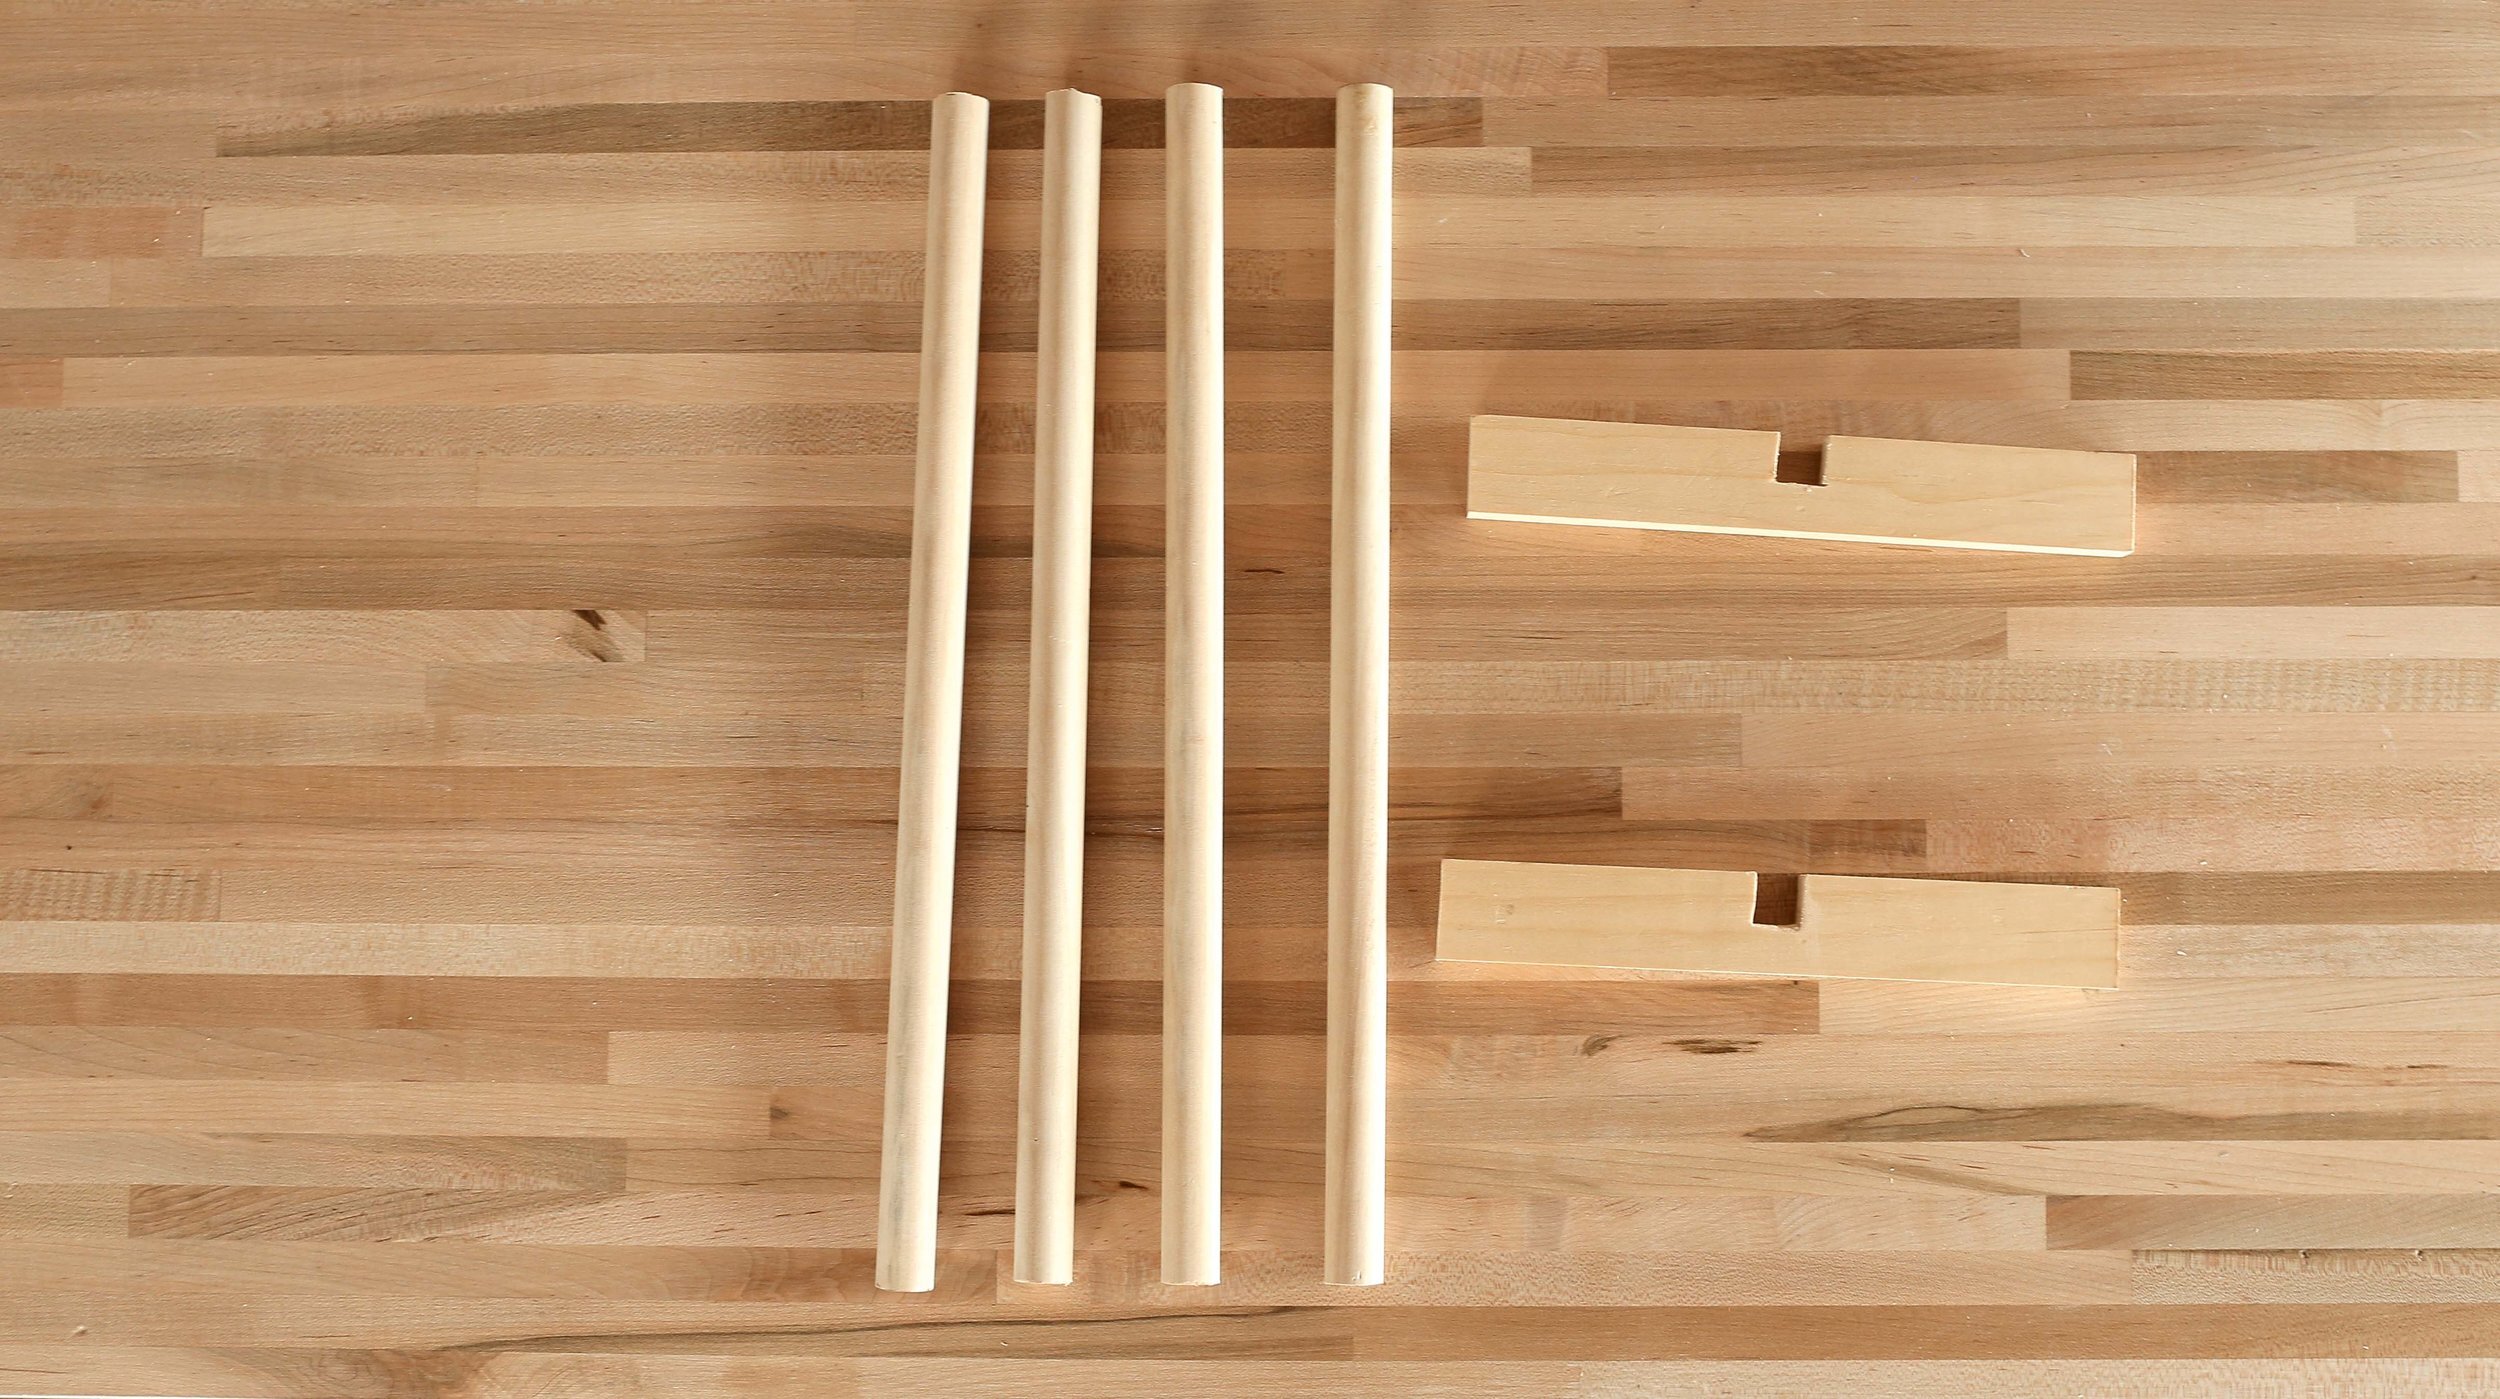
One piece of pine (24 inches long, 1.5 inches wide, and ¾ inches thick)
Pot with straight sides
2 ⅞ inch dowels (4 feet long each)
8 dowel pins
Cardboard or scrap paper
Wood glue
Wood stain
TOOLS:
Drainage pot:
Drill
Masonry Drill Bit
Mid Century Modern Plant Stand:
Hand saw or circular saw
Ruler
Pencil
Chisel
Drill
Drill bit the same size of the dowel pins (ask girls!!!)
Hammer
Sandpaper
Adding drainage holes to cute pots:
The most important part of this DIY is having a masonry drill bit. Place your pot on a surface that you don’t mind drilling through, such as a small piece of wood. Find the center of your pot and, very slowly, begin drilling. There’s no need to push too hard down onto the drill, just let the weight of the drill create the hole. This hole will now act as your drainage! Make sure to put a plate under the pot to collect any water. We bought a really cheap terracotta plate and painted it white to match our pot, but you can totally use whatever you have around the house that might match the pot.
Plant stand DIY:
First you need to find a pot that is vertically straight, rather than a traditional pot that is more angled. We found ours at IKEA.
The first thing we are going to make is the base that will go under the bottom of the pot. This base will be two pieces of wood to create a cross; this cross should be the same length on each side as the diameter of the pot! To make this cross we used a piece of pine that was 24 inches long, 1.5 inches wide, and ¾ inches thick. Cut two pieces out of the wood that are the same length as the diameter of your pot. Next we need to create two notches in the middle of each piece of wood so that they slide together like a puzzle piece. Measure to the middle of each piece of wood and draw out a notch around that mark that is as thick as the other piece of wood and as deep as half of the other piece of wood. Create that shape on the wood. We used a hand saw to cut down and create a couple of little notches inside of the cube shape we drew and we used a chisel to pop out the rest to create a clean hole. Repeat on the other piece. We’re going to hammer the pieces together later, but first we are going to create and attach the legs (it’ll be easier to assemble later).

For the legs, we picked up some ⅞ inch wooden dowels. We decided we wanted our legs to be 18 inches tall in total. Our dowels are are 4 feet long, and so we are cutting each of our two dowels into two 18 inch pieces. We decided to make the portion of the dowel that sits above the cross and onto the pot 7 inches high, and the rest of the legs will end up being 11 inches. We marked 7 inches down onto the dowels so that we know where the cross will sit.
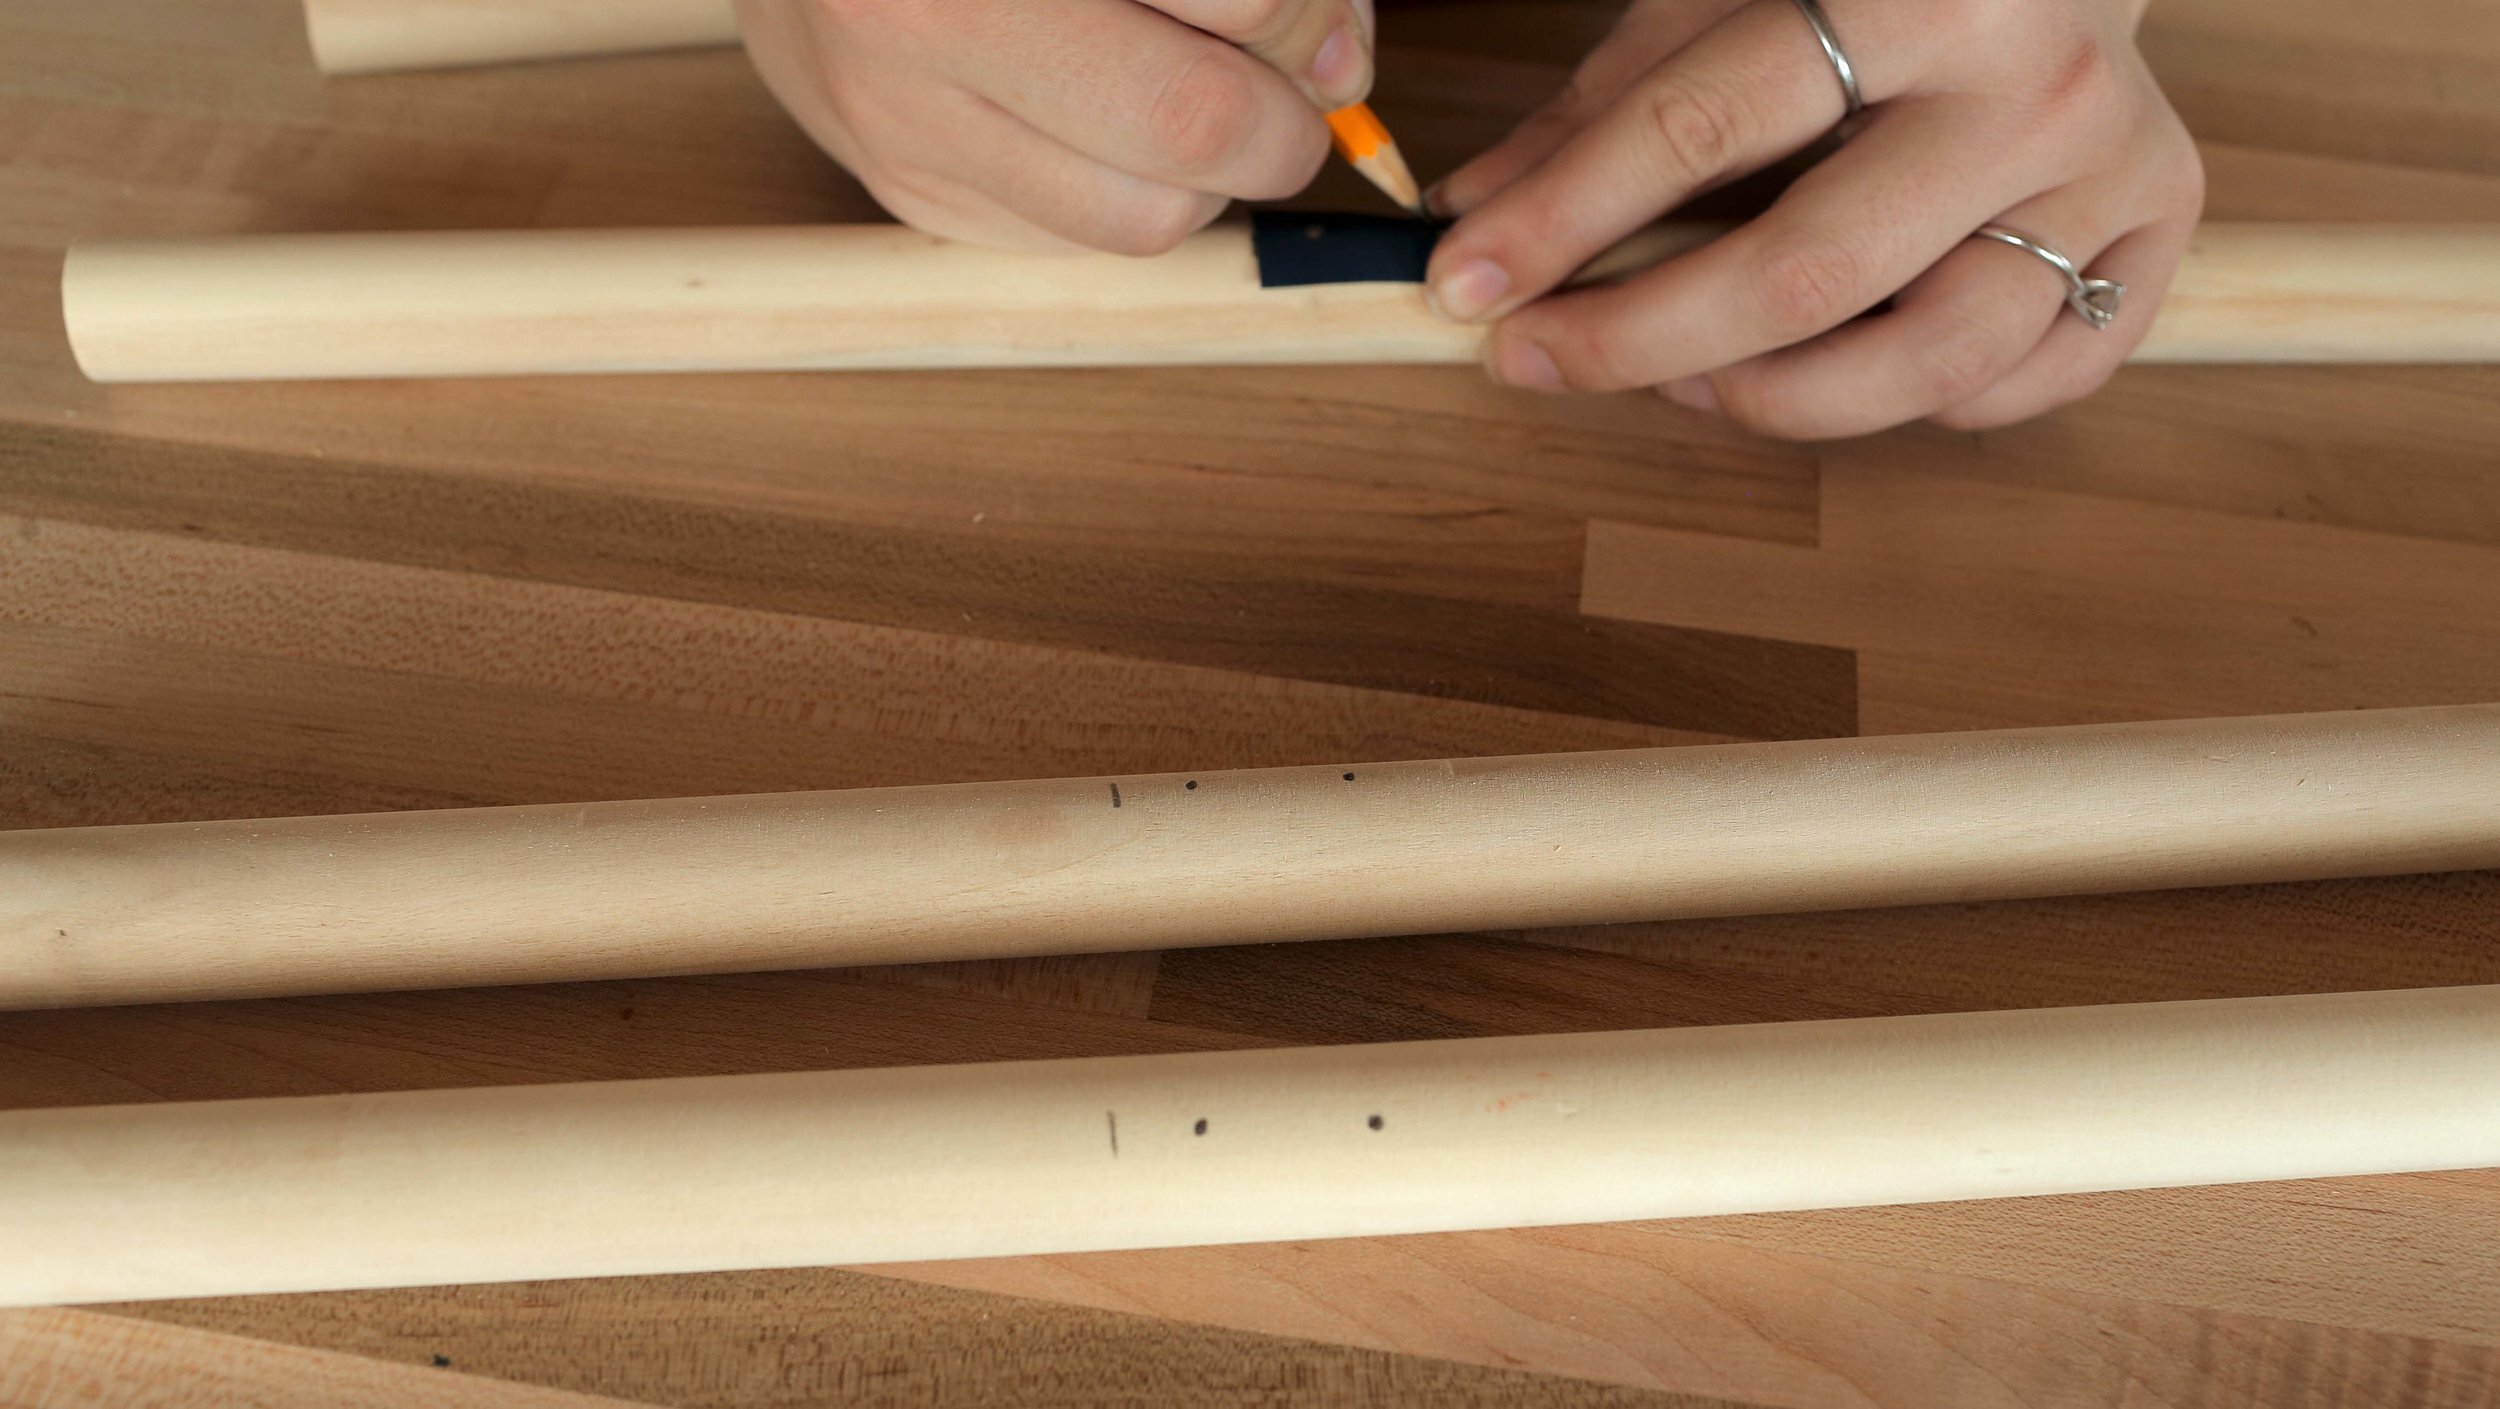
To attach the cross to the legs we are going to be using two dowel pins for each connection point. We are going to attach one end of the dowel pins into the short end of the cross piece, and the other ends of them into the dowels under the 7 inch line. To help us drill the holes for the dowels, we created a template using card stock that is the size of the short end of the cross pieces of wood. We created marks on this template for the dowels ⅜ inch down and ⅜ inch in. We pokes small holes where we created these marks and used the template to create these same holes onto the ends of each of the cross pieces. We also used the template to create two holes below the 7 inch mark on the two wooden dowels.
Next step is to drill holes into our marks on both the dowels and the cross pieces. These holes cannot be deeper than half of the length of the dowels. To help us with this depth, we put a piece of tape on our drill bit at the depth of half the length of the wooden dowel as a guide.
Next step is to assemble. We first lined up the notches and hammered together the two cross pieces. We put one dowel pin in each hole and then connected them together using a tiny drop of wood glue inside of each hole. Once put together, follow your wood glue’s instructions for drying times (ours said to let dry for 25 minutes).
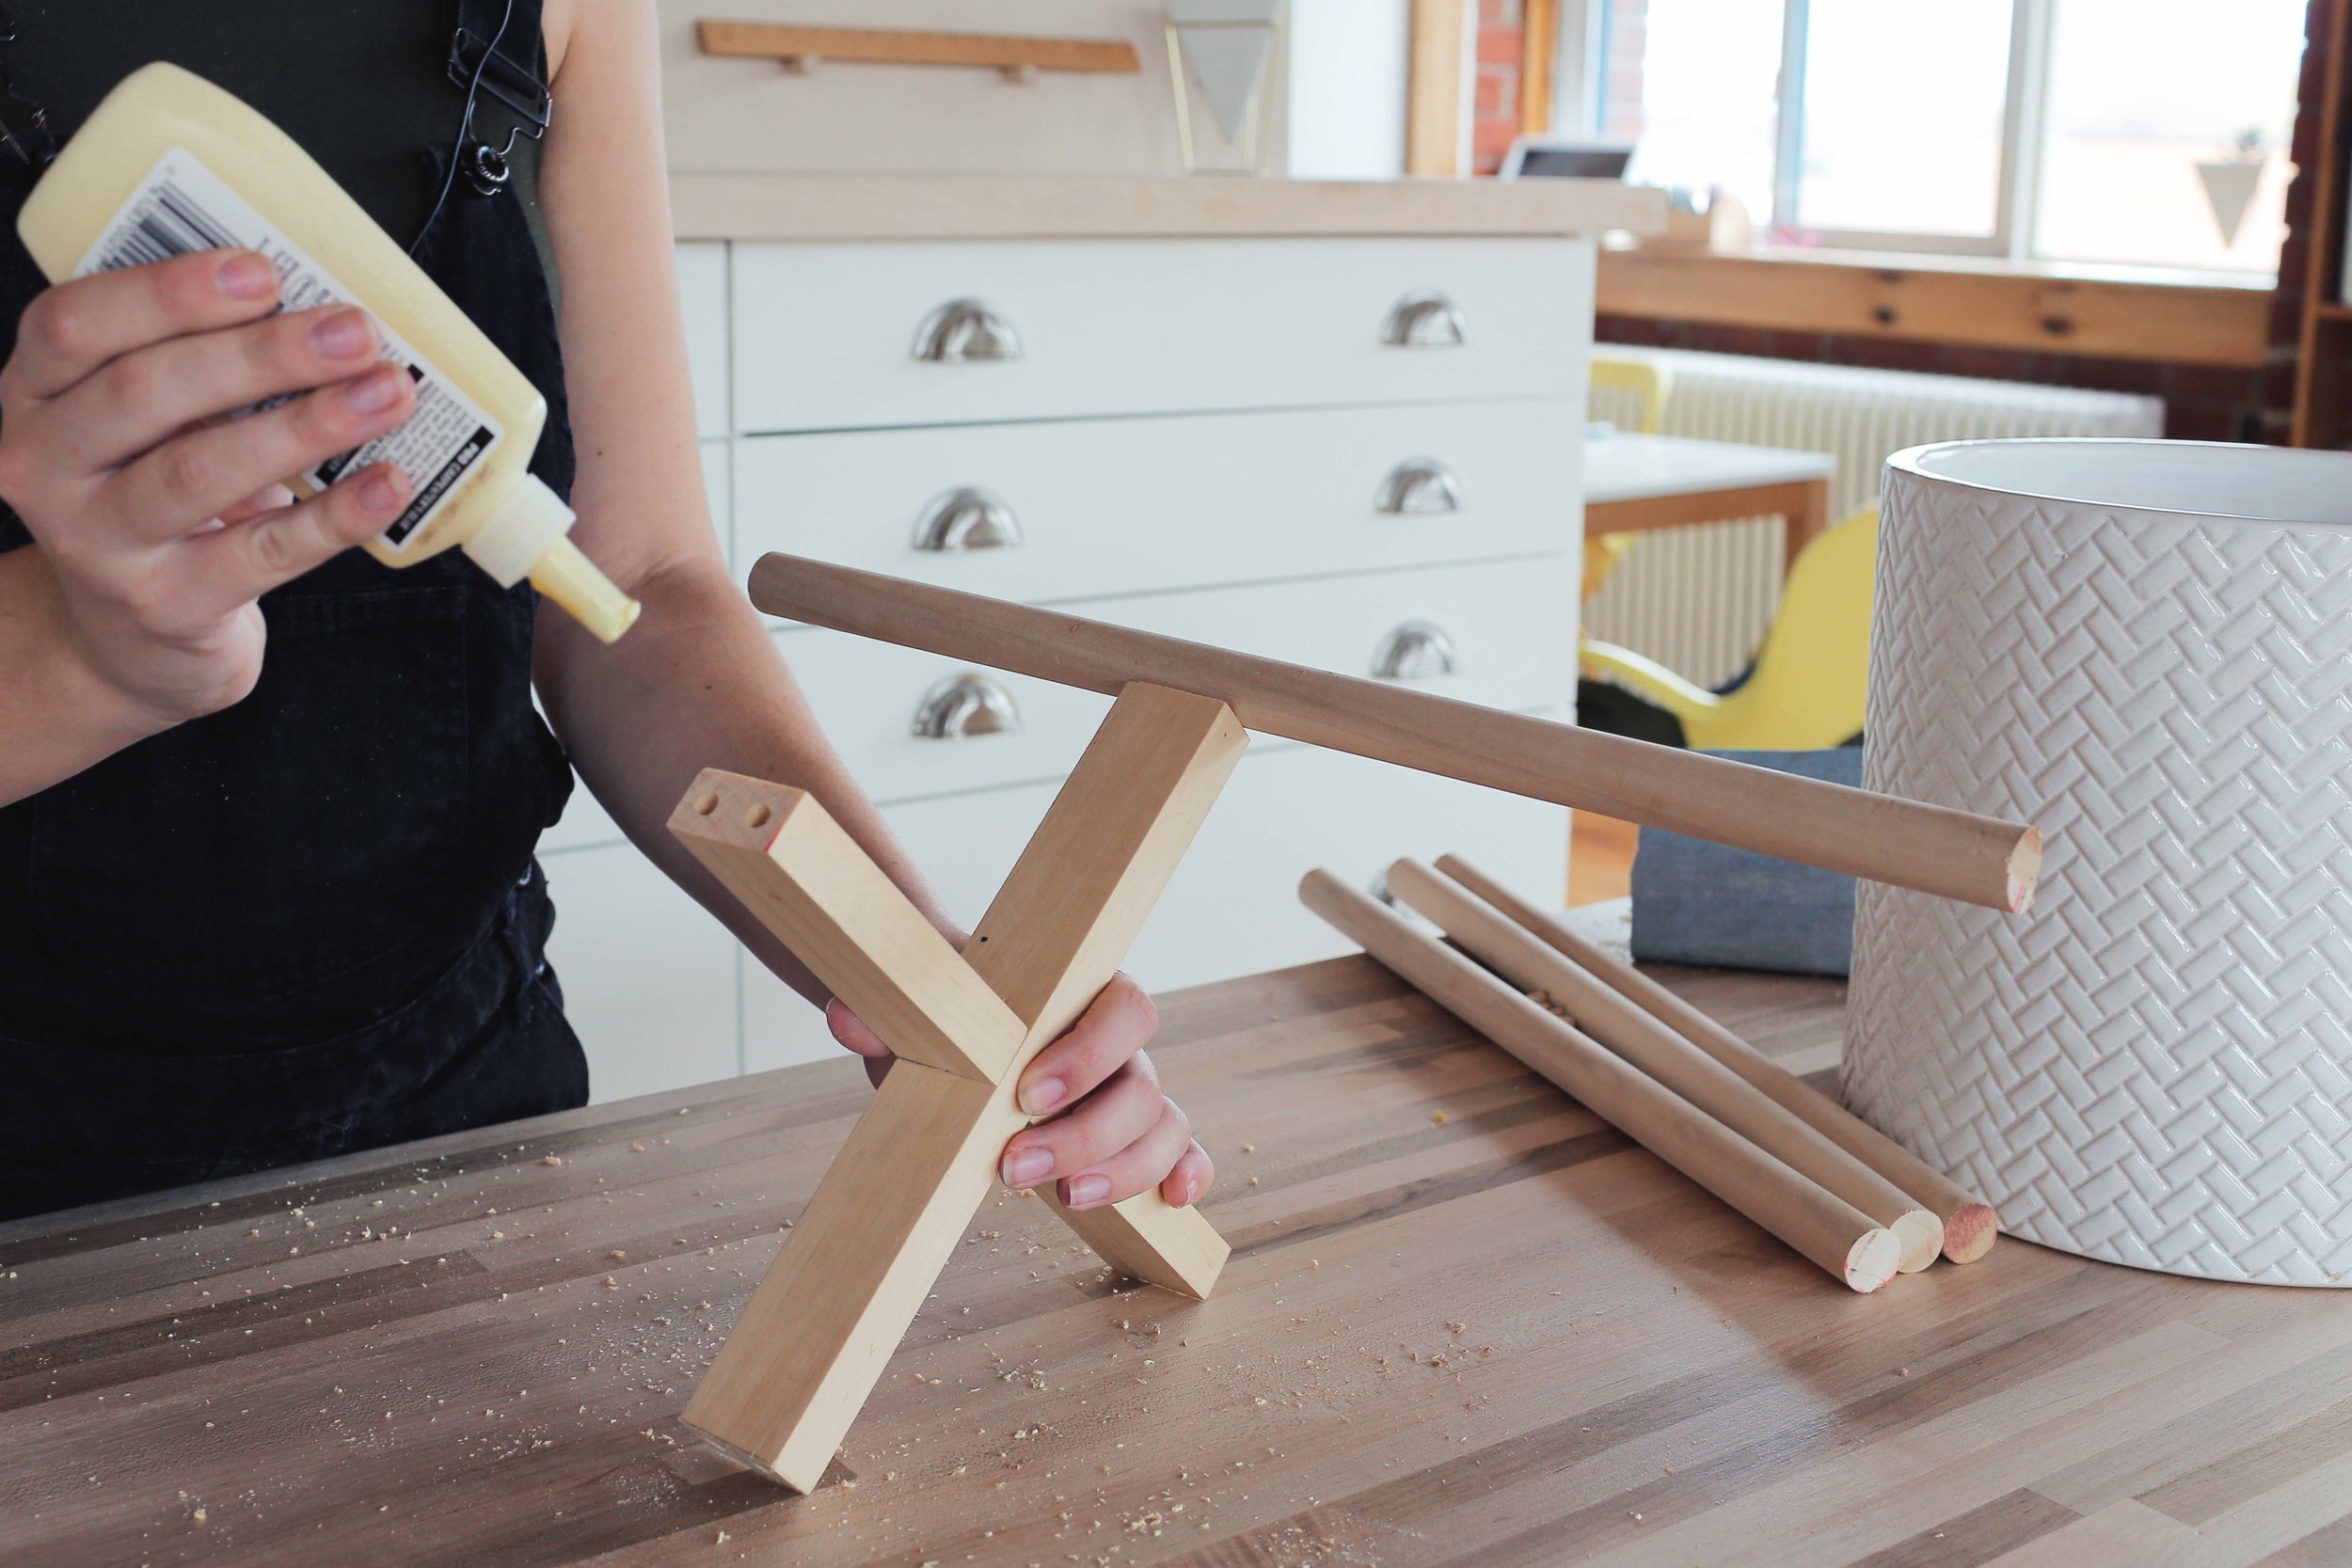
To finish the stand, we sanded the edges of the wooden dowels to refine the edges. We then stained the whole stand and let it dry according to stain instructions.


Just add a plant and you’re done (we potted our lovely zz plant)! Be sure to always show us what you've made with the hashtag #SorryGirlsSquad, and check out the video below for more!
recommended posts


Lorem ipsum dolor sit amet, consectetur adipiscing elit. Vestibulum id ligula porta felis euismod semper.