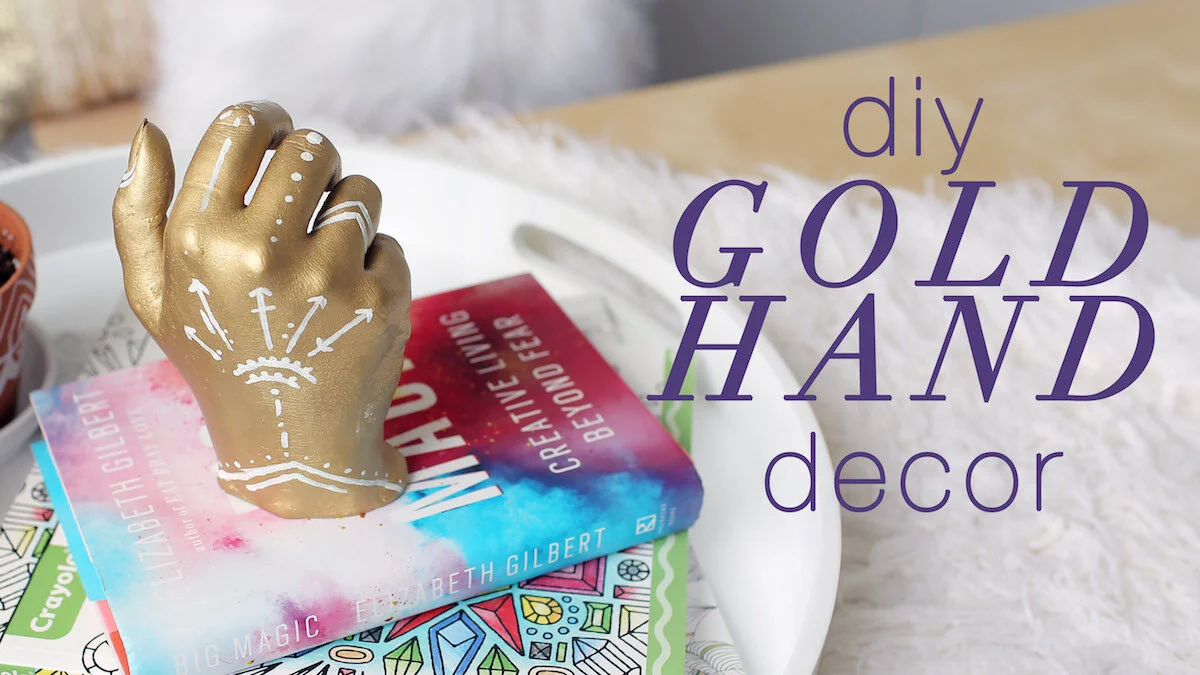
DIY GOLD HAND DECOR
To make our gold hand we started with a hand casting kit, which can be found online or in art stores. The alternative to this is buying alginate (which is the material used to make the mold), and plaster of Paris (what you fill in the mold with) separately. But we found that the kit was a better price so we went with that!
Cost: ~$25
Difficulty: ✂ ✂
Tools:
– sand paper
– paint brush
– disposable bucket/ container
– stir stick
Materials:
– hand casting kit
– gold spray paint
– white paint
– water

The following steps were included in our kit so follow your kit instructions! We added 6 cups of cold water to our bucket and then poured in the water. At this point we recommend wetting your hand (so it’ll be easier to slide out of the mold) and practicing how you want your hand to be placed. We added the “Make a mold” alginate impression mixture to the water and stirred quickly for a minute. You won’t get rid of all the lumps and that’s okay, you don’t want to mix it for too long otherwise your mold material will harden and your mold will be of the stick you’re mixing it with. After just a minute of quick mixing, I inserted my hand. We probably waited just a littletoo long between mixing and putting my hand in because we had to maneuver some of the matter over my wrist rather than it filling in the gaps on it’s own. I know it’s hard to tell but try to not touch the bottom or any of the sides with your fingers otherwise it could compromise the end result.

Our instructions said to leave our hand in there for 1.5 minutes but we left it for 3 minutes for good measure. Once the time was up and the top was hardened (But still jelly) I carefully wiggled my fingers and hand until I could pull it free. You want to make sure that every part of the mold stays intact.Next we made our plaster of Paris. To do this we added 1 2/3 cups of cold water to a mixing bowl. We added the plaster of Paris to the bowl and mixed it together until smooth.We then spooned our Plaster of Paris into the mold a couple of spoonful’s at a time. You need to make sure that you tilt your mold and vibrate it to get the plaster into all the nooks-and-crannies of your mold.
At this step we should have tilted almost upside-down because my fingers were bent. We didn’t get it into the furthest part of the fingers, comment below if you didn’t even notice that the tips of the fingers were missing! But again, to avoid this add a little bit of plaster at a time, and tilt/ hit your mold on the table until you’re confident plaster has gotten everywhere. You should do this per finger/ thumb. Once the digits are filled you can add move spoonful’s at a time and start to fill in the hand. Keep rotating and vibrating the mold to remove all of the air bubbles. Even when the mold was full we vibrated until we stopped seeing air bubbles rise.
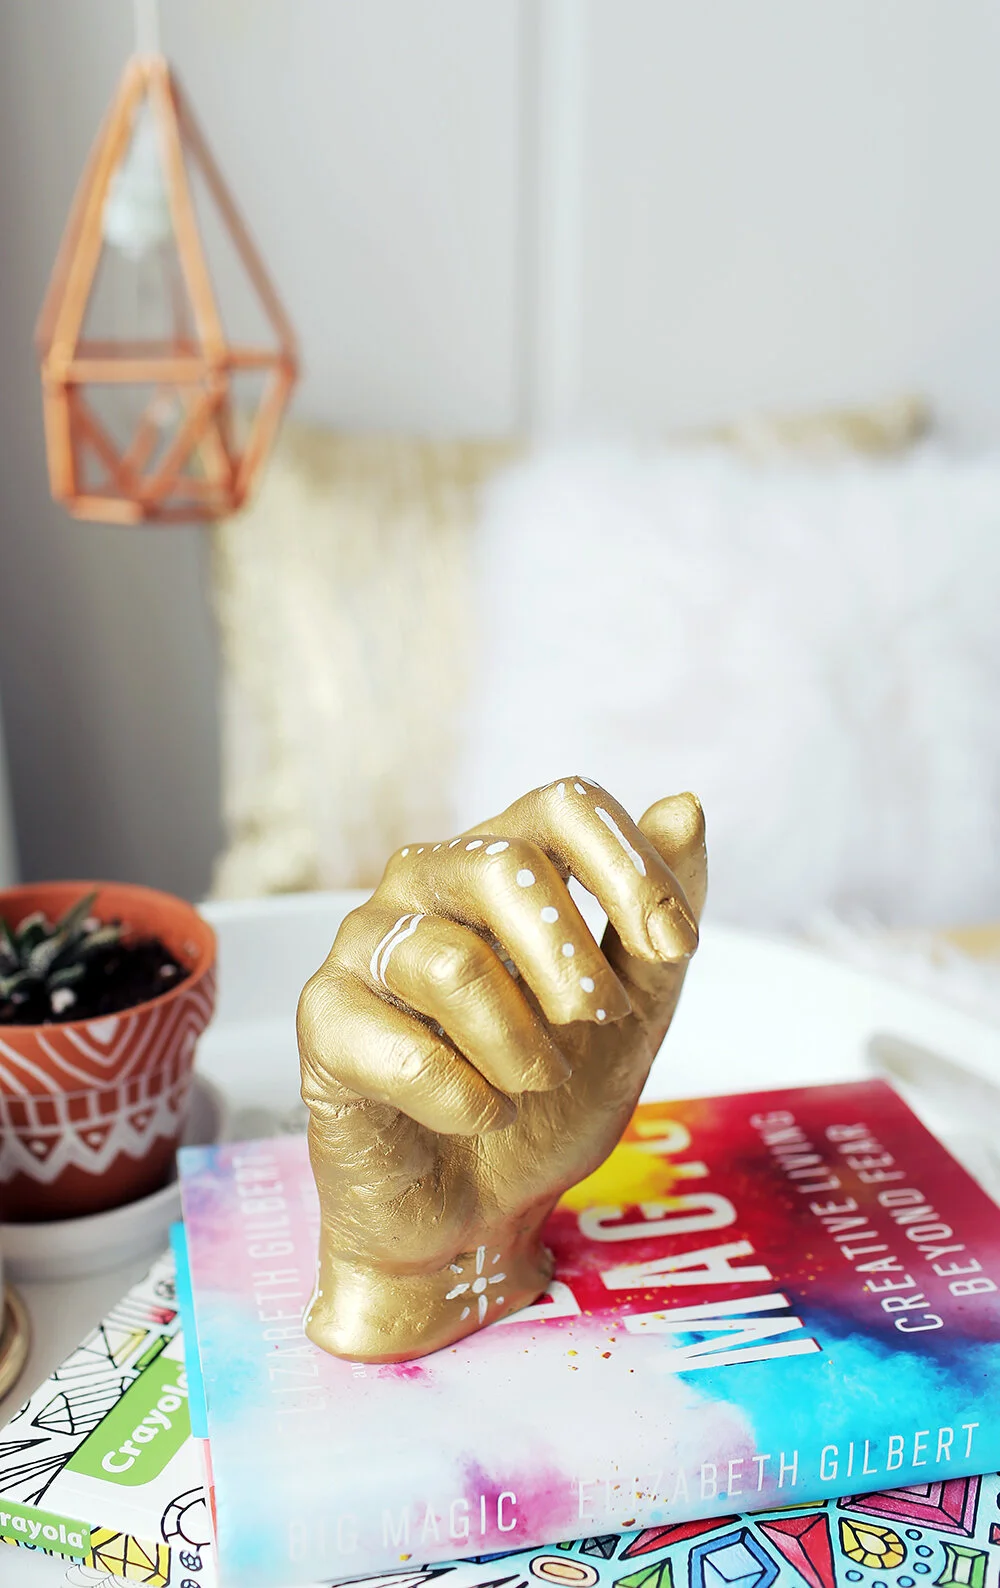
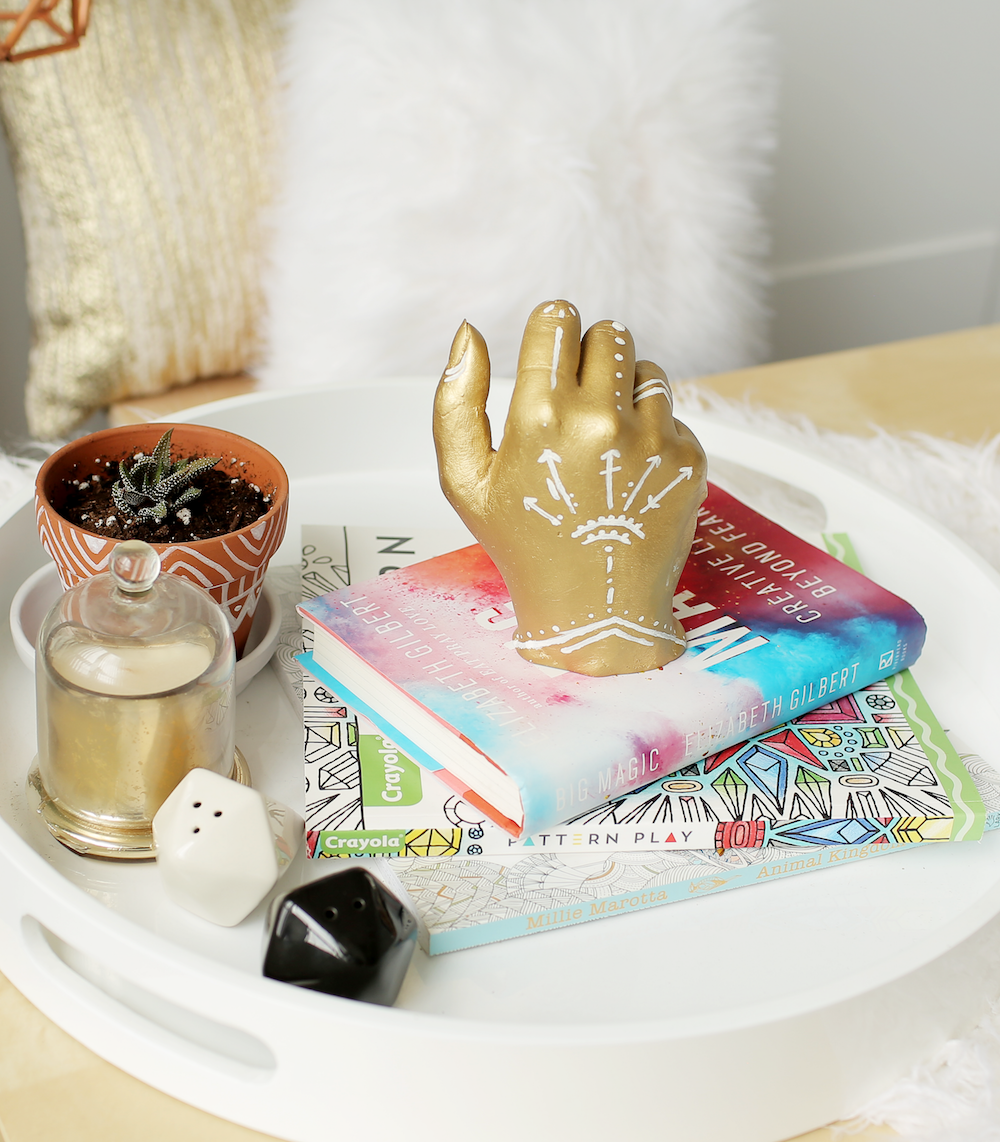
We then let it dry for 2 hours. After the time was up we were able to dump our mold out of our container and began slowly and carefully pulling away chunks of the alginate. It took a while but once the hand was freed we used some find grit hand paper to sand off any imperfections. This is what it looked like after some sanding. We also made sure the plaster was completely dry and the hand clean of dust before moving on to our next step, painting it! With some gold spray paint, we took the hand outside and gave it a couple coats of gold paint. Once it was dry we brought it inside to add one finishing touch. We decided to take some white paint and draw some flash-tattoo inspired designs on the hand. We did this to make the hand look a little bit more like boho inspired décor rather than a stature or something from your bio class. Take your time with this and have fun free-handing lines, arrows and dots.
Check out the video below for our full video tutorial (which always proves to be super helpful)! #doitforthediy
recommended posts


Donec id justo non metus auctor commodo ut quis enim. Mauris fringilla dolor vel condimentum imperdiet.