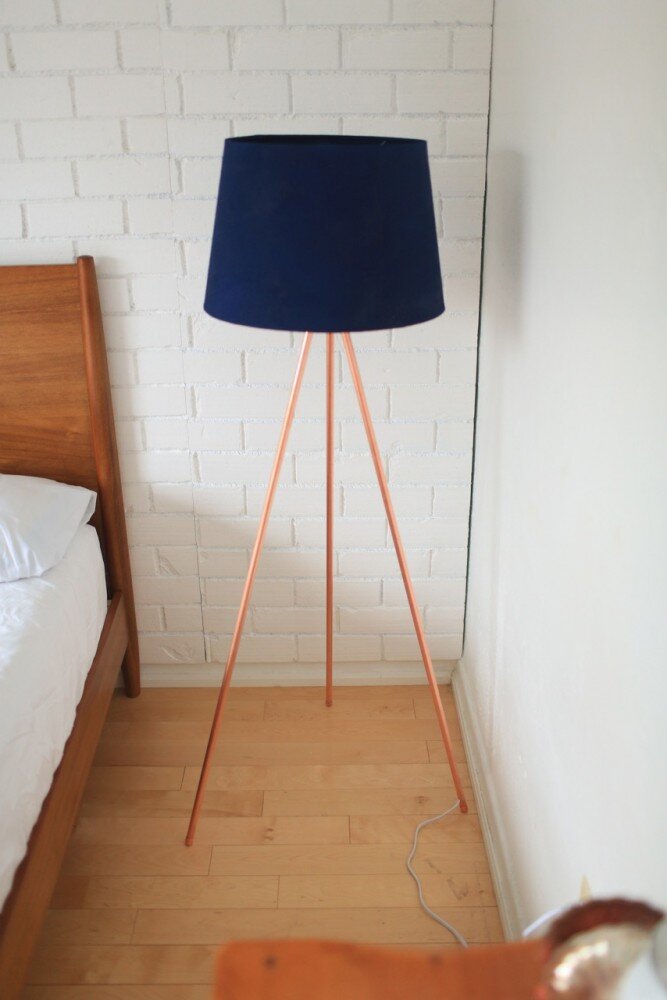
DIY COPPER TRIPOD LAMP

Here’s how this DIY copper tripod lamp came about…
Me: I want a floor lamp
Me: *looks up floor lamps* $$$
Me: OMG. Nope. Can I DIY one?
Me: *looks up DIY floor lamps*
In my search for both a floor lamp and a DIY’d one, I found these two lamps. Loved them both but obviously I wasn’t going to pay that much. Then I found this (http://sarahmdorseydesigns.blogspot.ca/2013/10/knocktoberfest-tripod-floor-lamp.html) blog post and thought, hey that looks do-able.
Becky and I decided to try the copper tripod lamp but had a couple of alterations to make. We thought you guys might want to see our take on it and maybe in video tutorial form? Check out the video below for our step-by-step tutorial.
Difficulty: ✂ ✂ ✂
Cost: $50
Materials:
– three ½ inch copper pipes (4ft long, you can get longer pipes and get them cut to save money)
– three ½ inch copper pipe caps
– lamp kit (we really just needed the cord, nipple, nut and socket)
– small block of wood (piece of a 2×4)
– 2 x rubber grommets (size that you would like to drill your hole for your electrical cord)
– copper spray paint
– Ikea lamp shade
– navy spray paint (or whichever colour, if you want to paint your lampshade)
– masking tape
– gorilla glue
– scrap cardboard
– nail polish removed + cotton pads
– ketchup and paper towel
– E-6000 glue
Tools:
– pipe cutter (if you didn’t get it cut at the hardware store)
– drill
– 5/8 drill bit
– drill bit the size of your “nipple” from your lamp kit
– drill bit just larger than your electrical cord and suitable for copper
– ruler
– pencil
– protractor
– safety gear
– paperclip
– cotton swab
– masking tape
– screwdriver
Make sure to watch the video for full instructions!
We hope you guys love this lamp as much as we do. It really brightens up the room (ha ha!) Thanks for much for stopping by and make sure to use the #thesorrygirls on Instagram so we can see your creations!
recommended posts


Quisque iaculis facilisis lacinia. Mauris euismod pellentesque tellus sit amet mollis.