DIY TIGHT OFF THE SHOULDER TOP

Today we are bringing you one of the hottest summer trends at the moment… tight off the shoulder crop tops!? We don’t know exactly what these guys are called, all we know is that we’re loving them right now! We’ve got three different ways of making these, varying in difficulty slightly. Some use thrift store shirts, while the last one is make from scratch with fabric!
A tip for buying thrift store shirts for this project: make sure to buy tops that are tight to your body. Think about cutting off the shoulders, would the top stay up without them? If so, you are good to go!

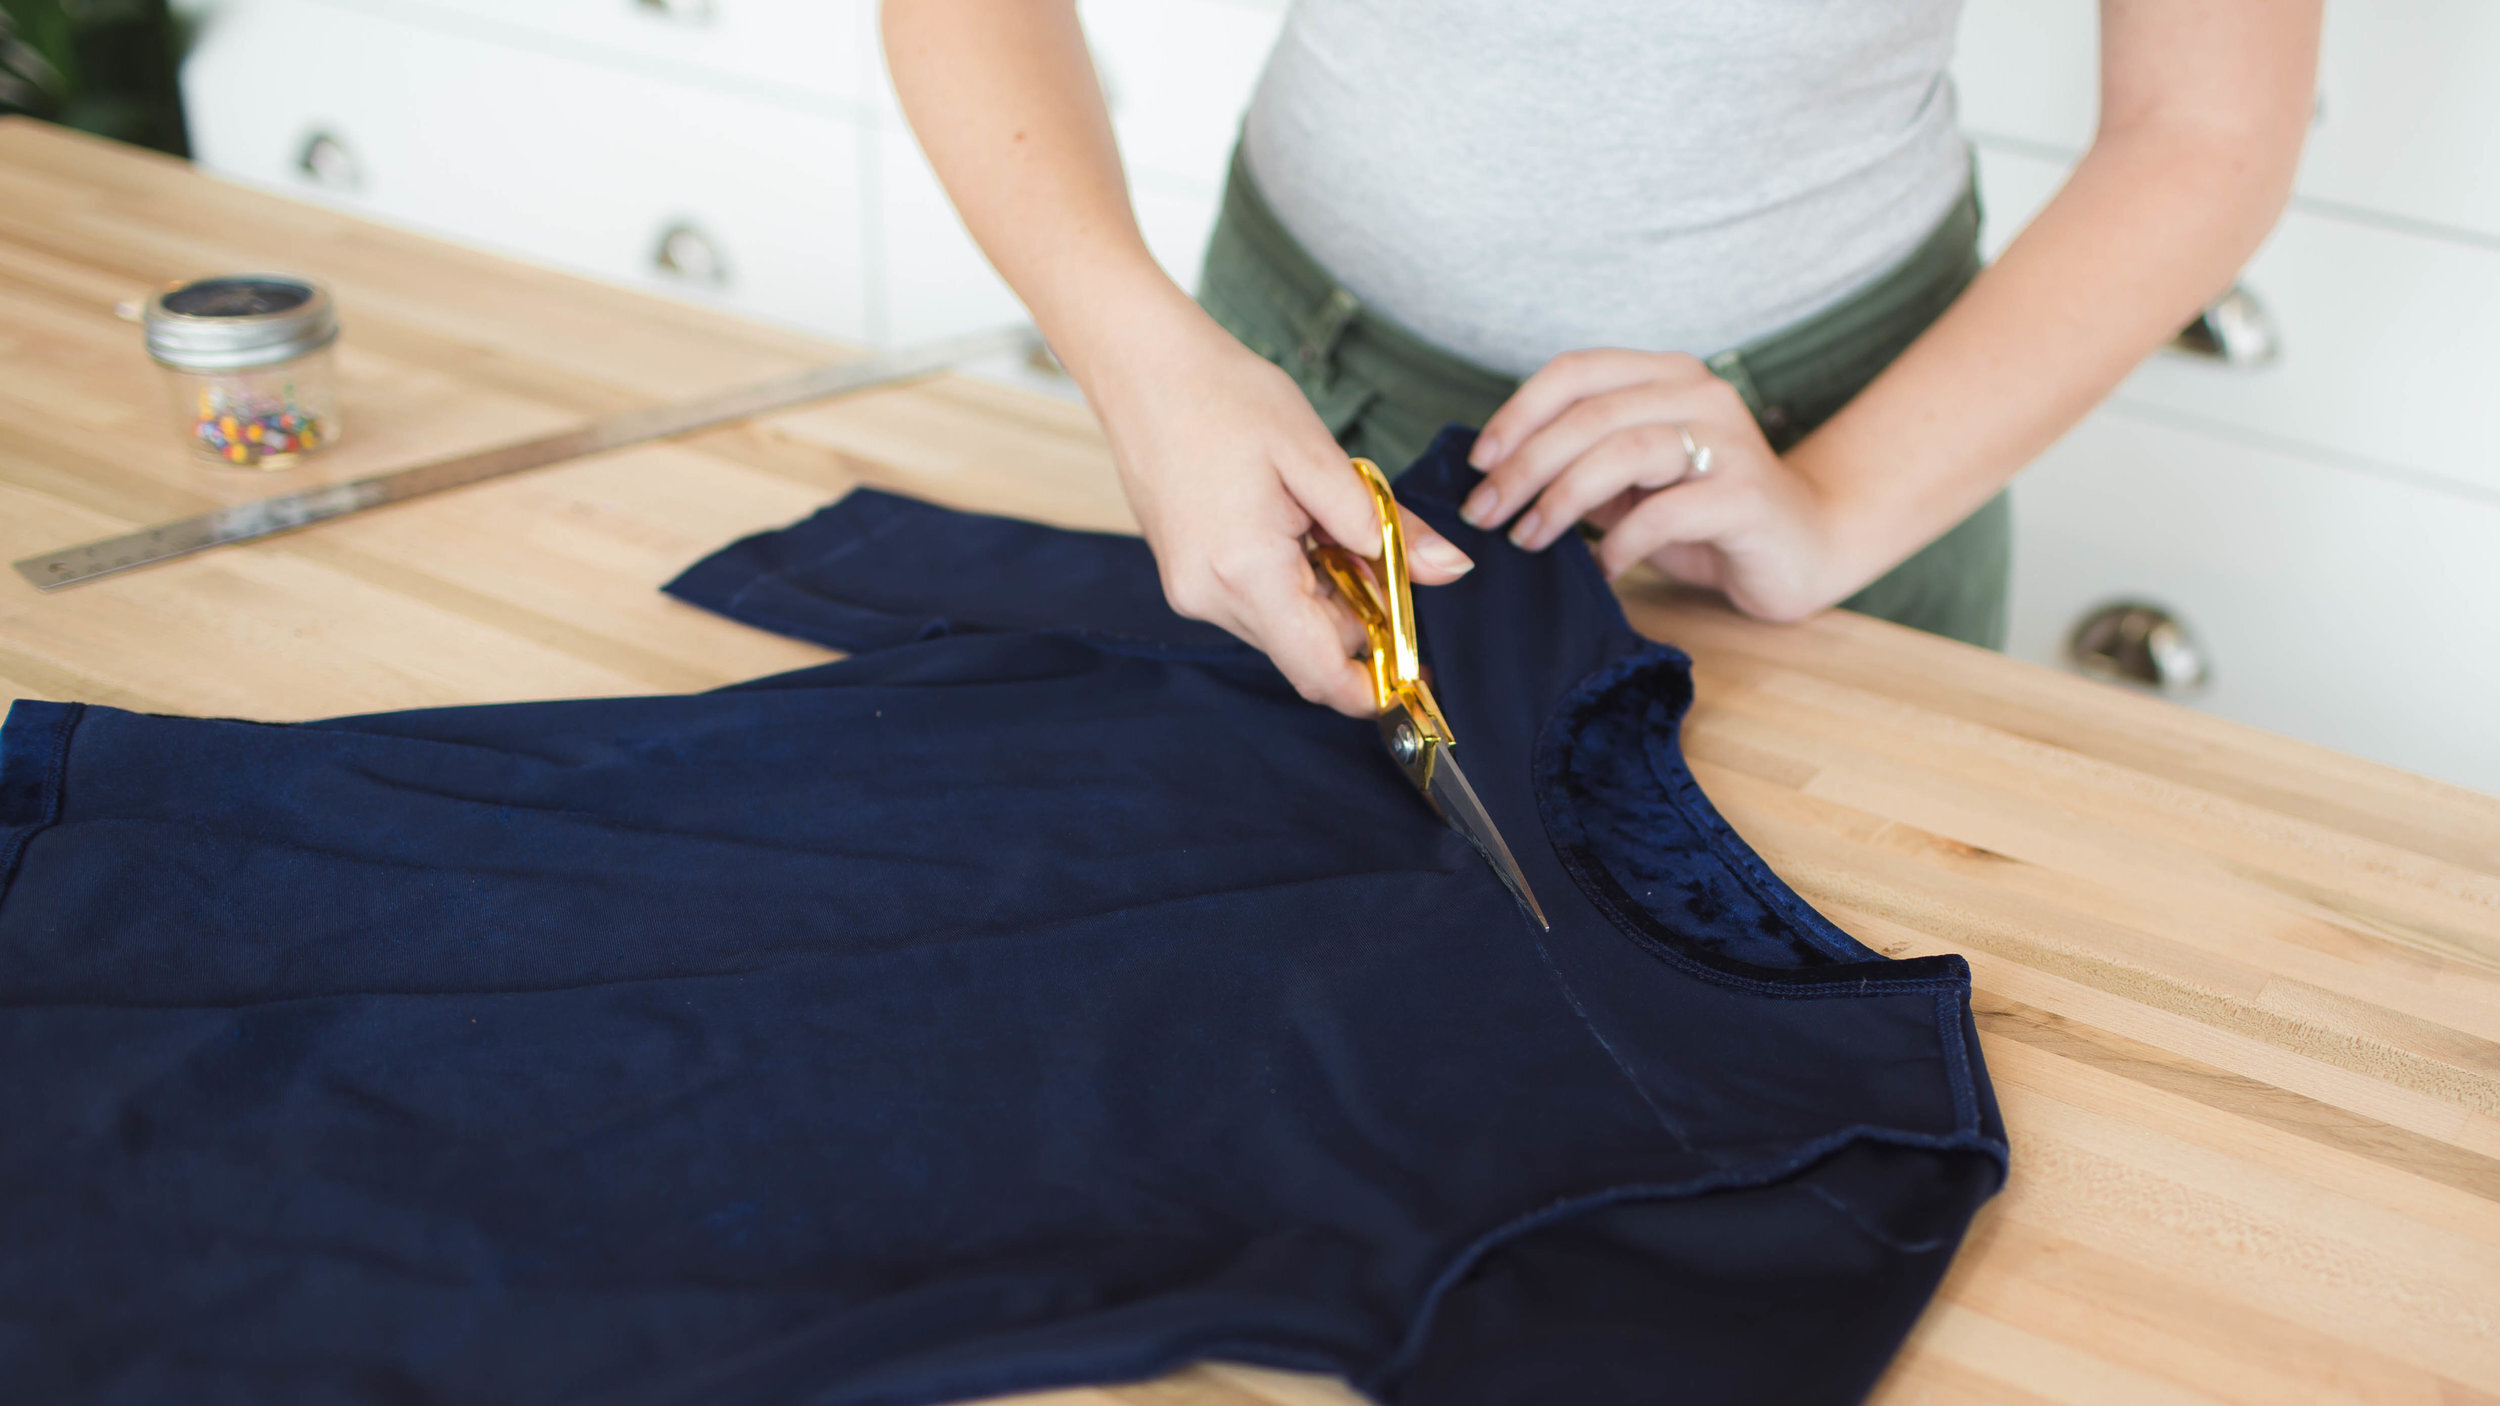
blue crushed velvet
First step is to flip the shirt inside out. It helps to put the shirt on and mark where you would want the shirt to sit. A helpful tip is to always cut off less than you think, you can always cut off more later! I’m going to go about an inch down from the shoulder seam, and cut down on an angle, across, and back up the other side. Mark the shape with chalk for easy cutting! You can also trim the sleeves and bottom if you’d like.
Pin the edges and hem all the way around!


striped lettuce leaf
I started off by cutting this shirt the same way we cut the crushed velvet shirt, cutting down on an angle, across, and back up the other side. I also trimmed the bottom of the shirt and cut off all of the hems. I cut off the hems because we are going to be adding a lettuce leaf hem to this top (totally 90s! look it up)!

In order to achieve this hem, you are going to need a sewing machine and a shirt that is very stretchy. I am going to flip the shirt inside out and fold over the raw edges, pinning all the way around as if I were sewing a regular hem. Before starting the lettuce leaf hem, you’re going to want to make sure that your machine is on the zig zag setting, and that the distance of your stitches is fairly wide (we set our dial to about four). I started my hem like normal, with a few forward stitches and a few backward stitches.

When you begin the lettuce hem, you are going to want to make sure that when the needle is zig zagging, it is going onto the fabric, and then off of the fabric with each zig zag (click here to see it in action). As you are hemming, also make sure to pull and stretch the fabric as you are sewing.
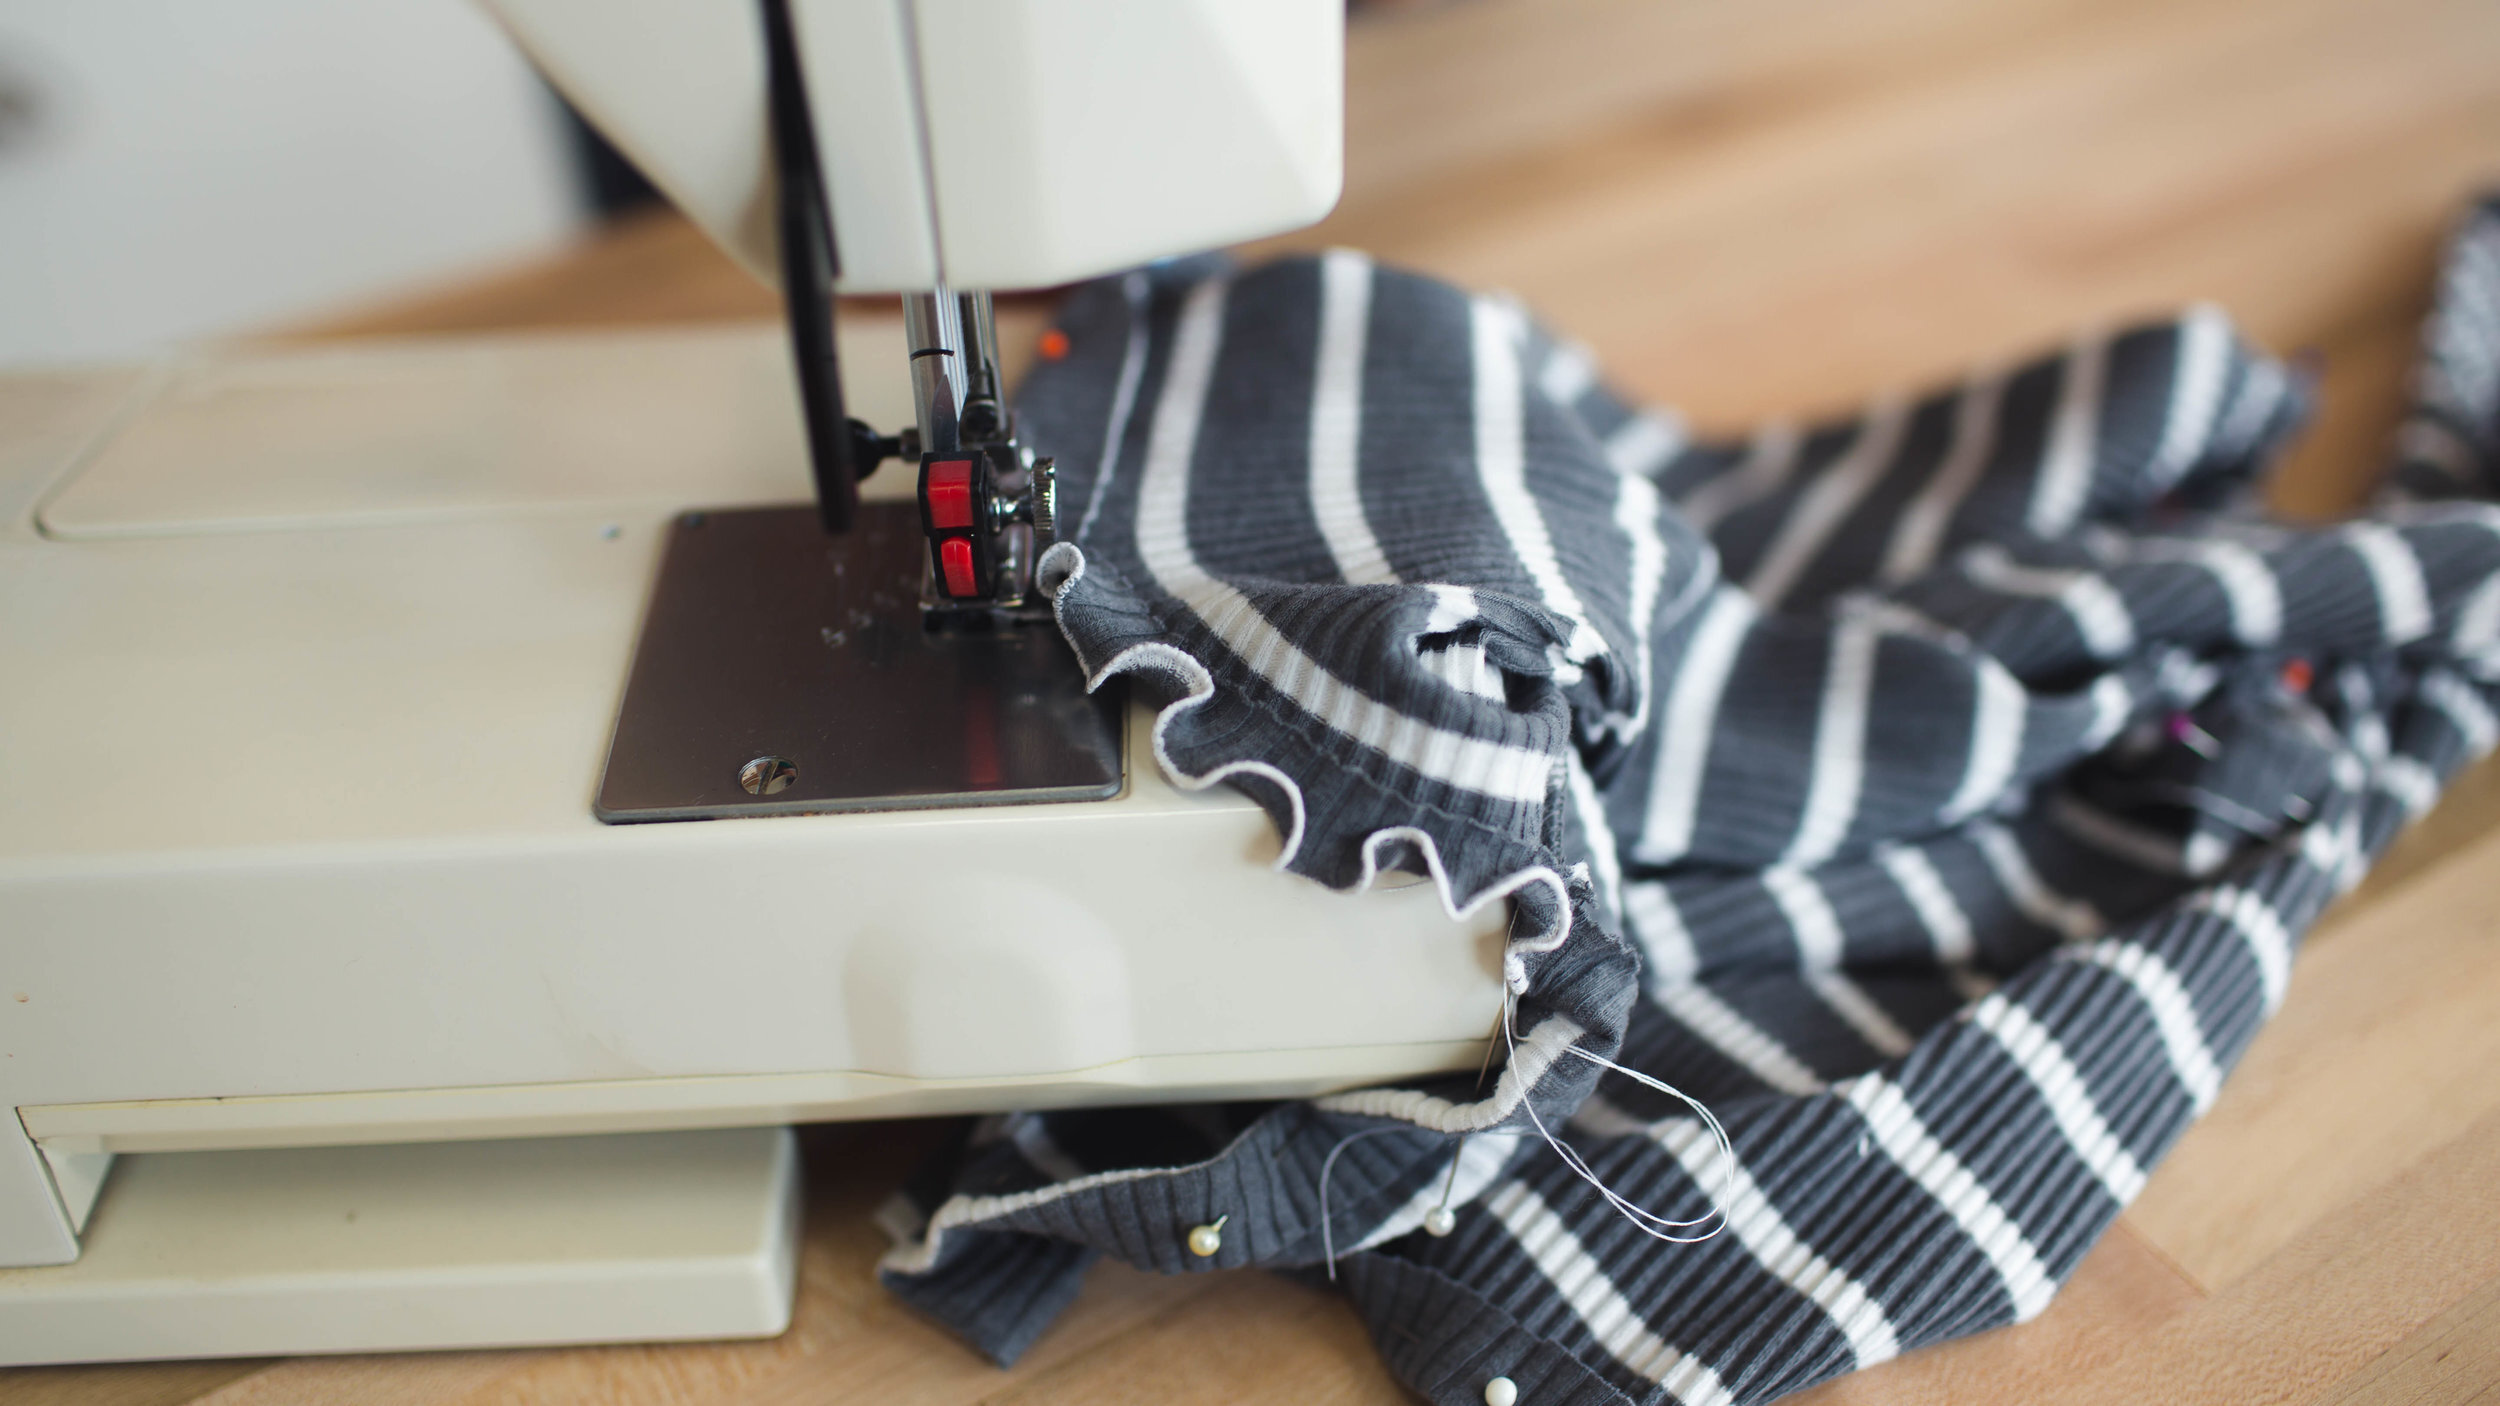
This technique takes more thread and more time, but it’s totally worth it!


pink from scratch
This one we are going to be making completely from scratch, but trust me, it’s super easy. You’re, again, going to want to pick a fabric that is very stretchy (we went for a ribbed knit material). We are going to start by making some measurements of our body! Measure the bust, the desired length of the top, and around the arms. Fold your fabric in half, for your bust measurements, divide the measurement in half and mark on your fabric. For the arm measurements, keep the measurement whole and cut out a strip of that length. Before sewing and cutting, make sure the stretch of your shirt is horizontal and not vertical. Pin the two body pieces together and sew along the two sides.
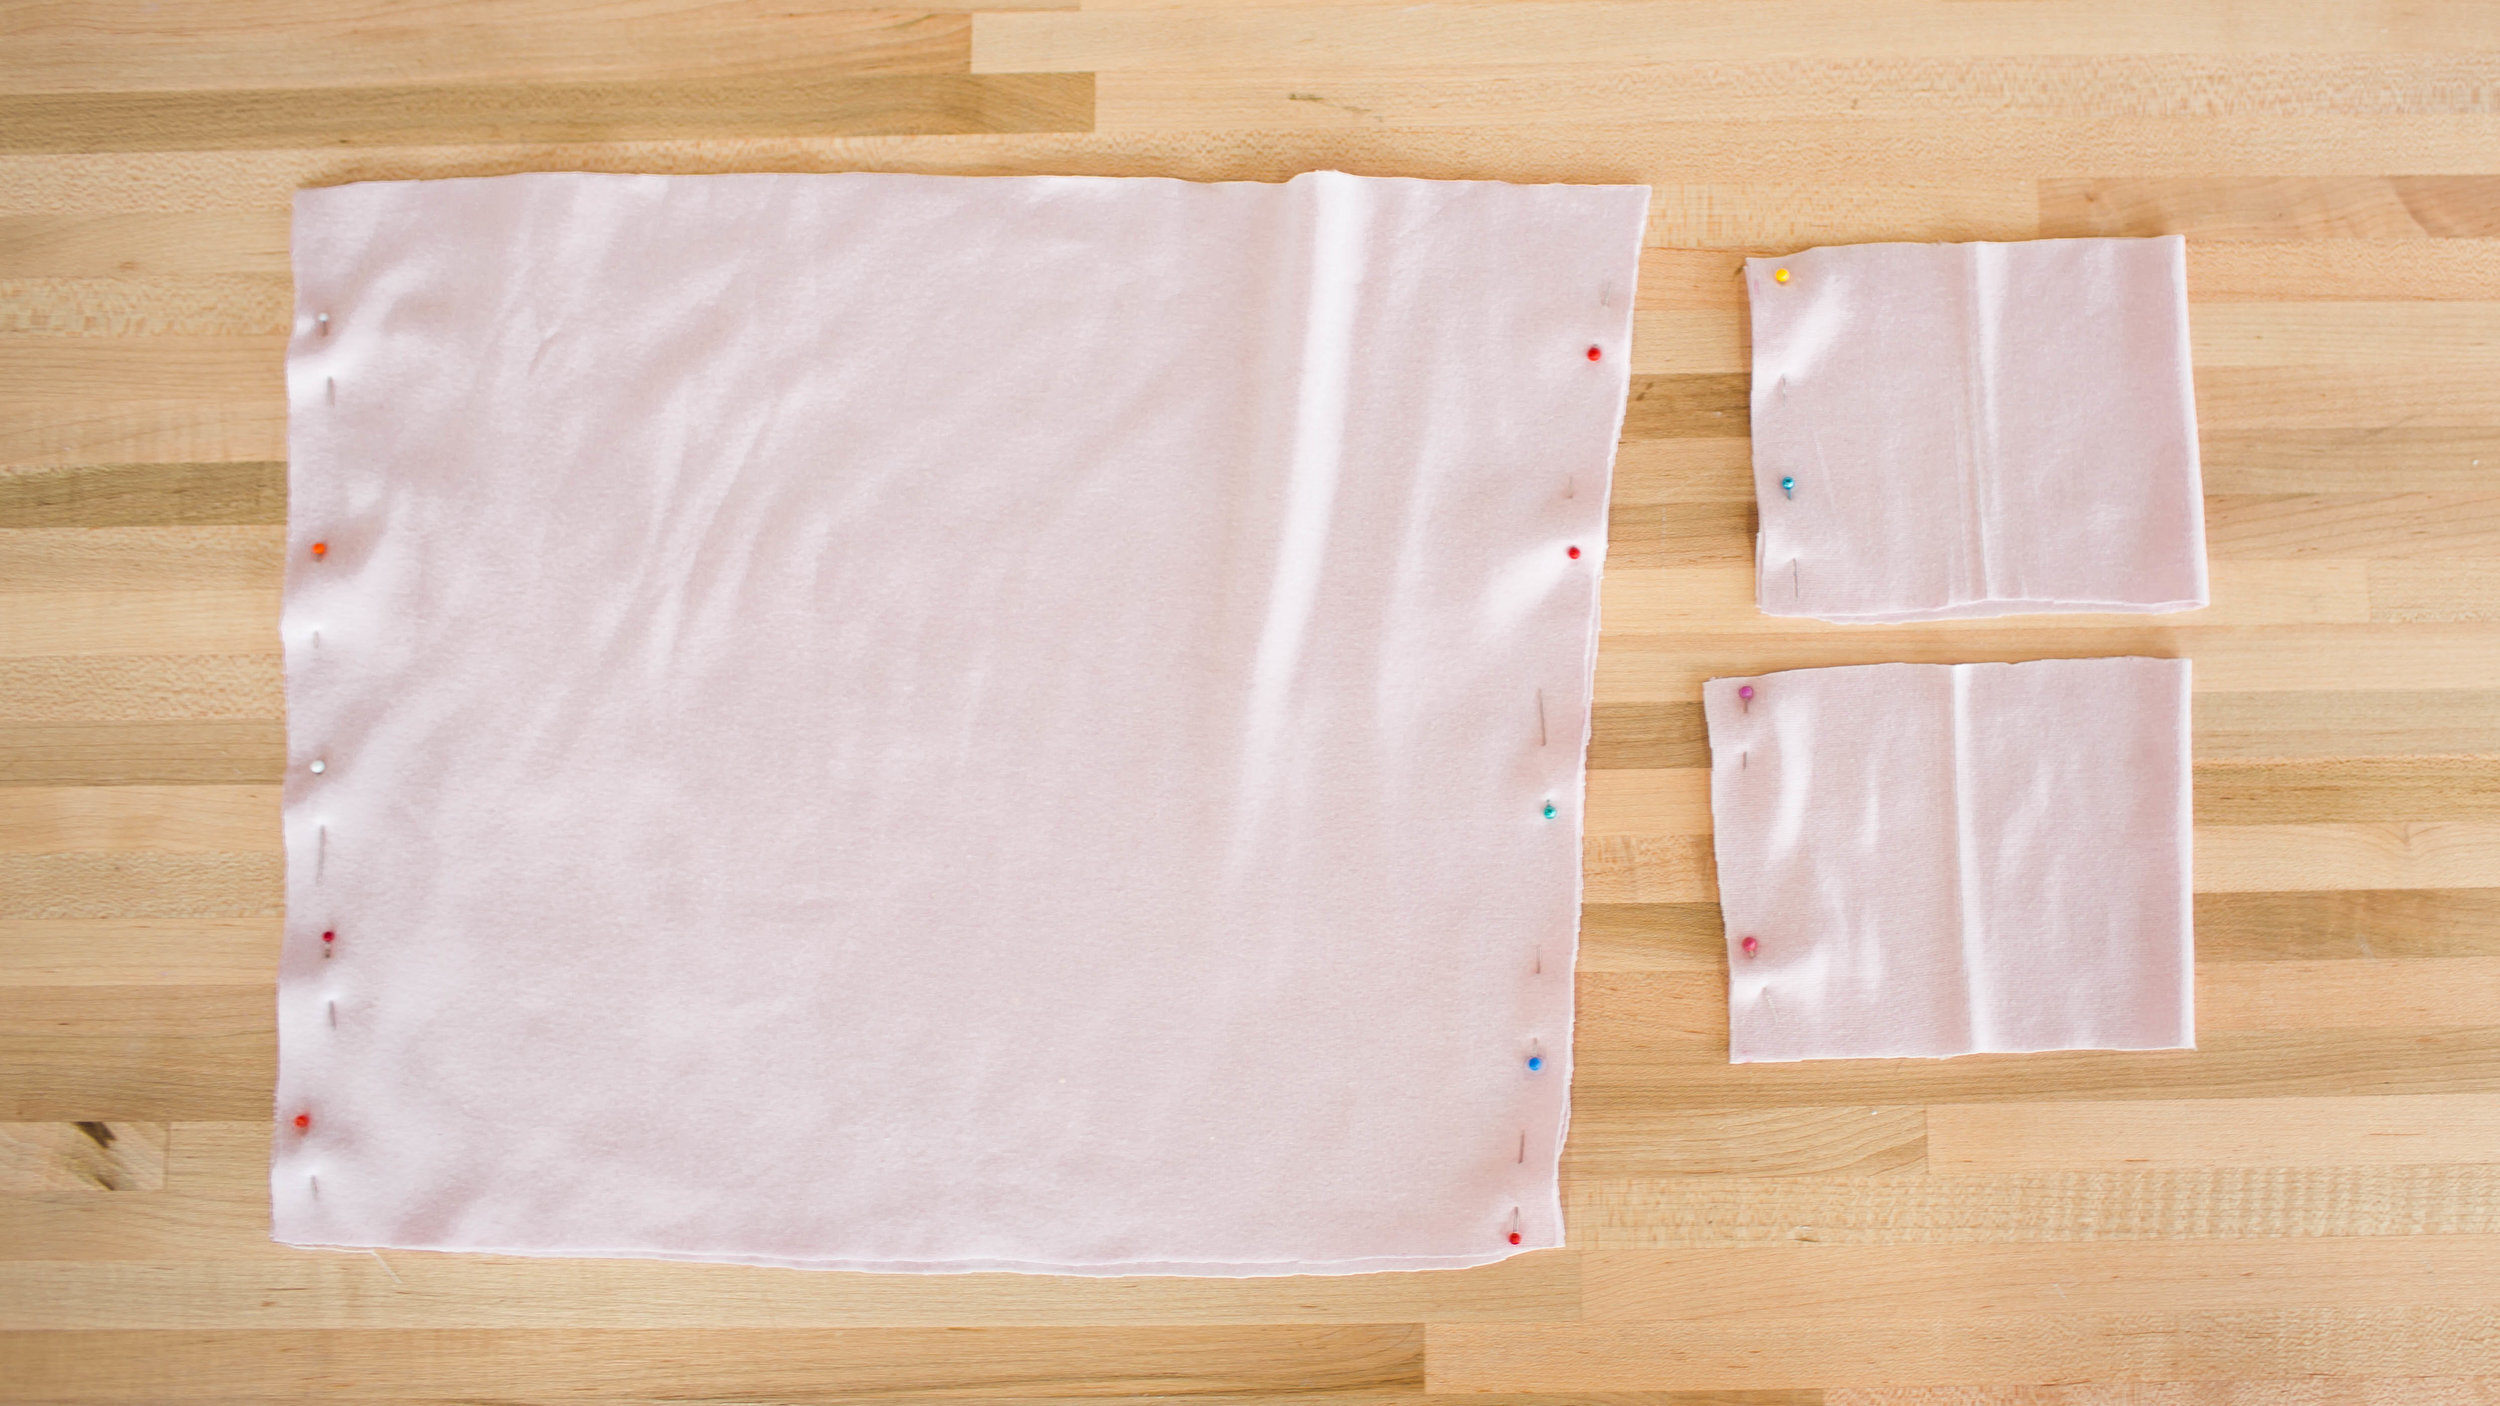
Sew the two smaller rectangles together into a tube as well. When your pieces are all sewn together, hem the ends of each of your tubes. The last step is to add the sleeves, I joined up the hems of the body and sleeve, and sewed an inch wide segment to hold them together.

And that’s it! How cute!?


Thank you SO much for reading! If you wanna watch the video on how to make these, check it out below. We also made off the shoulder tops last summer so go check that out here! If you make any of these, please show us using the hashtag #SorryGirlsSquad.
recommended posts


Sed purus sem, scelerisque ac rhoncus eget, porttitor nec odio. Lorem ipsum dolor sit amet.