DIY HEAD ACCESSORIES + BANDANA HEADBAND
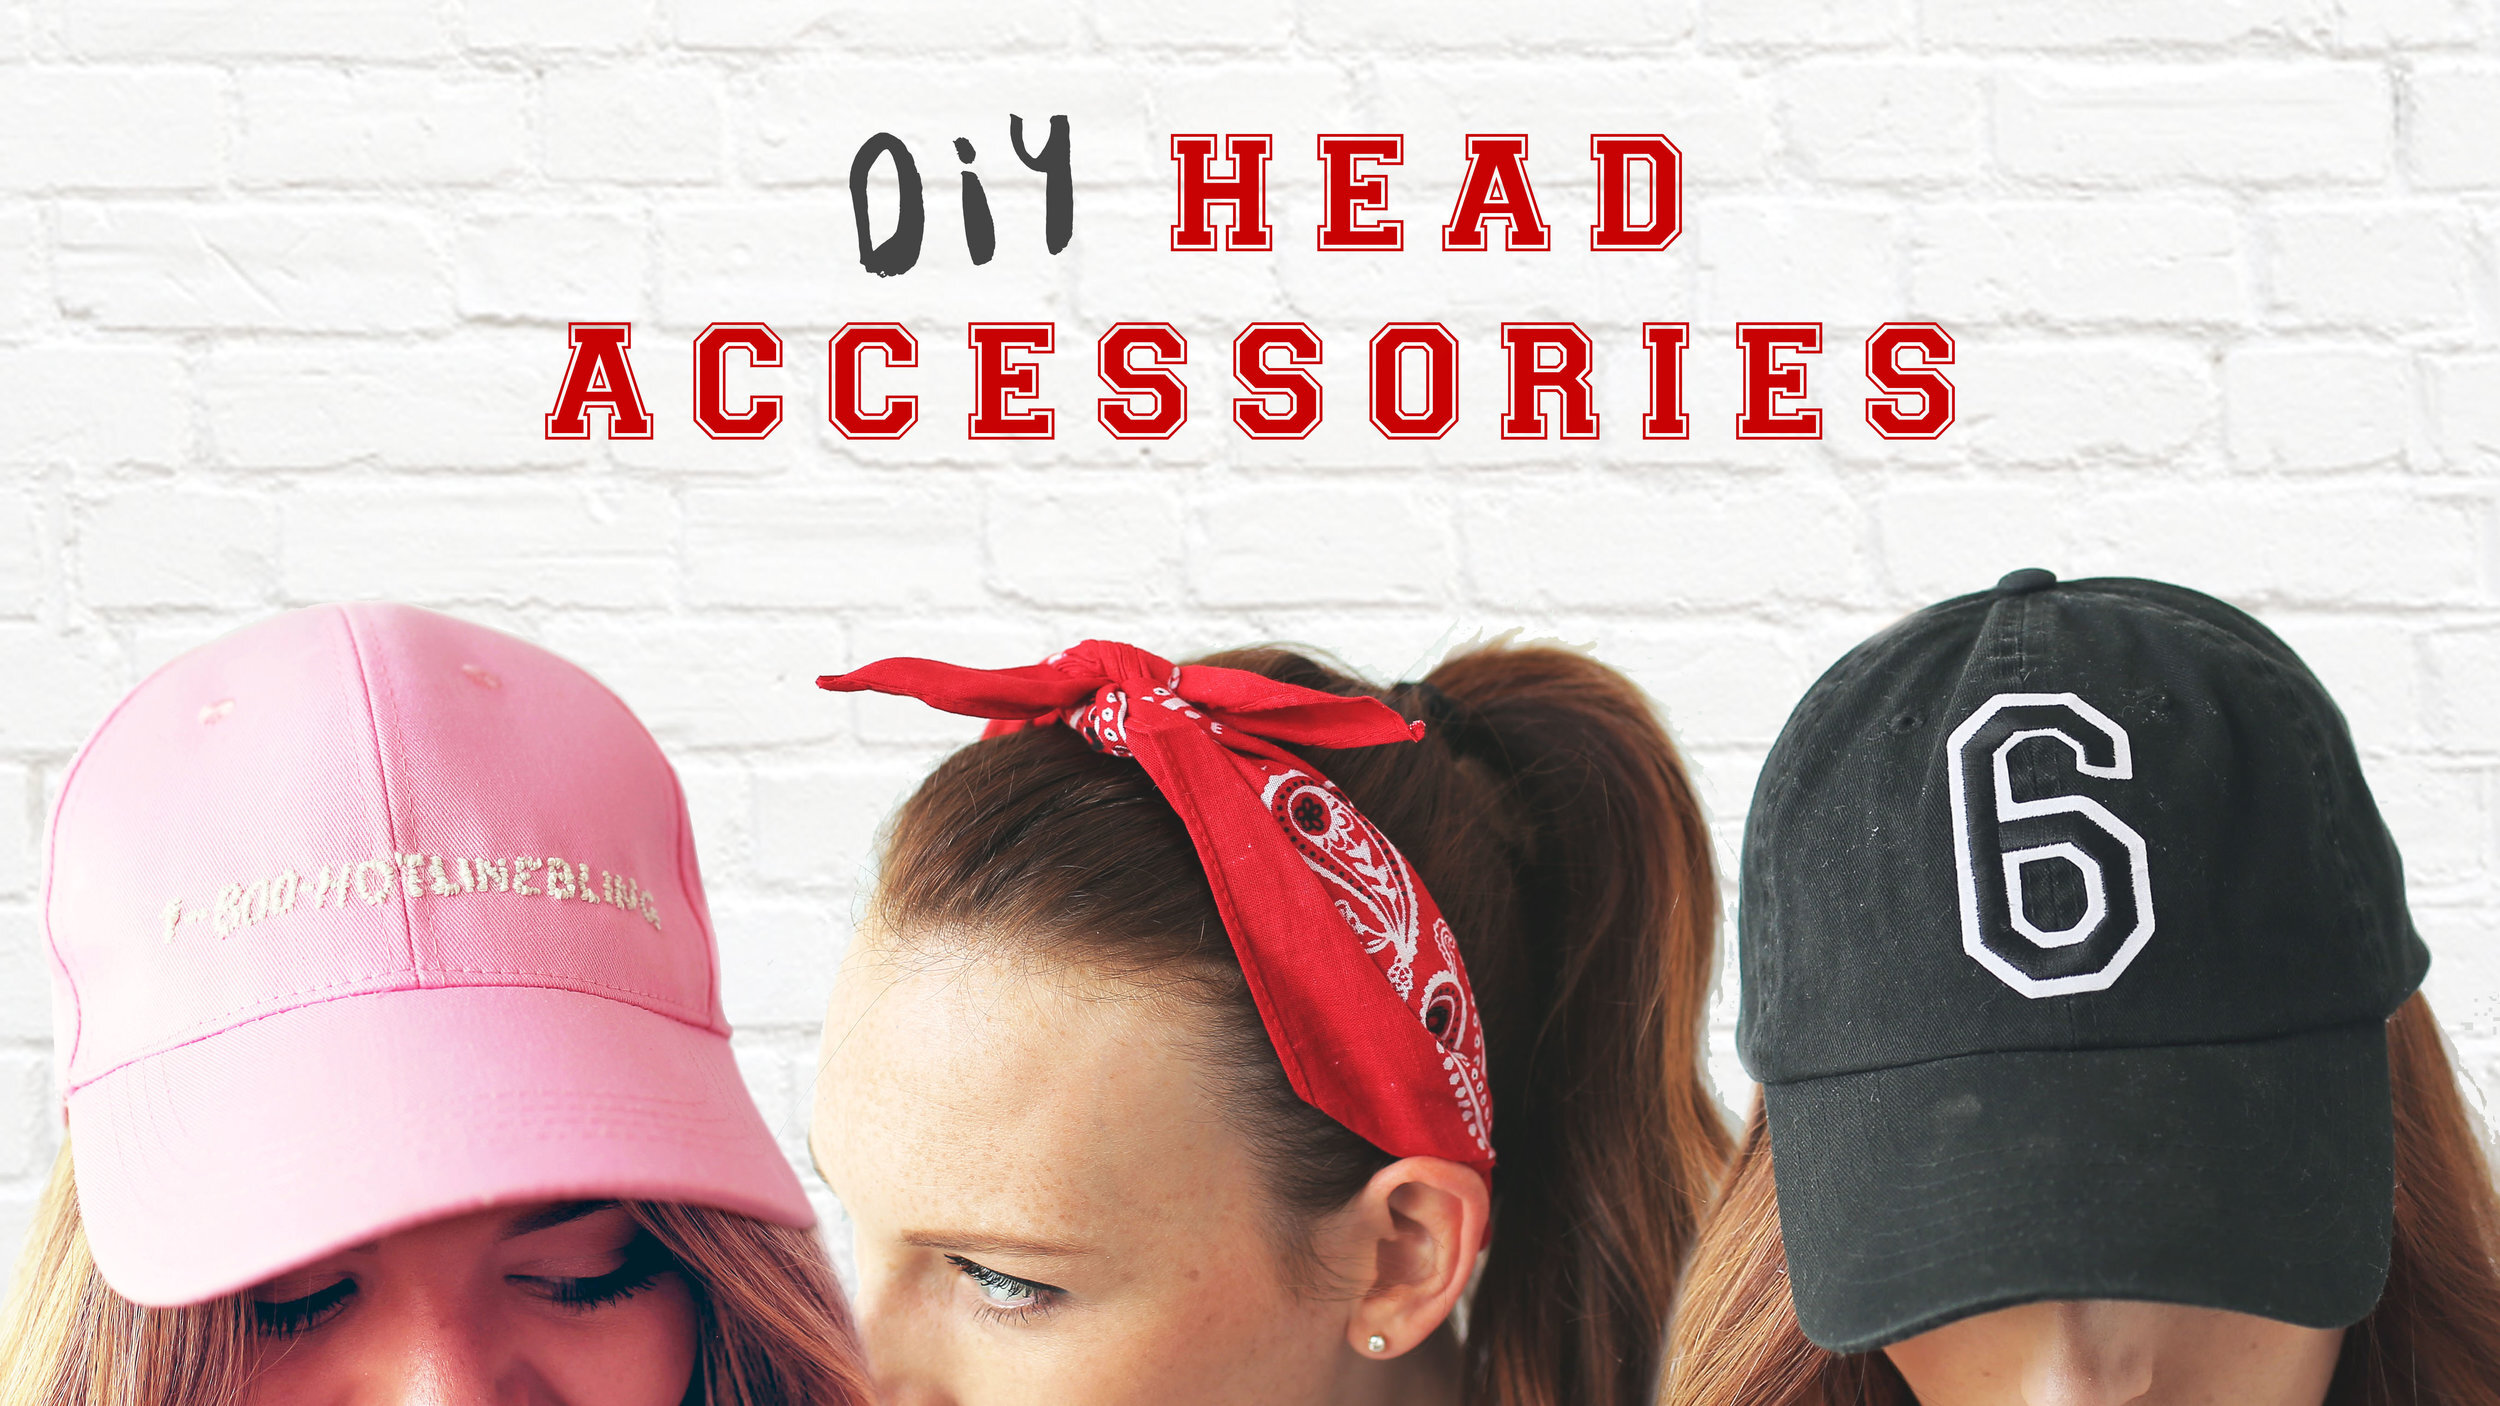
We took to our vlog channel to ask if you guys wanted to see DIY HATS. The answer was YES. Here we have two diy hats and one bandana headband. The hats are both accidentally Drake inspired while the bandana headband was inspired by the fact that they DO NOT STAY ON MY HEAD. Hope you guys enjoy these simple diy techniques! Make sure to check out the video tutorial below!

DIY PATCH HAT
Cost: $8
Difficulty: ✂
Materials:
– blank hat
– patch
Tools:
–iron
– scrap fabric/ towel
Start with a basic hat that needs some jazzing up and grab a trendy iron on patch. We picked this black and white “6” patch up from the craft store. Remove the paper backing off the patch and place it on your hat. We stuffed the hat with some extra fabric to help it keep it’s shape and then placed a piece of cloth over the patch. Iron over the patch for 30 seconds. Flip the hat inside out and iron the back for an additional 30 seconds.

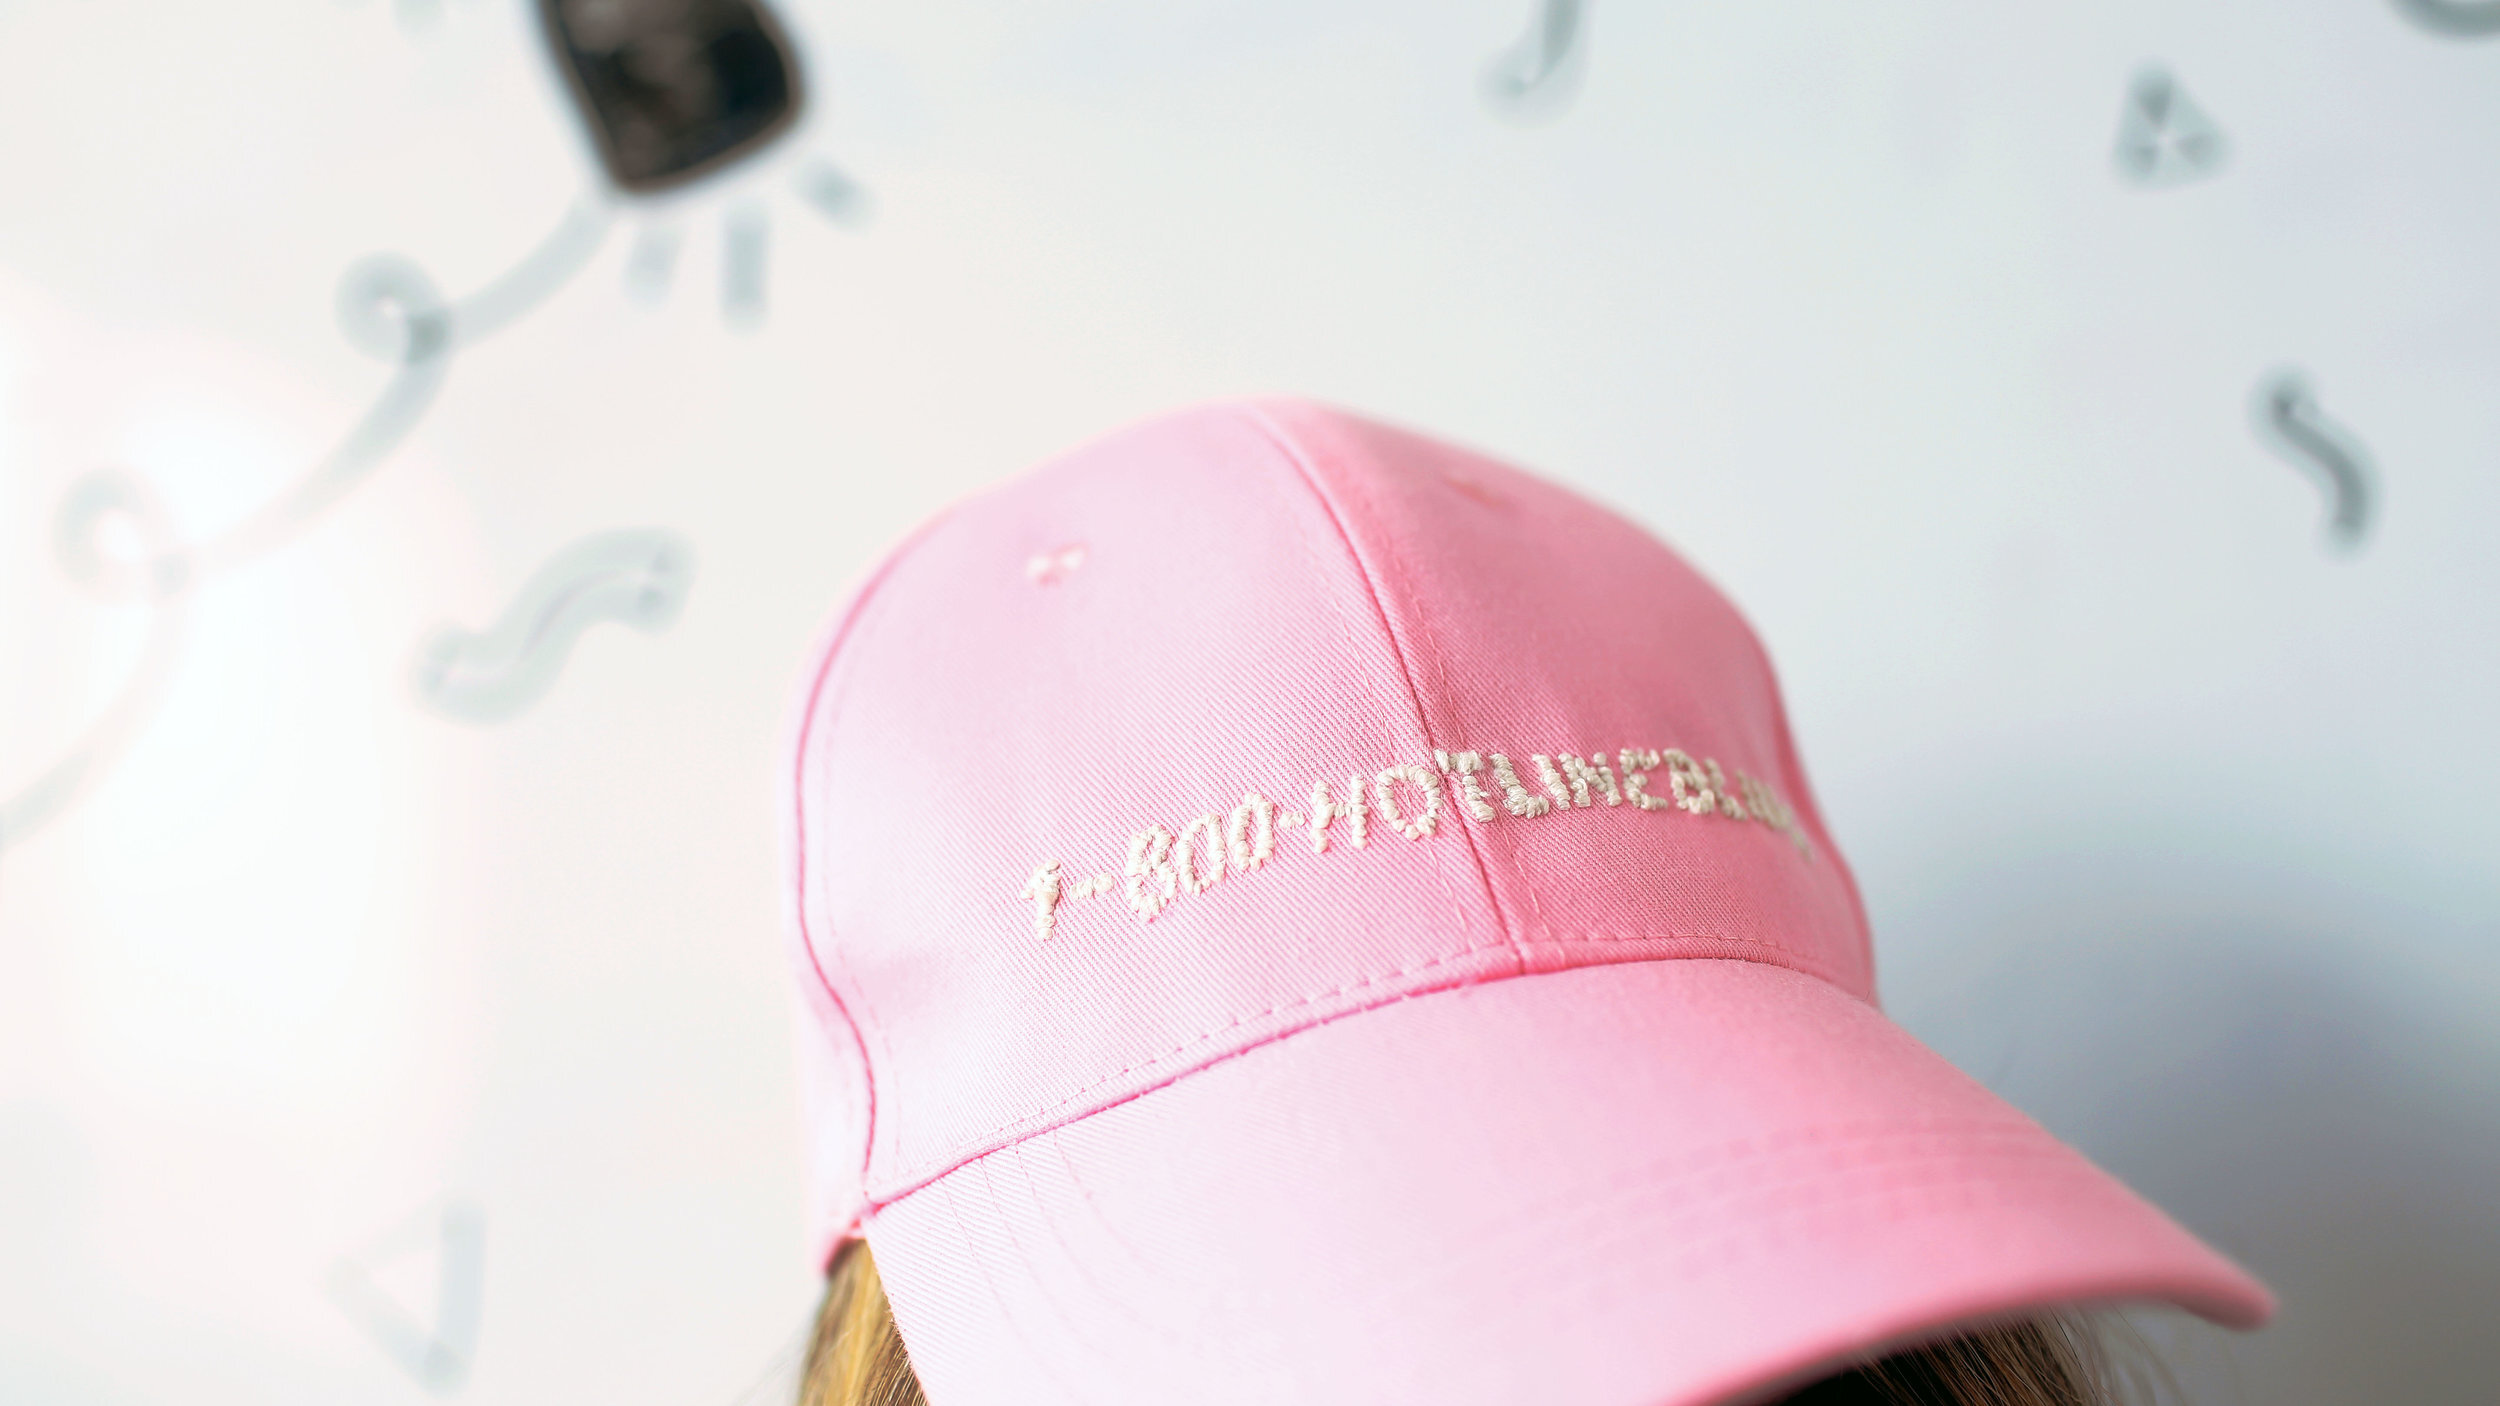
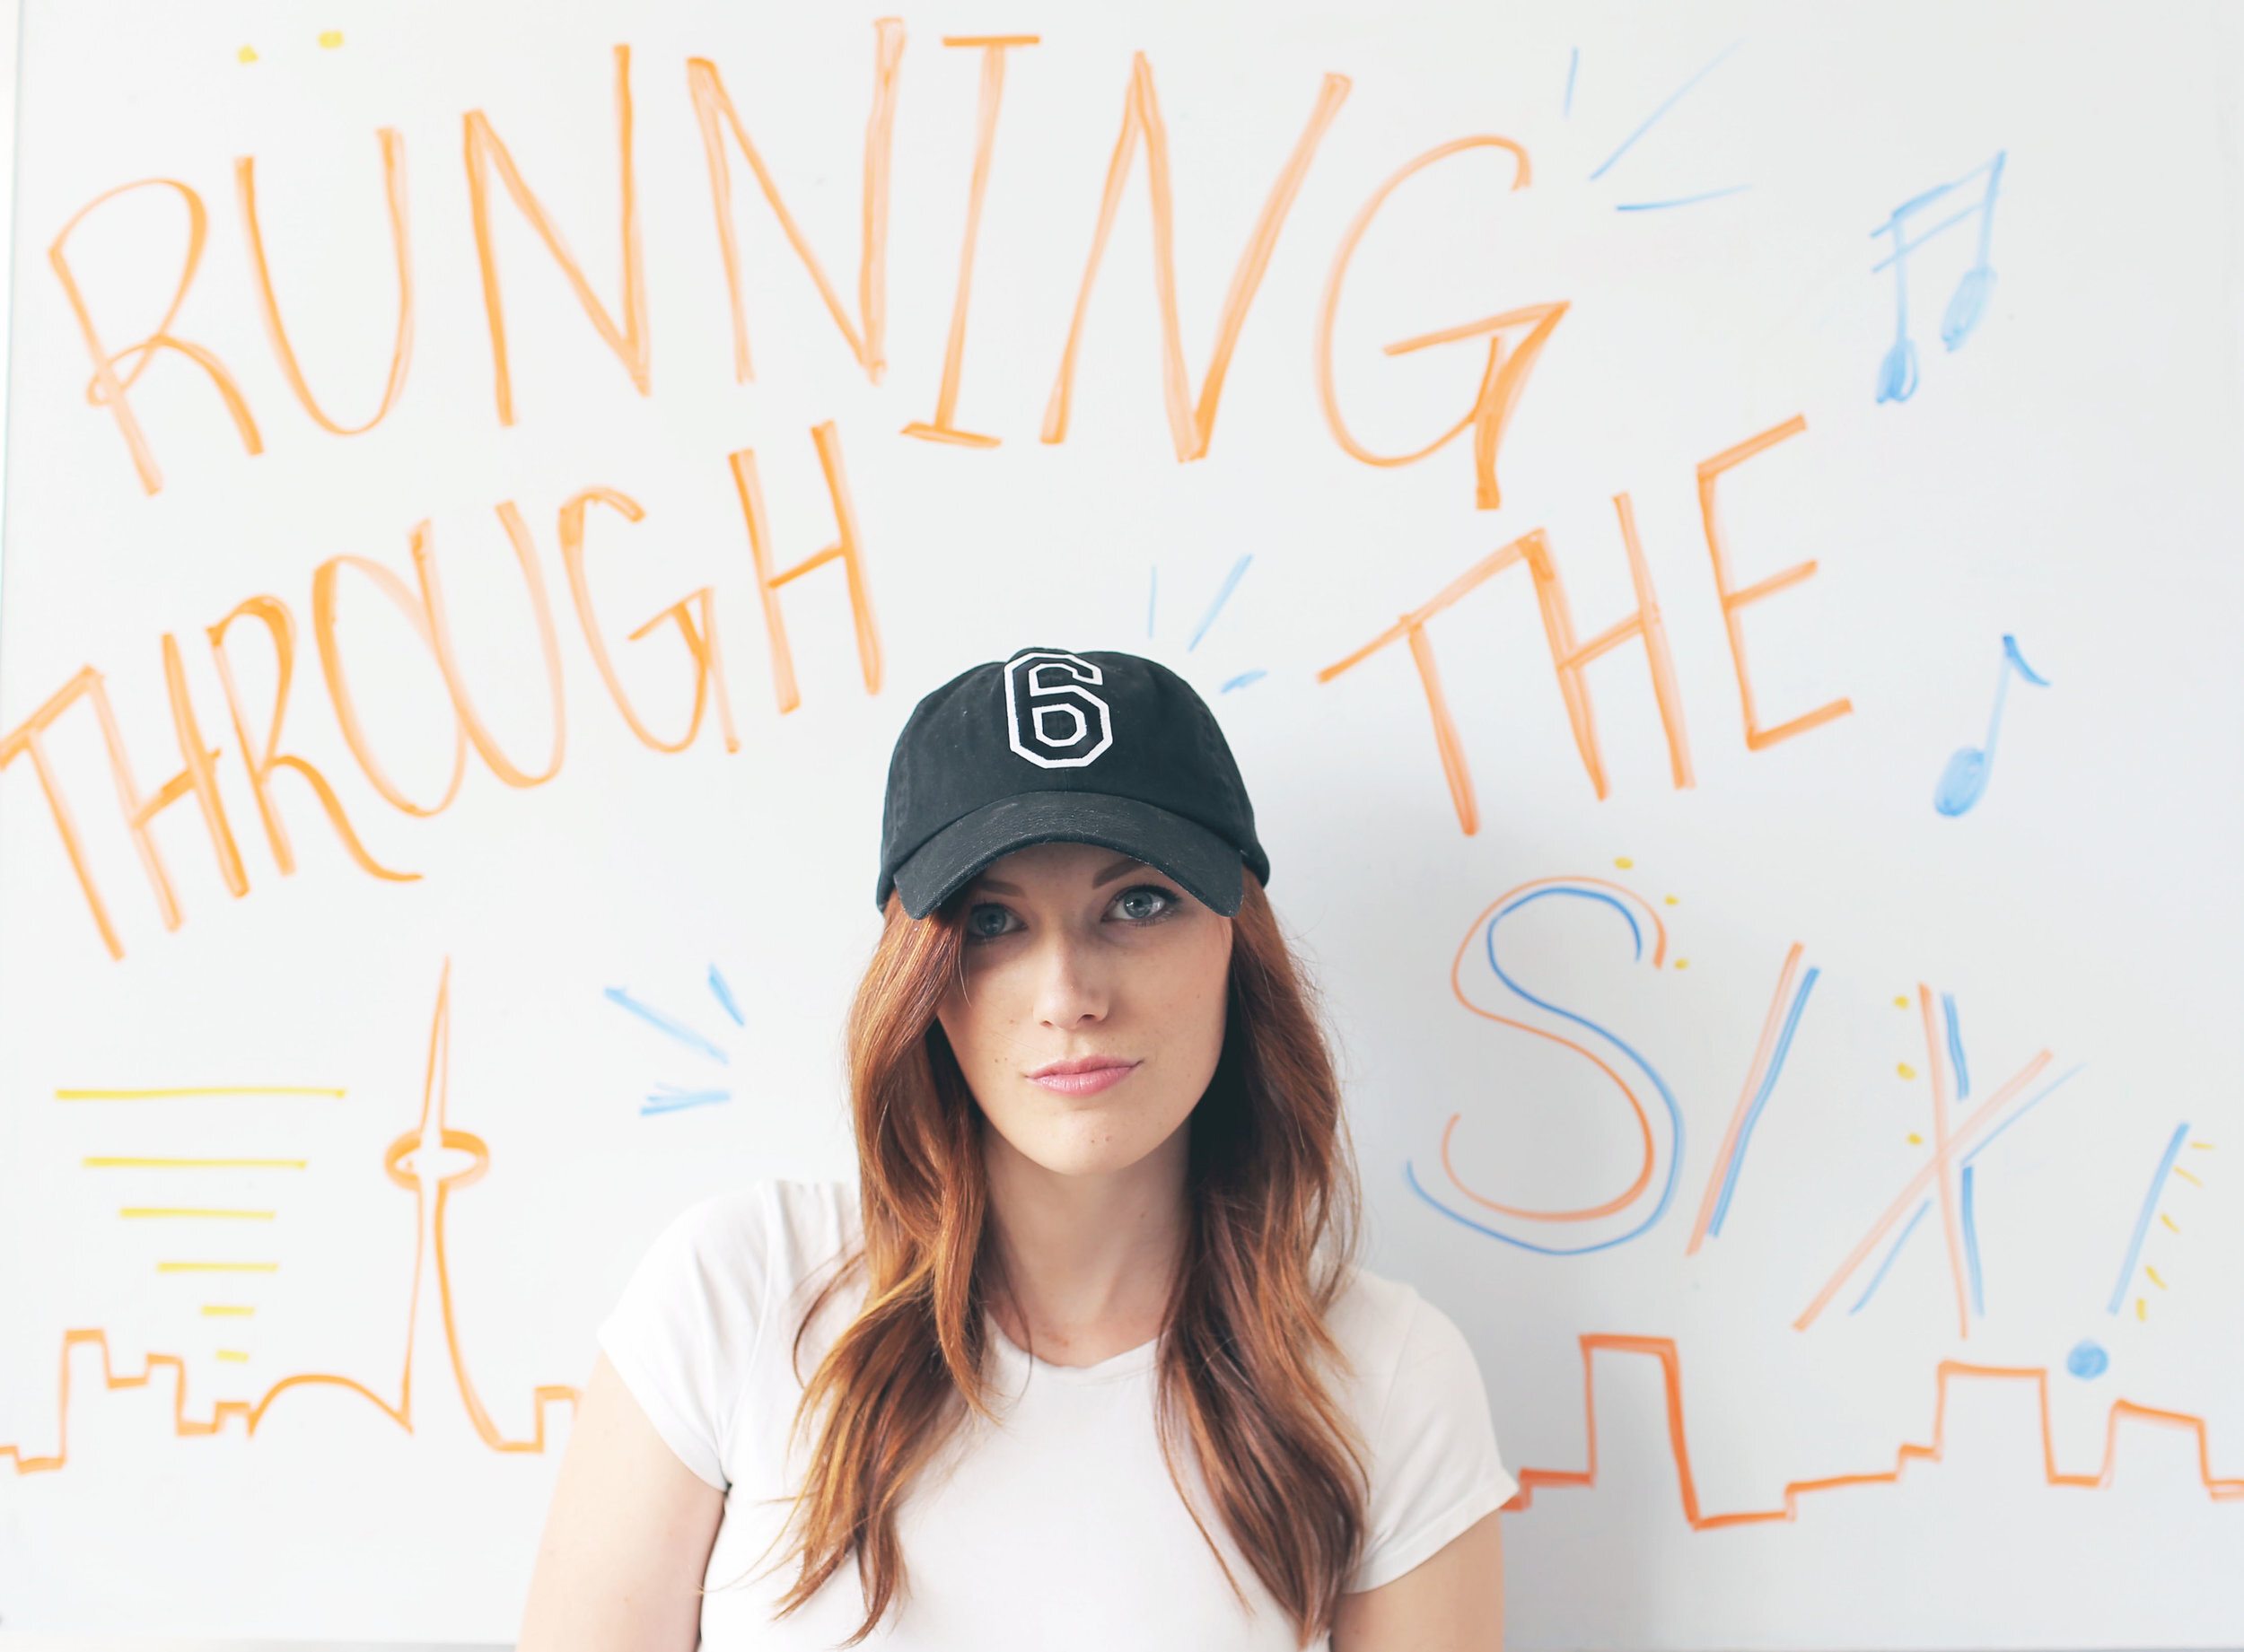
DIY EMBROIDERED HAT
Cost: $6
Difficulty:
Materials:
–blank hat
– embroidery thread
– printed out design (optional)
Tools:
–white pencil crayon/ fabric pencil
– needle
– scissors
For the second hat, we’re going to a show it another super simple technique but this one’s a bit more time consuming. We’re taking this pink hat (we’ve linked one below) and we’re going to embroider 1-800-HOTLINE BLING onto it. We printed out the hotline bling image from the web so we can use it to get the spacing just right. Tape it to the hat just below where you plan to sew. Using a white pencil crayon or fabric crayon, draw out you words. Next using a needle and some white embroidery thread, start from the back of the hat and thread your needle through at the bottom of your first letter. Loop the thread around your letter horizontally. We’re basically sewing short horizontal lines all the way up the letter (or in this case, number). When you get to a part of your letter that goes horizontally, switch your stitches to vertically wrapping so your’e always going around the white pencil lines. For any round letters, loop your stitches around on an angle.
You shouldn’t need to cut your thread each time, just bring the thread from the back to the bottom of your next letter and continue. Once you reach the end, tie a knot at the back and cut the thread.


DIY BANDANA HEADBAND
Cost: $8
Difficulty:
Materials:
–plain headband
– bandana
Tools:
–scissors
– hot glue gun & glue sticks
Our last DIY is more of a hair accessory instead of a hat. Want to get the look of a bandanna without the worry of it constantly slipping off? This DIY is for you! Start with a bandana and fold it into a triangle. Grad the two ends and tie them together into a knot, like you would if it was on your head. Next cut the bandanna in the middle, opposite your knot. Take a plain hair band and hot glue the knot down to the centre of the band. Pull down the bandana around the band and cut off any excess. Cut a small strip from the excess and we’re going to use this to secure the bottom. Bunch up the bottom of the bandana tightly around the headband. Glue one end of the strip down. Wrap the fabric strip around the banana and headband tightly and then glue the end into place. Repeat the on the other side and you now have a pretty convincing bandana headband!

Here is our tutorial on YouTube! We have a YouTube channel, did ya know?!
Recommended posts


Quisque iaculis facilisis lacinia. Mauris euismod pellentesque tellus sit amet mollis.